Home
Repair And Restoration
From the worst of the bodges to the craft of restoration...
Anaerobic Gasket Maker
Anaerobic Gasket Maker?!? What the deuce is that? Well between Ren's mumblings and memories you might find just the merest hint of useful information. Maybe...
Norton Electra Starter
Ren was wondering what Ian's pawls were for, Ian has provided an answer! Details of the starter mechanism for a Norton Electra, particularly the actuating ratchet.
The DIY Camchain Tensioner
Ren's rattles are all resolved with the abuse of nuts and bolts and chunks of metal. As usual it isn't a pretty fix but it seems to be doing the job. For now.
CB500X Poor Starting
Ren's having minor issues starting the CB500X. Could the solution be both as complex and as simple as a washer and some knowledge?
Shtainlesh Shteel Pishtons
Sit down and take a deep breath. Ren spent some money. This time he's searching for the eternally perfect braking system. Will stainless steel solve one of his problems?
Abject Failure
Yay. Ren's got a great new way to fit motorcycles tyres. It'll be easier than making a brew. Well it would be except for one important factor... the tyre.
CBF125 Regulator Rectifier Issue (At 99,000 Miles)
Ren is bemoaning the passing of the reggy reccy on the CBF125. We do know he's had a good return on investment from the long suffering 125 but of course the miser hates parting with money.
Fork Seal Fix
Now the front end noise has stopped Ren appears to have created another issue for himself - worra muppet. It seems this one might only require a little work and a lid.
CB500X Fork Noise
The forks on the CB500X are driving Ren MAD!! Luckily for you this is the abbreviated version with a resolution after much trauma.
Somewhere Between Honda And I...
The crank access cover on Ren's CB500X makes getting to the crank bolt to turn the engine over easy. Well, that's the theory at least. It's time to make an already really awful job even more terrible.
See More
Reader's Comments
Tom McQ said :-
http://cb250n.blogspot.co.uk
01/01/2000 00:00:00 UTC
Ren - The Ed said :-
Cheers tom
01/01/2000 00:00:00 UTC
mick murphy said :-
Hi guys my honda 125 cbf is running at nearly 4000 revs in idle mode .any advie would be appreciated
01/01/2000 00:00:00 UTC
Ren - The Ed said :-
Hi Mick. Check the throttle cables are adjusted, check some idiot has not tried to adjust the throttle stop, this shouldn't need to ever be touched on the CBF 125.
Otherwise you're into the injector and you'll need to know what you're up to in there.
01/01/2000 00:00:00 UTC
RobE said :-
I have a tapping sound from my CBC on idle. Knocks seven or eight times then stops-does this repeatedly. Sounds a bit like a ratchet being turned slowly. Any of you guys come across this
28/05/2017 18:29:52 UTC
RobE said :-
CBF of course
28/05/2017 18:31:07 UTC
RobE said :-
CBF of course
28/05/2017 18:31:08 UTC
Ren - The Ed said :-
Hi RobE. It *could* be...possibly...perhaps...be the same problem as I had. Thing is check everything else before you start stripping the motor down.
Check out the links.
http://bikesandtravels.com/biker.aspx?ride=587
http://bikesandtravels.com/biker.aspx?ride=590
28/05/2017 19:53:24 UTC
Alfred said :-
I have a dominator nx650 1997 and I have a 1993 model wiring harness want to know wether it will work without any electrical problems.
02/08/2018 18:36:54 UTC
Ren - The Ed said :-
That's a fair old ask Alfred! You'd need access to the wiring diagrams for each year to see if there were any upgrades or alterations made. I daresay my first port of call would usually be Haynes manuals but I've checked their website and I don't see one listed for the Dommie.
Then I was going to suggest an owner's forum but I'm not doing very well there either.
https://www.lingshondaparts.com will show you the fiche diagram for each wiring harness for each year. A cursory look suggests the harnesses LOOK the same but that is not guarantee they ARE the same.
Good luck with the work Alfred.
02/08/2018 22:34:12 UTC
CrazyFrog said :-
Alfred, you could try asking your question on the Honda Trail Bike forum. They have a section for Dominator riders.
www.xrv.org.uk/forums/forum.php...
03/08/2018 07:56:03 UTC
Ian Soady said :-
Yes, I found them useful for my SLR650. Bob (once of this parish although he seems to have disappeared) posted some interesting stuff there. I have a vague feeling he's returned to the Honda singles after dalliances with various other marques.
03/08/2018 11:18:30 UTC
RobEll said :-
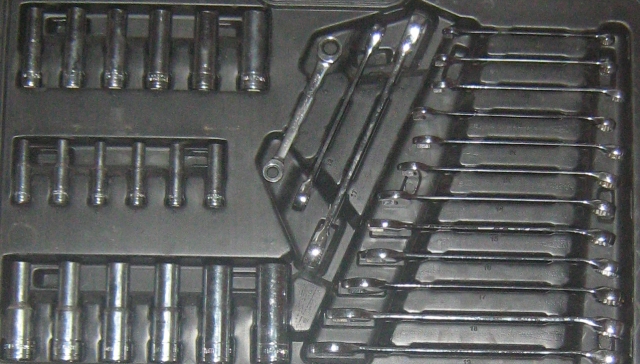
Sorry to add to your completed thread but I wondered if you had any tips or advice on adjusting Keeway RKV125 Tappets? It's not that I don't entirely trust the dealership but I have always taken some joy in maintaining my own bikes albeit mostly old, small capacity smelly strokers from the mid 80's. I'm assuming by the casing shape and engine numbers of Sharon's old RKS that they are likely to share the same engine. Any pitfalls or help gratefully received notwithstanding the excellent how-to tappet adjustment for the cbf. A great website by-the-by, and one of the main sources of inspiration/confidence to get back on two wheels after almost a decade away from bikes - thank you.
01/04/2019 23:08:48 UTC
Ren - The Ed said :-
I'm pretty sure the RKV has the same engine as the RKS - it should say on the engine casing KW127FMI.
Firstly - do you know how to set tappets?
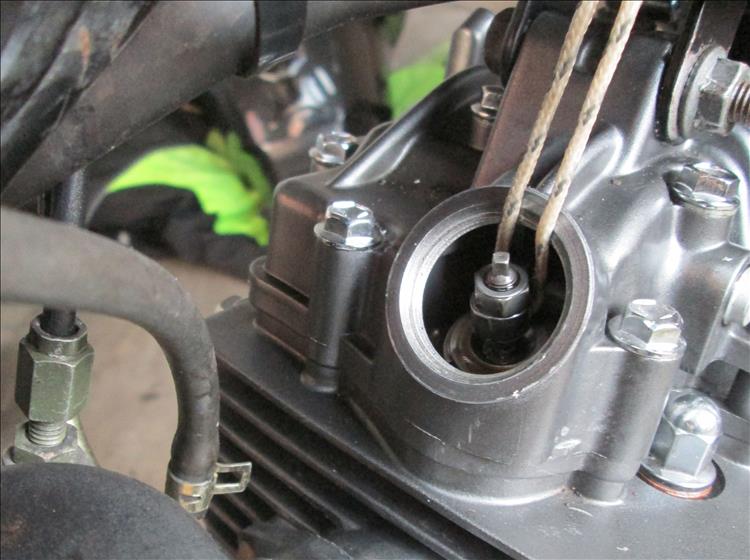
The main pitfall is this. Access to the tappet adjustment is under 2 caps on the rocker cover. Getting the feeler gauges in there is fiddly to start with - BUT - the tappets are held closed by these springs under the cover. This is a real pain in the ass. The only solution I've come up with so far is to hold the tappet open with string.
 02/04/2019 08:39:14 UTC
Ren - The Ed said :-
Getting the string in wasn't easy either.
 02/04/2019 08:40:00 UTC
Ian Soady said :-
Or you could use my cunning plan of using the adjusters as micrometers as posted somewhere here.....
02/04/2019 15:04:27 UTC
Ren - The Ed said :-
Yeah true. If RobEll comes back and asks I'm sure you'll explain once again. I'd be tempted to remove the springs, the Suzukis which the motor is based on never needed them. But I would not dare to mess with Sharon's bike without written permission.
This week I offered to ride her bike back to my place and keep it during the week. This would allow me to get it MOTd without inconveniencing her in the slightest. The look on her face!! You'd think I'd just pooped in the corner of her kitchen. She did not like the idea of not having the bike at home, of me riding it unsupervised and the (not unreasonable) fear I might tinker with it while it's in my possession. Sheeeeeez!
02/04/2019 15:33:39 UTC
RobEll said :-
Thanks for the reply. The engine No is slightly different - KW157FMI. Perhaps not exactly the same engine. I have the basic idea of how to check valve clearances and a few years tinkerage in years past. I was considering taking off the valve covers only and giving them a check, but those non-valve related springs...why? The only issue I don't know how to check is alignment of the timing marks as I haven't taken the head off and as your photos suggest the rocker cover might lift off the entire rocker arm gubbins etc. Im not looking forward to that, perhaps I'm a little bit lazy. I'll start with checking them only and try out the routine of getting to and uncovering the valves. I'm between self-educated guess and half an idea about basic bike maintenance in terms of competence but sometimes I can bodge things into submission. The closest I can get to a Haynes manual is the Chinese motorcycle offerings, not yet purchased. I like the shoelaces idea though! Is there a window or other way I can align the timing marks accurately, perhaps similarly to the RKS? I know it's a bit of an ask knowing that the engines may indeed be slightly different, but hopefully similar enough.
03/04/2019 22:17:38 UTC
Ren - The Ed said :-
Sorry RobEll, typo, yes Sharon's RKS is a 157 not 127... Silly me.
If you give me some time I'll see if I can find some instructions online tomorrow. The engine is RIDICULOUSLY common so there must surely be a good solid guide somewhere. I'll let you know what I find.
03/04/2019 23:27:35 UTC
Ren - The Ed said :-
Hi RobEll. This video will give you the absolute basics but it's not exactly professional.
https://www.youtube.com/watch?v=xh2VX5jZ0Pw...
04/04/2019 13:47:45 UTC
Ren - The Ed said :-
This is a Suzuki manual, you're engine is a copy of this. At 2-5 is a very simple explanation of checking the valves
http://suzuki.com.pe/motos/wp-content/uploads/2016/12/GN125FSERVICEMANUAL.pdf...
04/04/2019 13:56:40 UTC
RobEll said :-
That manual is spot-on what I was looking for, thank you! I'd have a check at the clearances this weekend but the dealership had marked the plug over the timing window. I'll have to be careful to align it properly if I have look in the near future. Thanks again.
05/04/2019 22:40:20 UTC
Glyn said :-
Hi All,
I've stumbled across your site because I was paid (for a plumbing job) with a 2012 CBF125. Sadly it was stolen / recovered 18 months ago and has not run since. I love this little bike and intend to renovate it completely. As part of the stolen issue, the ignition wiring was ripped out of the ignition switch. Having fitted a new switch and rewired the damaged part, I replaced the oil, plug and air filter. One new battery and some fresh petrol later and it started, hooray! However, every time the engine stops it makes a very odd sound almost like a starter motor recoil. It does this about 1 second after the engine comes to a halt. Does anyone have any ideas please?
The bike has done 19,000 miles and I've gone 66 years to date.
10/07/2021 20:01:37 UTC
Upt'North ¹ said :-
Glyn,
Could it simply be a sticking starter button? Has it got a starter button, I presume it has.
If not a sticking button check the wiring again.
Upt'North.
10/07/2021 21:37:49 UTC
Glyn said :-
Hi Upt'North, Thank you for your reply. It does have a starter button as you presumed. Your post got me thinking more about it. I had thought it was something more internal but, if the starter mechanism remained engaged after the engine was started, it would account for the rattle noise when running (not overly severe and I haven't heard one of these running before so have no benchmark). I think I should try bump starting it to see if it still does it when I don't actually use the starter motor. However, the Centre stand is rusted in the down position and so I will need to sort that out first. The starter solenoid does not have any volts on it when the bike is running and so I think the wiring is ok. I'll report back but it might be a little while as I have read the removal of the Centre stand can be a major operation in itself. I am presuming the starter motor has some sort of bendix (harking back to my 1960's car experiences) that could well be sticky after standing unused for 18 months.
Glyn.
11/07/2021 08:39:47 UTC
Ren - The Ed¹ said :-
I suspect Upt' could be onto something here. I've had the actual starter button stick on and admittedly the noise is there but so quiet I didn't notice... for a few miles.
The centre stand is the BITCH FROM HELL to remove. The pin that goes through the frame then the swingarm rusts in place. Usually the pin will affix to the stand but still rotate in the frame, allowing the centre stand to operate fine. It's unusual for it to seize in the frame preventing regular expected movement.
Yes if you get the bike bump started with the starter motor disconnected and the problem persists it would appear the starter clutch is dysfunctional. It does not have a bendix system like a car. There's a gear on the end of the starter that engages with a larger gear on the back of the alternator's rotor (a bunch of magnets in a bowl shape). Behind this there's a clutch operating on the "sprag clutch" system. You *WILL* need the correct flywheel puller to gain access to the sprag clutch.
12/07/2021 09:27:44 UTC
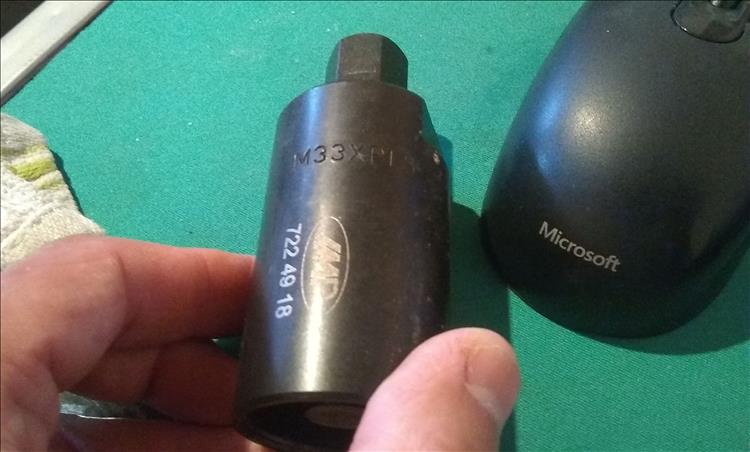
Ren - The Ed¹ said :-
My flywheel puller for my 09 CBF125 is an M33 x P1.5. That's an M33 thread internal with a 1.5mm thread pitch.
 12/07/2021 09:34:01 UTC
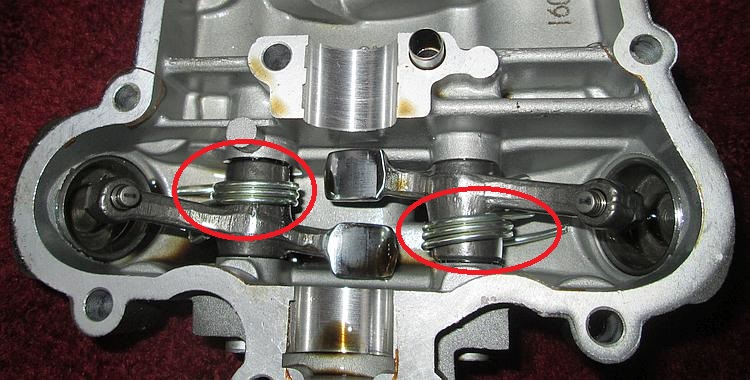
Ren - The Ed¹ said :-
This IS NOT a CBF125 engine but very similar... The flywheel is the bowl shaped item and the starter gear is circled in red. It should be easy to move with your fingers in one direction, it should turn the engine in the other direction.
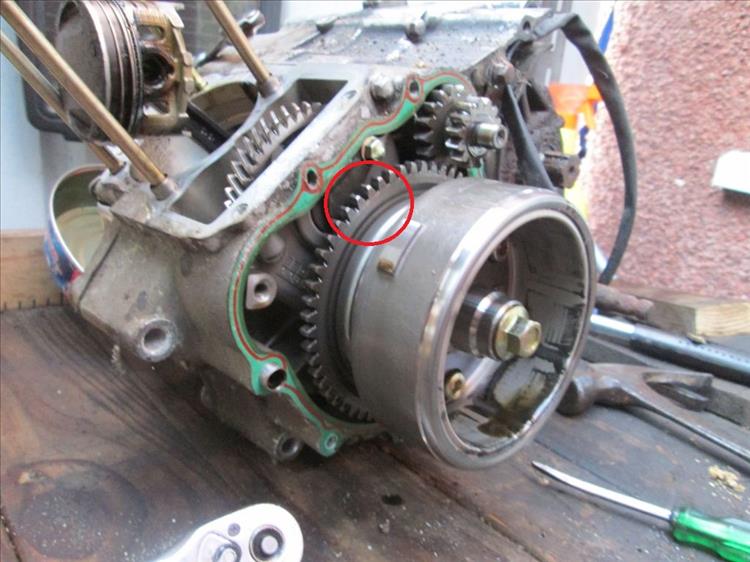 12/07/2021 09:49:41 UTC
Glyn said :-
Thanks for that information Ren. The Centre stand pin is rusted in the stand as you say. However, it is stuck because the stand goes "over the centre" and jams against the frame. I got it off by putting the front wheel onto 2 pallets and strapping the bike and down then was able to work underneath it. A single strike with a heavy mallet got it loose and then after many operations it seems ok. I have not yet further investigated the engine noise but will do shortly.
14/07/2021 06:42:29 UTC
Ren - The Ed¹ said :-
You've made a start Glyn. That's half the battle.
14/07/2021 18:24:01 UTC
Glyn said :-
I got a little further today by removing the alternator cover. The starter motor idler wheel was removed and the Sprag clutch did exactly what it said it should in the Haynes manual and in Ren's wise post above, That is, move freely in the clockwise direction and try to drive the motor when turned anti clockwise. I re-attached the idler wheel, removed the Spark plug and spun the engine by hand. As soon as the engine ceases to turn, the Sprag clutch engages and makes a slight mechanical noise in doing so and moves very slightly clockwise. This is almost similar to the problem I have but much quieter and not so long lasting. I did notice that when I drained the oil, it had the consistency of water i.e. zero viscosity and wondered whether this could be causing me some problems. Poor little bike, I imagine that has been so neglected by the previous 3 owners. There is a chance that this could be the original 9 year old oil.
15/07/2021 18:16:37 UTC
Ren - The Ed¹ said :-
Curious, maybe we've not gotten to the nub of the problem yet Glyn. But yes! Be sure to put some fresh oil in there, the engine will thank you without question. As a matter of good sense I'd also check the tappets because if the oil ain't been done then the tappets won't have been either. Haynes will guide you well but just in case - check the link.
https://bikesandtravels.com/biker.aspx?ride=711...
16/07/2021 10:25:59 UTC
Glyn said :-
I am on it Ren, I bought a new set of feeler gauges today as my old set were languishing in the bottom of my toolbox with an unhealthy covering of rust. I decided to make access as easy as possible so started to remove the exhaust pipe. A previous attempt by persons unknown managed to completely mangle the nut next to the frame which took an age to get free. I couldn't use the angle grinder as I needed to reuse the entire exhaust as its not too bad. (in fact its very good but as someone has slung the bike down the road at some time, the Chrome heat shield is badly scratched). I bought some stainless steel studs and nuts ready for the refit. Whilst I'm at it, I shall remove the clutch cover to check the items in there and clean / replace the small oil strainer as mentioned in one of your helpful previous posts. A new complete engine gasket set is on its way and so I might as well open it all up.
Haynes manual is ok (print very small for old eyes) but your link is brilliant. Many thanks.
16/07/2021 19:17:48 UTC
Ren - The Ed¹ said :-
I still think there must be a better way to attach exhausts to cylinder heads. Beware of stainless nuts on stainless threads, google "stainless galling". Use plenty of copperslip or similar.
19/07/2021 08:44:04 UTC
Upt'North ¹ said :-
Remember using lube on any bolt/nut could result in over tightening. Torque figures are usually given for dry assembly.
Upt'North.
19/07/2021 09:24:22 UTC
Glyn said :-
Many thanks for the advice, I will use copper grease and I have a torque wrench. I'm sure the noise problem when the engine ceases to turn is the Sprag clutch as turning it over on the starter with the Stator cover (and plug cap) removed does cause a similar noise so I'm going to have to buy the flywheel remover to get to it. Maybe it was the oil together with the bike only running for approximately 45 seconds after a two year lay up and so not reaching some parts during that period. In the meantime, I've turned my mind to the rear end and replacing the sprocket cush drives, the brake shoes and the chain plus a thorough clean. The front sprocket seems very loose on the shaft although the fixings are all tight. There's not much mention of this in the manual so further investigation is required.
22/07/2021 06:17:39 UTC
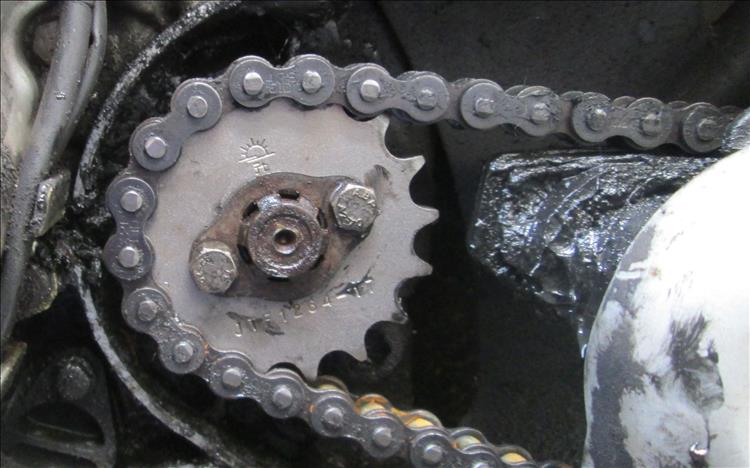
Ren - The Ed¹ said :-
The front sprocket. As per the image there's 2 10mm headed M6 threaded bolts that go through the fixing plate into the sprocket. The plate is there to merely stop the sprocket sliding off the output shaft. The sprocket is not *TIGHT* onto the shaft and some movement is to be expected. But yeah, remove the sprocket and inspect the output shaft. Any wear will be obvious but at such low mileage I can't imagine there will be any. Mine has 93,000 miles of abuse on it and it's fine.
If you've come from machines (usually larger capacity bikes) where the sprocket is VERY firmly affixed to the output shaft that play can be somewhat alarming.
 22/07/2021 08:53:41 UTC
Borsuk said :-
You get torque assembly charts for lubed bolts as well as teflon and xylene coated. Not just dry as all the bolts at work are lubed before replacement otherwise it is grinder time to get the damn things back off. 1.5 million barrels of crude and grinding sparks do not play nicely together so we try to minimise the need.
22/07/2021 21:46:33 UTC
Glyn said :-
So rear end rebuilt with new cush drives, Brake shoes, Chain and front sprocket. Getting the rear brake serrated plate assembly (the one with the two springs on, return and switch) on to the pedal spindle, in the right place, was awkward and drew blood. I got it wrong several times causing a nice short movement pedal but with the brake light on all the time or a long movement with the springs not being under tension at all and falling off. Also, getting the rear wheel fitted in with spacers either side, continually falling out cush drives & sprocket plus a brake drum assembly doing the same thing was also not easy single handed and promoted some very bad language. The tappets were as tricky as described and took some time as Ren said they would. I was not overly happy with the aftermarket Gasket kit that was not the best fit in all places which is why it was only £15. I had to trim the round gasket until it fitted inside the oil filter / separator unit. I filled her up with new oil and the engine now runs very sweetly. I now think that the engine rattle I reported earlier could be coming from the exhaust silencer. Unfortunately, the Sprag clutch still makes a sound like treading on 5 garden snails simultaneously the second the engine stops turning. However, we move forward albeit at a pace similar to the snails (prior to being crushed).
 25/07/2021 17:22:10 UTC
Upt'North ¹ said :-
Ed, won't like it, it's clean!
Glynn, if the exhaust has got an heat shield they can't half cause a rattle.
Upt'North.
25/07/2021 18:23:29 UTC
Glyn said :-
I'm a bit OCD about restoration stuff like this. Maybe because I Couldn't afford to be when I was a lad. I cut my teeth on BSA Bantams 125 / 150 and 175's and never paid more than a fiver for any of them. I used to ride the 125's in Schoolboy scrambling in Ringwood, Hampshire. Wish I owned a dozen of them now. You never needed more than a flat screwdriver (no such thing as a Pozi or cross head) 2 spanners and a roll of tape to fix almost anything. They were easy to fix but you did it often as they were not at all reliable.
Yes, it has a heat shield but holding it firmly doesn't make much difference to the rattle. I have total hearing loss in my left ear which makes tracking the source of any noise a bit more complicated as I cant pinpoint exactly where its originating from.
 25/07/2021 18:36:27 UTC
Upt'North ¹ said :-
I might be teachin granny to suck eggs.........
BUT, a long screwdriver placed against the offending part and the handle part against your good ear might locate the source of the noise. It does work.
Upt'North.
25/07/2021 23:16:51 UTC
Ren - The Ed¹ said :-
The rattle from the exhaust is the Catalytic Converter. To quote every motorcycle dealer "they all do that sir". Unless you replace the exhaust with an aftermarket exhaust without a Cat then leave it. It'll rattle on for eons and cause no issues. It'll be a tinny metallic noise that's particularly noticeable at certain revs.
Replacing the rear wheel. Put in the cush rubbers. Remember to install the spacer between the "middle" wheel bearing and the cush drive bearing. Place the sprocket and cush drive into the rubbers. ZIP TIE the sprocket, drive mount, cush system and wheel together. This makes mounting the rear wheel a LOT easier.
Without any brake parts fitted at all, put the spindle though the chain adjuster, left side swingarm slot, the spacer, the sprocket/cush/wheel until the spindle reaches the right hand bearing. THEN replace the brake plate, the right side spacer, the right side adjuster.
Check out this link...
https://bikesandtravels.com/biker.aspx?ride=836...
26/07/2021 07:14:00 UTC
Ren - The Ed¹ said :-
... and also this link
https://bikesandtravels.com/biker.aspx?ride=1210...
26/07/2021 07:14:19 UTC
Ren - The Ed¹ said :-
And yes, that motorcycle is far far far far far far far far far far far far far far far far far far far far far far far far far far far far far far far far far far far far far far far far far far FAR FAR FAR FAR FAR FAR FAR FAR FAR FAR FAR FAR FAR FAR too clean.
26/07/2021 07:14:58 UTC
Glyn said :-
It's a restoration Ed, I can always restore the dirt at the end of the task. I have working on dirty bikes.
The fairing panels are next, all scraped up and split badly on one side. I'm getting paint mixed because one (so called specialist) supplier sent me a "mixed especially for you and not returnable" can that's red but nothing like the red that's On my bike. The price of the decals is ridiculous for a few strips of black vinyl.
26/07/2021 12:59:50 UTC
Ren - The Ed¹ said :-
What is the purpose of the restoration Glyn? I mean the CBF125 is a long long way from being a classic and while it was a popular machine as yet it has little value. Is this for fun? You're enjoying doing something for the sheer pleasure of doing it and doing it well.
27/07/2021 09:45:21 UTC
Glyn said :-
You're bang on there Ed. I have had a very active and varied 66 years thus far. I built a Kit Car (from an MGB GT when they had very little value) renovated 8 houses in 10 years and finally built us a new Oak Framed house here in Hampshire (featured on the "Building the Dream" TV program) 4 years ago. This was followed by renovating our 9 x 6 metre barn into a triple garage with Utility room, bathroom, workshop and large play room. How do you follow that when your joints have gone and you cant lift much anymore? Back to your early days playing with small lightweight motorcycles that's how and the offer of the CBF in return for a few hours labour has filled the gap very nicely. I have little interest in its monetary value but have enjoyed the process immensely. I am almost finished and have no idea what I shall do with it. It is quite likely I shall sell it for whatever I can get and find another model to do the same with. The overall renovation costs are just shy of £300 to date and so I don't expect to lose any money on it. The 125cc Bantams I owned as a 16 year old were also not classified as a classic back then yet fetch small fortunes these days. It would be interesting to see what they say about the CBF125 in 50+ years time. My brother is a case hardened 2 stoke man and the owner of a 1970's race prepped Yam 250LC. He pokes fun at my little CBF constantly offering to make me a wooden box for the Pizza's. It's water off a ducks back...
29/07/2021 20:25:50 UTC
Ren - The Ed¹ said :-
OH NO! You're one of those energetic, doing, achieving types Glyn. I bet you're really positive and helpful and a jolly good fellow all round. Here at Bikes And Travels headquarters I like to do things a little differently. Shoddy workmanship, bodges, a generally grumpy demeanour and we don't just cut corners, we round everything down.
It's unwise to inform me you're in Hampshire. You see my father lives near Worthing and I'm prone to see him a few times a year. You may, unwillingly, find a dirty CB500X on your manicured driveway and a scruffy 49 year old oik dripping on your doorstep demanding tea and biscuits. Ask Ross and Ian Soady, I've traumatised them in the past.
And as for your brother being a "case hardened 2 stoke man", well that is frankly unforgivable.
However, it does rather warm my cold and embittered heart to hear the CBF125 renovation is bringing joy to you. It may not make you a fortune but if it keeps the weary bones moving and the brain thinking then it's good. I shall of course be appropriately distraught at seeing such clean and meticulous work. Would you care for me to bring a tub of used engine oil to spread around your workshop - for that genuine "Ren" experience?
30/07/2021 14:43:45 UTC
Glyn said :-
Brilliant... It's not only the Honda that brings me joy but the jottings, humour, comments and all round cracking advice on this web site...Love it.
I can be grumpy as well. When I found my long suffering wife had secretly sent my beloved, worn out crash helmet to land fill after I sold my BMW 1200 Cruiser a few years back, I was not positive, nor cheerful nor a good all round fellow at all. However, as the renovation moves forward I shall have to replace it in order to ride "Horace the Honda" at least for a short while. And, where did I find more good advice on buying a helmet????
One thing that may concern you is that, if you choose to visit, you may find the CBX all cleaned and polished prior to you departure. I cant see you'd be enthralled by that.
P.S. Two stoke villain lives on the Isle of Wight if anyone's up for a crusade..
30/07/2021 15:57:14 UTC
Ren - The Ed¹ said :-
Glyn - we have rules about saying nice things to me. It is forbidden by edicts hailing back thousands of years.
As for your "wife" disposing of your old crash helmet! I hope you have punished her by sulking and moaning and griping for at least 10 minutes? At least refuse to make her a cup of tea just once - that'll teach her. But don't refuse to do the washing up or it'll be you that regrets it. Mind you I imagine your timber framed mansion has a dish washer.
Even a man of your calibre, enthusiasm and energy would struggle to polish my 500. Remember the old saying "you can't polish a turd".
Are you suggesting an invasion of the Isle of Wight mounted upon steeds of the 4-stroke variety? To face battle against an evil scourge of villainous be-cursed 2-stroke heathens? I'm up for that. I shall grab my old broom handle as my lance and steal (steel?) a plastic sword from a child and meet you at Portsmouth. Bring sandwiches, this may take a while.
31/07/2021 09:17:00 UTC
Glyn said :-
Indeed I do suggest marauding and pillaging the evil bi-strokers of the Island. They're easy to find just follow the high pitched buzzing sound and blue haze and there they'll be. I'll bring the snacks..
I've attached a photo of my repaired fairing as there is an aspect of it that may make the Ed smile. After filling the holes and painting I was appalled to find the price of (Non OEM) decals for the fairing would amount to £84+. Undeterred, I took tracings of them, turned that into a 4mm plywood template, If you flip the template over you have the other side. I ordered some black car wrap from ebay for £4.88, drew around my templates and the result can be seen. I had to get a little careful putting some overspray on the bottom one to match the originals but I think it would fool most. Just a bit of flatting and polishing of the lacquer and that part is done. Better start looking for the new helmet. .
 02/08/2021 07:51:37 UTC
Glyn said :-
I thought I should add that the paint is a pretty good match. The tank is original and the fairings I sprayed with a rattle can. I had Rainbow paints of Ferndown, Dorset match it on their spectometer and mixed it for me into an aerosol can. It costs £14 a can and is called "Spectro B060 Red 97.5%.
02/08/2021 08:01:03 UTC
Upt'North ¹ said :-
Nice work Glyn, and so clean.
Ed, look it's sparklin.
Talking of two strokes, I cannot remember the last time I heard or smelled one. Perhaps they all breakdown or run out of fuel/oil before they get here.
More clean pictures please, and look Ed, sunken lighting, in the GARAGE!
Upt'North.
02/08/2021 09:51:19 UTC
Ren - The Ed¹ said :-
I'm loving the £4.88 decals Glyn. As for the rest... I shall put some comments in chit chat.
02/08/2021 11:40:37 UTC
Glyn said :-
Can you help please Ed?
Some of the various cables and looms from the handlebars of the Honda CBF125 seem to get caught up when turning fully to the left or right. The left hand side is obvious and the wiring loom and Clutch cable are both fed between the left fork top and the headstock. However, on the right hand side, the throttle cable and the ignition wiring loom go through between the fork top and the headstock whilst the starter button loom goes outside (as does the brake pipe). It is actually the throttle cable that gets caught on the lower part of the instrument binnacle on extreme turns. Do you know if this routing is correct?
 05/08/2021 17:55:53 UTC
Ren - The Ed¹ said :-
I don't right now Glyn but I shall have a look at my own 125 tomorrow. I'll see if I can get any helpful images.
05/08/2021 20:40:17 UTC
Ren - The Ed¹ said :-
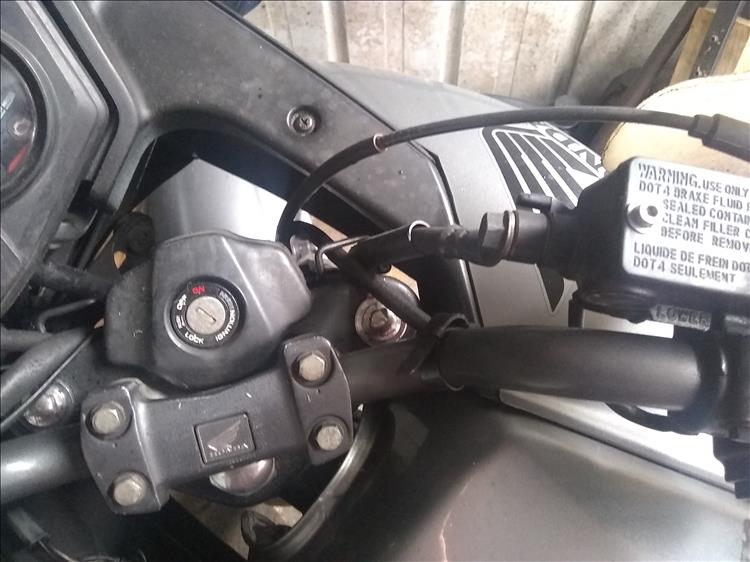
Glyn - is it me or does your throttle cable appear to leave the twist grip downwards? Mine leaves horizontally to the left, bringing it towards the ignition key then drops down. It then passes between the fork leg and the right side of the headstock. Then under the tank and alongside the right of the frame.
Yours appears to drop vertically first before turning under the tank.
 06/08/2021 12:37:21 UTC
Ren - The Ed¹ said :-
I suspect you may have the metal not quite 90 degree elbow pointing down rather than left?
 06/08/2021 12:41:04 UTC
Glyn said :-
Many Thanks Ren,
I think I can see it from your pictures. You have a wire clip that is holding your brake hose through which your starter wiring loom also goes and on through the fork / headstock gap. This answers my question with regards to this loom. Unfortunately, I do not have a clip but merely a broken cable tie which I have just discovered. You can see that my wiring loom is outside of the upper fork which needs to be addressed. The 90 ish degree bend on the throttle cable is the same as yours but the cable seems too long and gets caught on the binnacle or, even worse acts as a stop when the it gets jammed between the fork and the headstock. I may3 need to feed some of the cable back towards the injector and cable tie it there somewhere under the tank.
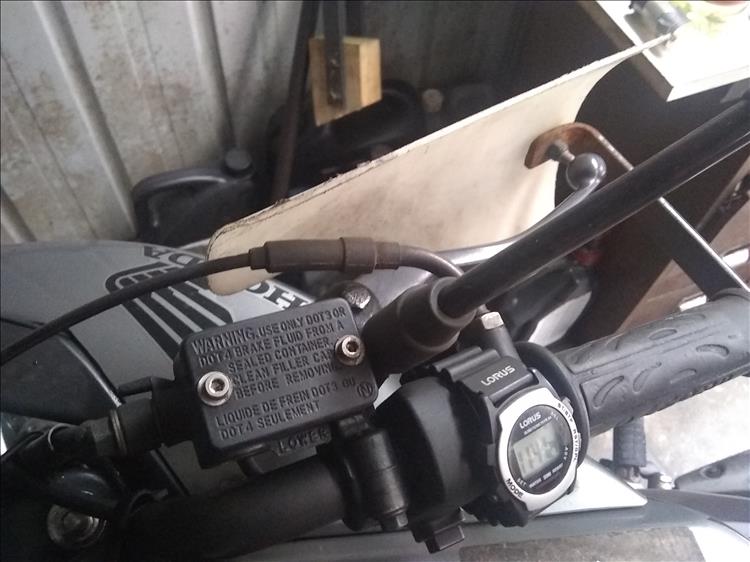
Every picture tells a story and I do like your dash clock. I've copied your Stainless steel bolt trick with the Brake Reservoir screws that had gone instantly round even when using the correct screwdriver. Had you considered fitting your hand guards to your gloves, then you could use the same pair on all your bikes?
Glyn
 06/08/2021 16:06:54 UTC
Ren - The Ed¹ said :-
Yeah that wiring from the starter button goes betwixt the fork and the frame. As for the cable being too long - how odd? I wonder if it's off another model, grafted in as a spare. Like you say play around under the tank and see what happens.
The watch came from Argos eons ago. Cheap, entirely waterproof and accurate enough for my needs. It's a moulded unit so nothing gets in or out.
Now... young chap. Don't you be putting hair brained ideas into my head. I'm liking the handguard-glove combo suggestion just a little too much. I've just gaffer taped a piece of cardboard to my gloves to see if it'll work. I think the idea is sound but needs work, I can't operate the brake or the clutch as yet but we can worry about that later. I'm off to the patent office, back soon.
06/08/2021 20:46:23 UTC
Glyn said :-
Oh Woe is me, woe is me. It was almost time to take the little Honda for a ride but, it happened again, and I couldn't get the little tinker off the centre stand. Lift up the front wheel on to a pallet and give it a tap with the hammer and it releases from its "nook" on the main frame and closes up on its own springs. Now I'm not one to shy away from a tricky job and with the words of Ed "bitch from hell to remove" warning ringing in my ears I decided it was time to remove it for a proper repair. True to form the pin is rusted solid through the stand. The first round of hammers, easing oil and cursing started. It wasn't until I employed the might of the lump hammer that I hit my thumb hard and square which released a hail of expletives for which I am truly apologetic, especially as I live next door to the local Vicar who had garden visitors at the time. The nail instantly turned almost as blue as the air and an interim repair to the missing skin was administered with the use of some 1" masking tape. Out came the battery drill followed by the mains drill and all the various size bits that glowed wildly red after a few seconds as I lie on my back under the bike. Eventually, the stand came out of the frame but the pin is still firmly stuck in the centre of the stand and further work is required. I'm not entirely sure what happens when I get it out as I'm going to need to obtain / fabricate a new pin and how tight a fit it will be in the frame and the stand is yet to be seen. Not a great day in the garage to be sure.
 09/08/2021 19:24:25 UTC
Bogger said :-
You want to get some proper heat on it lad. Then hit it with a big hammer and a drift.
Err the centre stand pin that is, not parts of your anatomy!
I've done a few of these now and they are a right pain.
I managed to do them at home with the aid of a DIY blow torch. But you will need patience.
Bogger
09/08/2021 21:01:53 UTC
Glyn said :-
Thanks for the advice Bogger. Unfortunately, I made such a mess of the left thumb that any advance on the stand will be halted for a few days. I'll update when I restart the project. I do have the DIY flame thrower but I have drilled almost half way through it and filled it with WD40 hoping that it might let go in a day or two. I'm a bit nervous of using the Hammer and bolster at the moment.
10/08/2021 18:11:38 UTC
Ren - The Ed¹ said :-
Hi Glyn, I'm so very sorry to hear about the thumb, but much to my shame I did laugh. A lot. An awful lot. Sorry. That's gotta really really hurt and the best bit is yet to come - when the nail comes asunder. Oooooohhh eeeee...
I think you're right. Let the delicate pinkie have a little time to heal before even looking at that hammer.
10/08/2021 19:19:46 UTC
Upt'North ¹ said :-
Glyn, just to give you a little more confidence.
When using the chisel and big thumping hammer, firstly wear gardening type gloves with rubber palms and if you can, fit in a little cloth padding between skin and glove.
Also wrap a cloth between hand and hammer.
I feel for you buddy, it ain't funny.
Upt'North.
10/08/2021 21:37:49 UTC
Upt'North ¹ said :-
These are good too, nothing like closing the stable door after......
 10/08/2021 21:41:32 UTC
Glyn said :-
Thanks for your good wishes lads. The moment arrived when the lump hammer was deflected off the rubber of the foot peg and missed the drift completely. The thumb is currently an amazing palate of colours but there is some feeling coming back.
12/08/2021 20:33:27 UTC
Ren - The Ed¹ said :-
Oooooh, owww, eeeee, argh! Just thinking about it hurts.
13/08/2021 09:49:41 UTC
Glyn said :-
Hey Hey I won.. I finally got the pin out although there's not much of it left. I had to drill right through then cut down the sides with a hacksaw until I managed to drift the final piece out. Now I need to get a pin or steel tube to fabricate a new snug fit one. Thumb is mending nicely now and its able to appose again, albeit lightly.
 13/08/2021 20:16:41 UTC
Ren - The Ed¹ said :-
That's a lovely looking thumb you have there Glyn.
Congratulations! You have achieved the almost impossible, kudos to your determination and your drills. Now, bearing (sic) in mind you will likely be selling the bike on to make space for another project, what's the plan? Merely replacement or will you create a brass bushing, stainless sleeve and gold plated retention system complete with grease nipples? Do keep this bodger informed.
14/08/2021 07:17:43 UTC
Glyn said :-
I have to say Ren that the most cost effective solution is where I'll start. I wish I had a lathe to make my own pin complete with retaining system. However, if I don't come up with any novel ideas then it's hand in pocket time. I have already been looking for the next bike, I started early to try to gain some skills in identifying the bargains. It's still a bit of a mystery why some bikes are worth so much whilst others are worthless and it doesn't always reflect the build quality. Spares prices for some can be eye watering so have to be a taken into account as well. I might just use the little CBF for a while and wait patiently for the next project.
Glyn
14/08/2021 08:24:49 UTC
Ian Soady¹ said :-
I wouldn't have thought that the clearances are particularly critical so I'd just find a bit of steel tube of appropriate diameter from your local steel stockist (or B&Q if necessary), cut to length, drill a couple of holes for split pins and Bob's your mum's brother. If it's a few thou undersize it won't matter.
I made a new spindle for the rear suspension linkage of a Honda Dominator out of a stainless bar (it had needle rollers running on it) and it was fine for the year or so I had the bike afterwards.
14/08/2021 11:35:40 UTC
Upt'North ¹ said :-
Good suggestion Ian, quick, cheap and simple.
Reminds me of someone.
Upt'North.
14/08/2021 11:50:32 UTC
Ian Soady¹ said :-
I hope you don't mean our esteemed ed. My creative solution is his bodge.....
14/08/2021 16:06:37 UTC
Upt'North ¹ said :-
Certainly not, I wouldn't dream of calling him "quick".
Upt'North.
14/08/2021 17:46:22 UTC
Ren - The Ed¹ said :-
You mean to tell me Glyn you DON'T have a lathe in that lufferly garage? My word, I must say I'm both shocked and a little disappointed.
Now - Ian Soady and Upt' - call me paranoid but is there any merit in stressing about metalurgy? Not with regards the centre stand but with the suspension. Certain metals flex and give, others are harder but more brittle. I know in some extreme duty equipment (hydraulics for example) failures can occur due to the wrong grade of steels being used. I know Ian upon a 180kg Dominator is barely pushing the boat out but is there a risk stainless pins could be too brittle?
14/08/2021 18:10:55 UTC
Glyn said :-
That's a good shout Ian Soady, I'll start the search for some steel bar. There are various pins on offer on eBay for the Cbf125:but, strangely they're not all the same size. This seems to happen a lot on eBay. I ordered a new throttle cable that doesn't fit although all the details are correct. The inner cable is too short, the outer too long and the thread on the injector end is 8mm instead of 6mm. I don't see Ed as a mechanic of dubious methods, far more of the Alan Millyard of the financially challenged.. keep it coming.
Glyn
15/08/2021 09:15:19 UTC
Ren - The Ed¹ said :-
"the Alan Millyard of the financially challenged"... WOW!!! I am a big fan of Mr Millyard, particularly after watching several of his YouTube videos. Not only is he incredibly skilled, he is also soft spoken, polite and doesn't need to shout and swear all the time.
But. There are some remarkable differences betwixt Alan and myself. Not only does Alan have the pennies for a shed and some turning machinery, he also has patience. And an eye for detail. And an eye for the aesthetic. And he appears to work hard. I suggest the only things we have in common are we both like to make things ourselves and we don't go to the pub on a Friday night looking for fights.
15/08/2021 09:56:04 UTC
Ian Soady¹ said :-
"is there a risk stainless pins could be too brittle?"
Yes there is but a 1/2" diameter bar which was only about 4" long in this application seemed safe enough.
Many years ago there was a furious argument between two rival stainless suppliers as to the correct material to make wheel spindles etc. One said he used a lower strength but more ductile version, the other a higher strength but more brittle. I don't think it was ever resolved so they both continued their own path and indeed are still both trading today.
Re the stand pivot - as I suggested I don't think the diameter is critical in this application and a few thou extra clearance is unlikely to cause distress. You may in fact find that an imperial size would work well enough - eg 1/2" is only .012" less than 13mm which would be a nice easy fit with plenty of grease. Of course we precision engineers wouldn't do anything like that! I would probably go for thick walled tube rather than solid bar.
What amazes me about Allan Millyard is that he seems to do most things with basic hand tools, even chopping up crankcases and cylinder barrels etc with hacksaws. Very impressive stuff.
15/08/2021 11:16:29 UTC
Ren - The Ed¹ said :-
I think you'd have to be "giving it some" to stress a 1/2 inch bar of most any material in a linkage pin so fair enough. It is something I'd ask tinkerers and bodgers such as I reading this to bear in mind though - not all metals are equal. If it's safety critical (brakes for example) then perhaps, maybe, it is worth just getting the right bit for the job.
When seeing Millyard's creations I assumed he had access to some serious tooling, such as CNC machines and laser/plasma/water cutters. I imagined him using CAD drawings and engineering diagrams. I was stunned to see him delicately hacksawing his way through cylinder heads then hand filing the edges to fit. He must have the patience of a saint.
15/08/2021 13:35:23 UTC
Glyn said :-
And, Mr Millyard does it all in a single garage we're told. I agree with all the things Ed has said about him and love the fact that these "stalwarts of the shed" are out there doing what ever they can, with whatever they have, with varying levels of ability and resources. Amazingly, we have the folk that can create a V12 Yam and others that can fabricate hand guards for a CBF125.
I found that a 15mm copper plumbing pipe was a very loose fit in the frame lugs for the CBF Centre stand and so am looking to find at least a 16mm bar for the job.
Glyn
15/08/2021 19:55:31 UTC
Ian Soady¹ said :-
Re Allan Millyard and somewhat off topic again....
During my enforced "holiday" from riding I've been using the excellent services of my local library. They have a scheme which allows you to "borrow" digital versions of various magazines - and this includes back copies for a couple of years or so. I've worked my way through some titles of interest and thought I'd give "Classic Mechanics" a try although I didn't think their style of bikes would suit me. I discovered that Allan Millyard has a column in each isssue where he describes in some detail the work he's doing and it's been an eye opener. Some of the other articles / columns are equally interesting, dealing with making special tools etc.
Worth a look at your local library to see if they have a similar scheme - it's free of course. Well until they're forced to privatise the libraries so they can become as efficient as test & trace.
16/08/2021 09:59:31 UTC
Ren - The Ed¹ said :-
"library" you say Ian? I seem to recall Sharon once worked at one of them Library things in the "before" times. I'll enquire with her Worshipful Madamness to see if hers did/does. I'll have to learn to read first, too busy writing.
16/08/2021 20:02:17 UTC
Glyn said :-
Centre stand job finally (almost) finished,
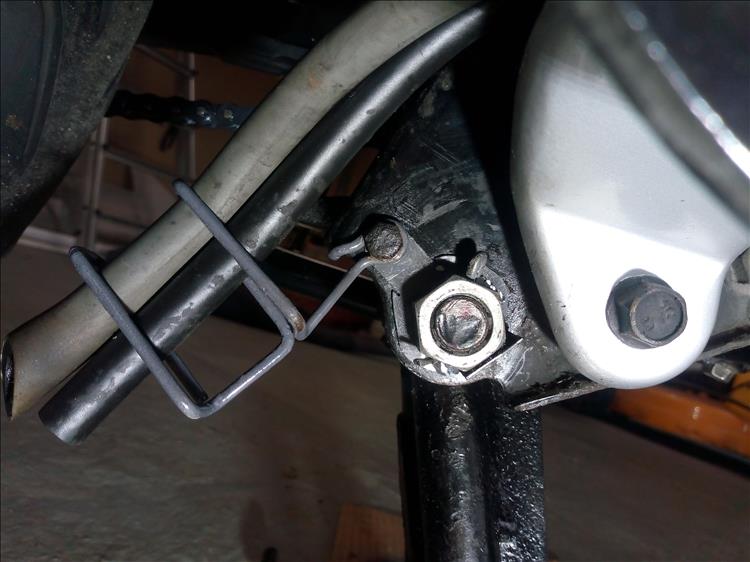
I found that a 16mm bolt was a reasonable fit through the stand and lugs either side but needed to stop the rusting in from happening again. Now I read with interested how the Ed stopped the pin from turning in the frame with a section of galvanised wire through the pin and around the tubing clip and decided to do something similar. I fabricated a tab washer from a flat section of steel and shaped it so that a 16mm hole could be drilled for the new pin (nut and bolt) and a smaller hole where the tubing clip is fitted with the 10mm bolt. I was able to tighten the new Nut and Bolt then drill a small hole through both, fit a split pin, which prevents any movement. I greased it all up and it works a treat. So why is the word (almost) mentioned above. I need a few tips on how to fit the double spring to the stand. The mole-grips wont hold it whilst I try to stretch it so I guess there is a knack.
 17/08/2021 17:18:07 UTC
Ren - The Ed¹ said :-
Regarding spring fitting - see my video linked below. BUT!!! This only works with a single spring not a double spring. My advice that I've used before is to spread the thicker, stronger outer spring as shown in the video and fit that, then fit the smaller spring by heaving.
It *might* be possible to use plastic (ie zip tie sections as per the video) on the inner spring then use some kind of blowtorch to burn them out. More likely though you'll set that nice bike on fire... then that nice garage... then that nice house. Perhaps do it outside or summat.
https://www.youtube.com/watch?v=P2EgB-21WiU&t=3s...
17/08/2021 17:43:37 UTC
Glyn said :-
Fantastic tip, many thanks Ren. Tomorrow I will do battle.
17/08/2021 18:41:01 UTC
Ian Soady¹ said :-
Never worked for me. What does is the Phillips (or JIS) screwdriver trick. The video's not too clear (oily arm in the way) but works for me.
I've also used a home made spring puller like this with some success.
https://www.youtube.com/watch?v=3SX2wPEHmjM...
 18/08/2021 10:58:14 UTC
Ren - The Ed¹ said :-
I know you've struggled with the wedge method in the past Ian. I think each spring and associated mounting is different and having a range of options in your armoury is worthwhile. That video you linked too made it look all too easy and a method I've used in the past. But you might struggle if the mounts are out of reach or tucked away. There's pullers as pictured, there's putting the springs on before positioning the stand ie. using the stand as the lever, and I'm sure there's more!
Glyn - whatever works works. Just watch them pinkies especially that sore thumb. Might I suggest some leather welding gloves?
18/08/2021 15:00:43 UTC
Glyn said :-
It worked fine for me. I put the large spring on with the Ed method then put the smaller spring through and used a metal hook to get it over the end. Sadly, when I was finished the springs didn't seem strong enough to pull the stand completely up to the top stopping about 20mm short of the rubber frame stop. However, I noticed the springs appeared to be binding slightly on the top pin as they turned around it as the stand came up and so I administered some grease. It was immediately cured completely and now the Centre stand operates as it should.
Latest news on my Er indoors, Upt North. She has come around completely and not only is the girl talking to me again, she decided she would accompany me to the bike shop to get me a new Helmet using the Ed's selection process. We emerged an hour later with "His n Hers" helmets (not matching, that would be too much). I'm hoping she's planning on being on pillion again after all these years because the alternative is that she has her eyes on my little (rebuild finished now) CBF125. Think I need to avoid her reading Sharon's blog or this could get out of control.
Glyn
19/08/2021 21:01:06 UTC
Ren - The Ed¹ said :-
"the Ed method" - I can't take credit for this Glyn, the trick is as old as springs themselves I'm sure.
Glad to hear the stand is back on and no reports of further digital injury. Yes, digital. My doctor once told me he was going to do a digital examination. I thought "ooooh technology has come a long way in proctology these days, he's gunna do some kind of computer scan". I realised digital in this instance referred to the use the doctors digits, his fingers, as he pulled on his rubber gloves. Yikes!
Oh my word! That second paragraph of yours Glyn, that made me laugh. I can just see it now "Darling, you know that cute shiny little CBF125, I, errrr, I don't suppose I could, well, you know, have it?" You could look forward to riding out together. I'll shut up now before we both get in trouble.
20/08/2021 17:35:04 UTC
Glyn said :-
Oh no there's been am invasion in rural Hampshire. The dreaded two stoker appeared from the Isle of Wight and infiltrated the garage. Actually, bike , rider (my brother) and me (along as a mechanic.. Ha)were just back from day one at the classic bike racing at Castle Combe. You can tell it's a two stoke cause its always breaking down.
Accompanying picture, Bikes from left to right; Yellow Harley Davidson, Red Honda CBF125, Recently acquired Yam Divvy 600s (awaiting major refit) and finally Yamaha Pro Am LC250.
 22/08/2021 08:06:36 UTC
Upt'North ¹ said :-
Is that a Sportster?
I'd love to take it for a spin......
22/08/2021 09:55:17 UTC
Glyn said :-
Brilliant Upt, wish I had that dry humour ability you demonstrate so vividly.
I think its actually a Hard Tail with dubious handling but nonetheless a 2 wheeler. Furthermore, I prefer the bars a bit wider on my rides but I have to say that the trailing stand is definitely superior to anything else I've ever tried. Terrible thing to get up a hill and round a corner at any speed above 3 MPH due to poorly designed weight distribution but still retains that old style charm that is still sought after today whilst still being modern being equipped with Electric power.
22/08/2021 22:28:07 UTC
Ren - The Ed¹ said :-
Harsh. Really harsh. Apologies to any Harley owners. But much to my shame I'm afraid I did laugh! Far too much. And you know I hate being happy. But this is entirely unfair on Harleys. I've used a Road King that managed a corner at 3 mph just fine and that's while loaded with 1/4 of a cubic metre of concrete. Admittedly I did have help (it was on the back of a pickup) but we (yes, WE) survived. The Road King has the 60cc motor and the Wide Glide base that improves stability and handling you see.
When all is said and done I'd rather have the 4 stroke cement mixer Sportster than that noisy 'orrible 2 stroke thingy though. At least the cement mixer will get you home.
23/08/2021 09:20:37 UTC
nab301 said :-
Damn! I'm slowing down in my old age , it took me a minute to see the cement mixer on the left...
Nigel
23/08/2021 09:22:59 UTC
Glyn said :-
And so here starteth the XJ Divvy resto. First job was to see exactly what came in the cardboard box that accompanied the bike. A petrol tap completely taken apart and put in a plastic bag but complete with a brand new rebuild kit. Seemed like a good place to start and with the help of some fine fella on YouTube the tap was duly reassembled with the new parts. It's not entirely simple though as it uses a vacuum from the engine to open the tap and it switches off when the engine stops. The tap positions are on (obvious), Res(erve) and PRI. Pri is for prime, such as if you run out of petrol, the engine will not run and so you get no vacuum so the tap will not open. Big sigh, what's wrong with Off, On and reserve without all the extra complications? I'm now searching this site to find Ren's jottings on how to reassemble a quad carb set up that has been broken down into every single component part. Sadly, Mr Haynes is very difficult to follow if you're not the one who took it apart originally.
26/08/2021 13:42:00 UTC
Ian Soady¹ said :-
I had one of those on the Honda 400 four I owned briefly and it was a pain. I converted it to work as a conventional tap but can't remember how I did it now - it is marginally possible I wrote about it here.
26/08/2021 15:03:13 UTC
Glyn said :-
The are Horror stories about the diaphram in the fuel tap failing and filling the float bowls with fuel that evaporates, consequently, playing havoc with the MPG. Even worse, if this happens and the float needles are poor, the fuel can run down into the crankcase flushing the oil from the bearings. Oh woe is me, what will I find as I progress?
Undeterred, I converted the many hundreds of parts from the cardboard box into a four branch carb set up using the supplied parts from the Keyway overhaul packs. Initially I got the throttle cable bracket the wrong way round and then took hours to sort out the double throttle cable set up. Finding I had two o rings left over in each pack I consulted google. Here I found many warnings about using the keyway rebuild packs but also found the genuine Yamaha packs at £53 per carb. That's £212!! I'll stick with the £18 per carb Keyways for the moment and see how it goes. I put the completed carb block on using new manifold rubbers and its looking much better already. I console myself with the fact that, If I had taken it apart myself, this would all have been that much easier. That's why "projects" usually come with a price advantage.
 26/08/2021 21:51:13 UTC
Snod said :-
One of the best things about the leaky vacuum tap on the TRX850, along with the use of a very forward slanted engine (much like your Divvy..) is that if the carbs do overflow, the fuel can fill the combustion chamber and then when you come to start it you get hydraulic lock and a bent rod. Which is a good game.
27/08/2021 01:02:54 UTC
Ren - The Ed¹ said :-
Good lord Snod - the voice of DOOM! Perhaps this is why they chose a vacuum tap - to stop leaky float bowls filling the barrels. I think the best solution is to park the bike upside-down thus eliminating the problem. Wouldn't happen with fuel injection.
I can't help you with a 4-banger carb rebuild Glyn - never done one meself. It looks surprisingly clean under that tank.
27/08/2021 08:42:02 UTC
ROD said :-
Glyn, I am probably trying to teach my grandmother how to suck eggs, but if you set the butterfly's the same with a set of feeler gauges the carbs will near enough be in balance when you start the bike.
27/08/2021 11:26:45 UTC
Glyn said :-
Thanks Rod, good call, I will do that. Now you know I like things clean Ren it saves me money on manicures. Right under the bottom flaps of the cardboard box of bits I have found a large shaped piece of flat rubber, possibly a heat shield. It seems to have 4'holes perfectly spaced for the inlet manifolds. doh Does this mean I have to take em orf again? Would I be tempted to use a pair of scissors to get them on with the carbs in situ? Also i see that there is a PTS sensor that's been removed, so I'll need to set that up as well. Strange to have a TPS on a bike without fuel injection, ABS or traction control so I imagine that it only affects ignition timing.
27/08/2021 14:09:15 UTC
Ren - The Ed¹ said :-
Regarding the rubber thing Glyn - no idea. You'll need a manual or someone who knows the Divvy well. I'll see if I can find some diagrams for ya...
The Fazer 600 had TPS even though it was carbed. Yes, it's for ignition timing so the computer knows when you're giving it large or not.
27/08/2021 14:11:57 UTC
Ren - The Ed¹ said :-
Maybe the piece of rubber is in the diagram in the link??
https://www.oemmotorparts.com/oem5.asp?M=Yamaha&T=XJ%20S%20DIVERSION%20%20600&Y=...
27/08/2021 14:13:34 UTC
Upt'North ¹ said :-
I don't know if the carb mats are common but the BeaST has one too.
I'm told it's to reduce hot air getting to the carbs?
I know some have not replaced them on Pan's without consequences. It could be a climate thing.
Upt'North.
27/08/2021 16:22:39 UTC
Glyn said :-
Thanks guys. Deep joy, I've found that it goes on top of the carbs below the air box and not underneath. I also eventually found it in the Haynes Manual and its called a dust cover. The usual line appears in the Haynes manual which says "take a note of the position when removing it" but I didn't remove it and so had to work out which way is up and which side is front etc.
I've discovered a Scottoiler underneath the seat which appears to work off of the inlet manifold (or did) by vacuum. The rubber pipe connection into the manifold has fallen to pieces long ago and looks like the hole has been bunged up with a matchstick (it probably played havoc with the idle and low speed running). My question to you all please; Is it worth resurrecting the system or is it a bin job? Does anyone have a positive experience with this final chain oiling system?
Glyn
27/08/2021 19:26:19 UTC
Ren - The Ed¹ said :-
Oh jeeeeez. Glyn - that's worse than asking which oil you should use. Brace yourselves gentlefolk...
27/08/2021 19:36:08 UTC
Upt'North ¹ said :-
Glyn, modern chain lube is simple, clean and cheap to use.
Those things are so messy.
But it's down to you.
Upt'North.
27/08/2021 21:08:35 UTC
Glyn said :-
Fair enough, its coming off. I was a bit worried about oil on the garage floor anyway, its made a right mess over the spring arm. I see they cost new about £100.
27/08/2021 22:44:53 UTC
Ian Soady¹ said :-
I agree with Mr North. When I had a modern bike with X ring chain I used Wurth chain wax which seemed to do a decent job. For the Norton with a "traditional" chain I use a Silkolene aerosol which works well.
It always makes me smile when people say "I'm using a scottoiler and that's why my X- or O-ring chin hardly needs adjusting". But of course they have nothing to compare it with so how do they know what it would be like using an alternative?
28/08/2021 10:18:59 UTC
Snod said :-
I loved the Scottoiler on my CB250, it saved me time and money by lengthening time between adjustment and eventually replacement of the chain. Perhaps it depends how clean you like your bike..
28/08/2021 17:44:11 UTC
David Barwick said :-
Here is a link to a recent and extremely comprehensive test of 55 (no less) chain-lubes, by John Milbank on the Bennetts Bike Social site.
Personally, I like to keep it simple, and use SAE 90 gear-oil applied with a 1" paint brush (little and often)
to my Super Cub 125, which has a very practical fully enclosed chain, which means it is always clean and dry.
https://www.bennetts.co.uk/bikesocial/reviews/products/motorcycle-maintenance-an...
29/08/2021 13:27:33 UTC
Glyn said :-
Great news lads the old Divvy runs again after 11 years of being in bits. I say runs, it's a right bucket of bolts, misfiring, cutting out, plumes of smoke (probably from the WD40 injected into the bores) and refuses to run without full choke. However, the most alarming thing is the noise. There's some fairly good looking original silencers on her but look underneath closely and the pipe to silencer joints have biodegraded to nothing leaving holes on both sides. What a racket (as mentioned by the Vicar next door). He said other things as well about being after 10pm but I wasn't taking a lot of notice. Fair play though, he was due at the altar this morning. The smoke finally cleared but everything in the garage, including me smelled of burnt WD40. However we now have the basis of a restoration.
29/08/2021 19:14:06 UTC
Upt'North ¹ said :-
Did the Most Reverend offer a blessing to the Divvy.
Upt'North.
30/08/2021 09:35:52 UTC
Bogger said :-
You need to be careful Glyn. There might be an impromptu bolt of lightning and the lightning conductor may end up piercing the heart of the beast.
Bogger
707850...
30/08/2021 11:58:03 UTC
Glyn said :-
I don't think it was a blessing he was uttering under his breath Upt' but it may have been a bolt of lightning that came down and thus did sticketh the clutch plates together. Failing that it was the 11 year layup. Whilst I'm not worried about whipping the cover off and rebuilding the clutch as it seems simple enough in the manual, I will have to empty out the 2+ litres of brand new (genuine) Yamaha oil that I put in 2 days ago to do so. Should have gone to Halfords. I've tried the usual method of running it on the stand in gear and operating the rear brake and rocking it back and forth in gear to no avail.
Sadly, not much will happen for at least 10 days as I'm off overseas for that period of time.
30/08/2021 13:23:55 UTC
Ren - The Ed¹ said :-
Overseas? Now? Brave man Glyn. 10,000 Covid tests later and your nasal passages will never be the same.
David Barwick - that is one very serious amount of information! And yet of course we will all remain with our own opinions and experiences.
30/08/2021 14:59:19 UTC
Glyn said :-
Well I've returned from Germany as a poorer man (expensive Covid tests plus warning lights illuminating the dashboard whilst traveling the M3). That's a long and boring tale so best left apart from saying it didn't ever happen in my Morris Minor! Eager to continue the Yam Divvy rebuild, I took the locked clutch apart to find only 2 sticking plates. After a thorough clean and new cover gasket it was all back together and operating nicely. I ordered new Delkelvik downpipes as the old ones are holed and took many other things apart to be cleaned and painted. The Honda CBF 125 has a new front tyre on order plus an MOT booked next week so I should be riding about the same time thatthe wet weather returns.
17/09/2021 12:09:12 UTC
Ren - The Ed¹ said :-
Morris Minor? Nope, no issues with engine management lights on them as there isn't one. I hope your Germanic expedition was worthwhile in spite of the hassle.
As for the Divvy - good show.
18/09/2021 19:14:16 UTC
Glyn said :-
Little CBF passed the MOT yesterday without any advisories. Nice little 26 mile round trip was the first time back on the road for 18 months or so. It's an interesting ride though as most aspects of the performance lack any finesse. Not being too critical I hope but everything such as throttle, front brake and clutch are not exactly progressive and a switch would do as the functions are either on or off. I did smile for the entire journey which is important. 65 MPH would be a struggle with the gearing I have though as its doing 5k revs at 40MPH. Somehow it doesn't feel very planted and I remember my 600 feeling safer at lower speeds than this. I somehow thought I'd be able to throw this little lightweight machine around with ease but it's not quite like that. However they do sat " yer pays yer money and you gets yer choice".
 24/09/2021 11:35:09 UTC
nab301 said :-
Quote "Somehow it doesn't feel very planted and I remember my 600 feeling safer at lower speeds than this. "
I have a CB125F and would agree with that comment , especially when swopping between bigger bikes , but when using it exclusively I find I get used to the miniscule inputs required to change direction . It does get a bit flighty on "fast" bumpy corners though .. and I miss the acceleration out of corners on a bigger bike compared to the chuck it in style and hope for the best that the 125 seems to encourage.
Nigel
24/09/2021 12:27:55 UTC
Glyn said :-
And so the Yam Divvy XJ600s resto continues apace. Sadly, the point where the expense outweighs the value of the bike has been passed and I'm in too deep to stop now. It is fortunate that I really like the bike and so doing it for love is ok-ish. The swing arm was fairly rusty and pitted so is currently away being blasted and powder coated. I was dubious of the Shock unit so took it apart to find all was ok. The language used as I took 3 days to work out how to get the spring compressed was appalling. However, the Vicar next for is away on his holidays so only the wife had to endure it. My biggest gripe is the exhaust system. As many know, the Japanese metal is returning to its original state quicker than most ironwork for whatever reason. The 4 branch headers were ok in the top part but the 2 into 1 sections at the bottom were rusted away and consisted of holes. In a fit of madness I ordered Delkevik replacements at £165. Now looking carefully at the silencers I see mounds of rust pouring out of each end when I turn them upside down plus I can push my thumb through parts easily. Silencers are a different problem to source as every after-market supplier seems to think I want myself and all others to be deafened by the system. Black Widow, Arrow and Delkevik openly boast about the deep raucous sound their pipes emit. If I leave the silencers off, I can get that! Hours of research ends in an Italian product by Marvings that is as close a copy of the original sound and looks as I can get. Furthermore, the product utilises the 4 original mounting brackets, others mentioned above use a glorified Jubilee clip to mount "somewhere" on the passenger footpegs brackets and in doing so happy to be ignoring the front silencer mounts altogether which must put extra weight on the manifold studs, nuts and heads. The certification of exhausts on bikes is a talking point as well. Many popular silencers appear to be illegal or dubious to use on UK roads. The Marvings are Homologated which should appease the Police and MOT testers. So the exhaust has cost just shy of £500.. ouch. However I now have the worry of importing goods from the EU which will be reported later. I should add that the original exhaust parts are obsolete and unavailable forcing me down this route.
I managed to get an offer of £1250 for the Honda CBF125 but (contrary to media reporting) young 17 year old CBT holders are unreliable! I took it off sale on trust but the deposit money has not appeared after a week making me a little upset as there were others interested.
02/10/2021 13:59:56 UTC
Upt'North ¹ said :-
Glyn, glad to hear you're cracking on with the Divvy.
Those silencers held on with glorified jubilee clips.....yuk. You see folks throw away a perfectly sound silencer with proper fasteners then fit something resembling a meccano set. WIGN.
Anyway, glad it's all working out with man maths.
Upt'North.
02/10/2021 16:25:01 UTC
Ren - The Ed¹ said :-
When we mortal folks watch these TV programs like Wheeler Dealers and Shed and Buried it all looks so easy, like a get rich quick scheme. Buy a bike (or car), fix a few little issues, give it a clean and BOOM! Sell it for a profit 3 days later. There's no standing in a cold shed covered from head to toe in oil, cuts and bruises while looking at rotten exhausts, studs broken off in cylinder heads, crusty green wiring and seized callipers. Then when you have finally fought your way through all this and created a masterpiece, the tyre kickers and time wasters want £500 off then don't bother to turn up with the readies.
If you're doing it for love Glyn, do it for love. Enjoy! Masochist.
04/10/2021 08:42:44 UTC
Glyn said :-
Oh dear the Divvy fights back. On inspection, the rear brake disc had a thickness that was well below the stamped number of 4mm, it was seriously grooved with a mighty lip at the top and bottom of the Pad track. Nothing to worry about thought I, simply take it off and fit a new one. The bolts could have been welded in they were so stubborn and a short time later, the Allen heads were rounded off inside of 2 bolts, another 2 had sheared off whilst the remaining 2 reluctantly came out. So now I need to drill and re-tap the holes which, if unsuccessful, will require a replacement wheel. This bike has only covered 19k miles for this to happen and so I would imagine that it is expected that discs should be replaceable. I bought an expensive set of Allen keys as well but the combination of rust and thread-lock has caused mayhem this time.
08/10/2021 07:56:13 UTC
Upt'North ¹ said :-
Glyn,
I'm sure I'm teaching grandma how to suck eggs.....but......if you drill the heads off you may be able to mole grip/stilson the remains out. Fingers crossed. Thankfully the only thing you're going to mark up is the disc you're replacing anyway.
Upt'North.
08/10/2021 08:54:39 UTC
Ren - The Ed¹ said :-
Oh lordy Glyn, my heartfelt sympathy. While the bike may only have 19k on the clock it's the age you're fighting against here. The CBF125 has 94k on the clock but is 10 years old and covered in oil so, errr, most of the bolts are compliant.
Have you considered acid erosion? I'll need to do some research to jog my memory but certain acids react with steel but not ally, this can be used to remove studs. Not sure what the wheels are made of though (not just aluminium I suspect). There's also spark erosion and the machine shop but you have to weigh the costs versus finding a used wheel. Being the rear is hopeful as most front are damaged in crashes but not rears. You may find the replacement has the same issues though.
Is this still a labour of love or is the honeymoon period fading fast?
08/10/2021 08:59:27 UTC
Glyn said :-
I am still able to stand back and admire the machine ( in the eye of the beholder and all that) so I'm not at the giving up stage yet. Actually Upt, the disc is off but with two sheared off bolts deep in their holes with nothing showing above the surface. I can drill them out ok as they don't appear to be high tensile although I think they should be. Thread sizes are odd though because my M8 1.25 tap does not spin freely into the remaining holes. So if I don't get perfectly into the centres of the stuck bolts with the drill and get them out clean, then I may have to re-tap to say M9 x1. New disc was ordered prior to the work starting which I may need to open the holes to get larger bolts in. Oh dear oh dear.
08/10/2021 11:03:35 UTC
Upt'North ¹ said :-
?
https://www.toolstop.co.uk/sealey-ak8189-left-hand-spiral-drill-bit-set-5-piece/...
08/10/2021 12:58:56 UTC
nab301 said :-
I've seen hardened steel drill guides used in the past but I can't find the link now...
Nigel
08/10/2021 14:14:26 UTC
Bill said :-
Glyn if you or a friend has a welder you can weld a nut over the damaged Allen screw and use a spanner to remove it. Your M8 may be different pitch than your 1.5 tap use one of the bolts that came out and hold against your tap to compare.
Good luck with the repair.
08/10/2021 17:29:28 UTC
Glyn said :-
I did that Bill and the two appeared to lock together perfectly. I drilled a centre hole through the 2 damaged bolts and used easyout screw extractors. They both came out but the threads were definitely compromised on one as the new bolts almost fell through. So I tried to apply the correct torque and they stripped very easily. It would seem that the blue locktite is stronger than epoxy after 25 years. I am going to try M8 Helicoils next.just trying to find max torques for them.
09/10/2021 08:50:32 UTC
Glyn said :-
Its all getting a bit confusing. Everywhere I read it tells me that a Helicoil is a superior fixing than tapping straight into cast aluminium (such as Engine casings and alloy motorcycle wheels). However when I look up the maximum torque settings for the M8 1.25 Helicoil it gives 9 NM. My concern is that the torque settings in the manual for the rear brake disc of the XJ600s is 20 NM, more than double that of the helical rating. Come on you clever Engineers, any advice or knowledge sharing would be most welcome.
09/10/2021 09:17:11 UTC
Ian Soady¹ said :-
Is that not the maximum torque when installing the helicoil rather than the max torque when fitted? In my experience, helicoils will easily take original torque figures but I confess a quick look hasn't turned up any figures.
09/10/2021 11:04:22 UTC
Bill said :-
Glyn, used helecoils for years and never had an issue, no torque for the actual helecoil just screw in flush and then snap off insertion tag as strong as the original threads. If you are worried look for threadserts they are a solid sleeve with inner and outer thread rather than a wire coil. I have used them but cannot remember the brand but Saem principal as video
https://youtu.be/anjDQJtWFc8...
09/10/2021 11:33:31 UTC
Bill said :-
Found similar on Amozon if any use for you Glyn
20Pcs 302 Carbon Steel Self-Tapping Thread Insert Screw Repairing Kit(Inner M6*1...
09/10/2021 11:37:18 UTC
nab301 said :-
I've used this brand before on non safety critical stuff , the wire type and the solid insert , the blurb on their website suggests 29% stronger (pull out strength ) for the wire type (10mm size example).
Nigel
09/10/2021 17:39:13 UTC
nab301 said :-
Forgot the link....
https://www.baercoil.com/pdf/BaerCoil_free_running.pdf...
09/10/2021 17:39:49 UTC
Glyn said :-
Many thanks Gentlemen, I've seen the Time serts before and generally they seem to be a slightly better choice than the Helicoils. I have ordered an 8mm kit which should arrive early next week as should the new disc. I don't really have anything to lose because, if it fails, as Ren says, there are a few in breakers yards out there although I've seen rear wheels for sale on Fleebay with the bolts sheared off just like mine were. I might have 5 good threads out of the 6 and will put in the Helicoil and see if it will torque up tp 19 Nm. I presume the 6 bolts work as hard to stop the disc warping as they do to prevent the disc rotating on the wheel itself.
10/10/2021 09:14:47 UTC
Ian Soady¹ said :-
The only possible issue with timeserts in some applications is that they seem to need a larger hole for fitting to cater for the greater wall thickness. Probably not a problem here. I have to say I've never had a problem with properly fitted helicoils.
10/10/2021 12:40:19 UTC
Ian Soady¹ said :-
The only possible issue with timeserts in some applications is that they seem to need a larger hole for fitting to cater for the greater wall thickness. Probably not a problem here. I have to say I've never had a problem with properly fitted helicoils.
10/10/2021 12:40:19 UTC
Ian Soady¹ said :-
The only possible issue with timeserts in some applications is that they seem to need a larger hole for fitting to cater for the greater wall thickness. Probably not a problem here. I have to say I've never had a problem with properly fitted helicoils.
10/10/2021 12:40:19 UTC
Glyn said :-
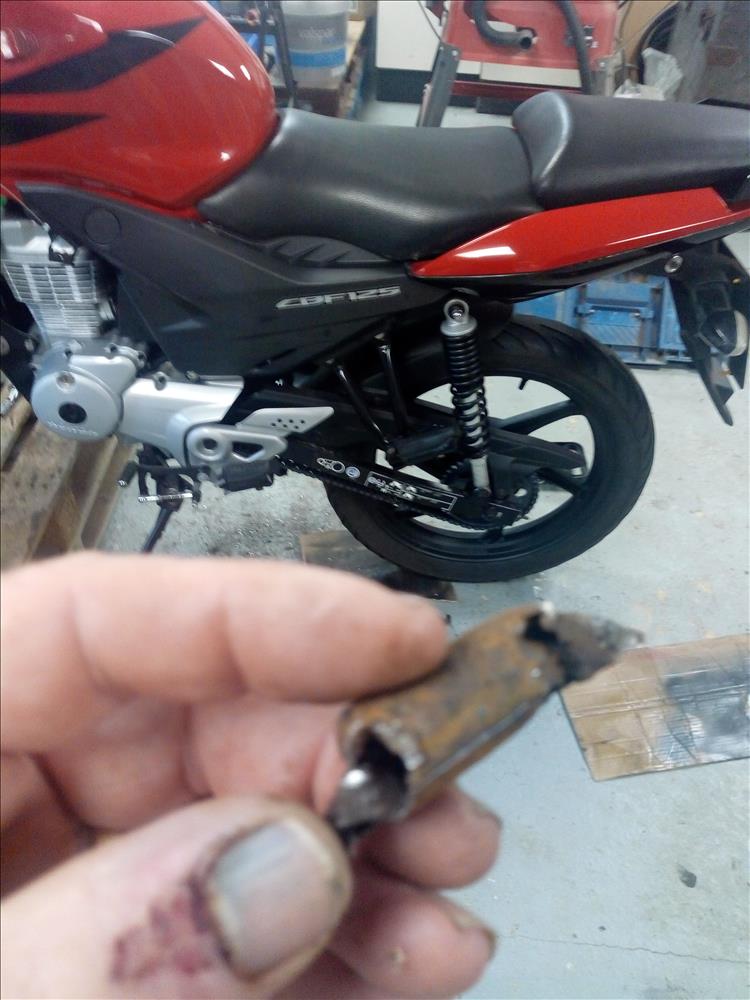
Whilst I await the brake parts arrival I thought of take another look at the carbs as the bike ran so badly last time I started it. The float levels were quite far out (18mm+ instead of 9mm) which probably meant it was running very lean as the fuel level may have been below the jet levels. I also check the electrical carb heaters and 2 of the 4 were open circuit. I found this image elsewhere on these pages. https://bikesandtravels.com/img4/brass_carb_heater.jpg
The problem is I can't find any anywhere for a Divvy or indeed anything on Mikuni carb heater elements.
10/10/2021 17:08:14 UTC
Bob said :-
The problem with helicoils is that they sometimes come out with the bolt when it is removed later on, particularly if there has been any build up of corrosion.
If the bolt is one which needs frequent removal I'd either use a Timesert or get it TIG'd up and re-drilled.
12/10/2021 11:47:29 UTC
Ren - The Ed¹ said :-
I don't suppose there's any possibility of getting a nut on the inside of the casting? It looks as though there may be access but I doubt there's a suitably flat area within the casting for a nut to seat onto safely. I'd be going for the timeserts or Bob's option of getting someone to weld up and re-tap. Thing is it all costs money.
 12/10/2021 11:56:49 UTC
Glyn said :-
You're right Ed, I can get a longer bolt to go right through but the back edge is at such an angle that the nut would bend the bolt as tightening occured. I might be able to make a bespoke washer with a sloping profile to keep it square. There's not much room to get a spanner on the nut and the longer bolt, washer and nut may put the wheel out of balance. Think I'll try the Helicoil first then a rethink if it fails. You can just see the longer bolt coming through in the picture. Sorry about the cleanliness Ed, I know you're not keen on such things.
 12/10/2021 21:13:29 UTC
Ian Soady¹ said :-
I can't see the nut idea working - it'll just loosen as it's not properly snugged up against a flat surface.
13/10/2021 11:02:52 UTC
Bob said :-
Having said what I said about helicoils - I think in your application it will be absolutely fine. How often are you planning on removing the brake disc?
Look at it this way, if you helicoil it now (for a few quid) and later on the helicoil comes out and a new one can't be seated, then you can get it welded up and drilled anyway (which I would have thought would be about £30 - £40)
13/10/2021 12:50:35 UTC
Glyn said :-
Thanks Bob, I am trying the Helicoil fix a little later today. The next time the disc will come off is when it gets down below 4 mm. It has taken 24 years to get there last time and so, by then, I'll be riding the Pearly Way towards, or beyond those big gates.
Ian, I had another thought about the nuts idea so did a little drawing. I can get to the rear of the hub (just). If I used 8mm threaded rod extension pieces ( a 25mm long nut available in stainless) then I could shape the nut to fit the curve on my grinder. The remaining portion would contain more threads than a standard nut and should torque up ok. All theoretical at this point and maybe tricky to perform. Maybe it is a "nuts idea"
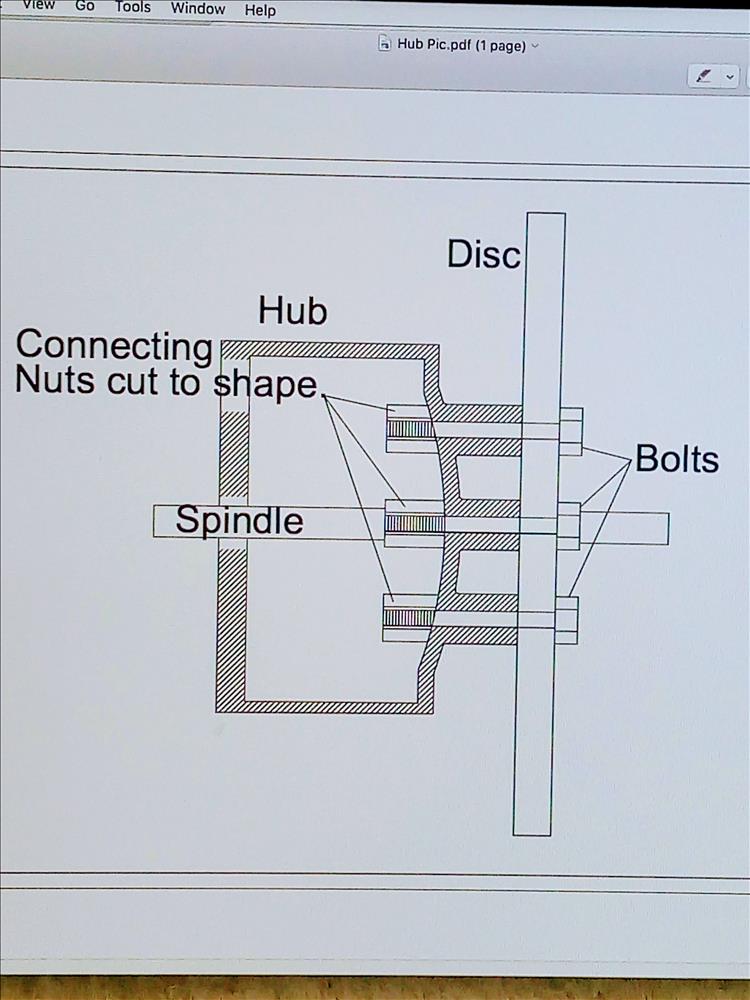 13/10/2021 15:01:53 UTC
Ian Soady¹ said :-
If there is enough meat you could have them spot faced on the back so that the nuts would seat properly - but of you don't have a milling machine that would be pricy.
You wouldn't be able to shape your nuts properly freehand and the likelihood is that they will come unscrewed. As Bob & I have said, helicoil will do the job fine. Screwfix sell kits for £30 - £40. They're easy enough to fit but you do need to take care to get the bore perpendicular to the face.
13/10/2021 15:57:24 UTC
Glyn said :-
I worry too much and over-think everything. The Helicoil kit arrived and less than an hour later I had 2 new helicoils fitted and the Disc in place plus torqued up fully with absolutely no problem whatsoever. 19 Nm torque is not that high really and Locktite on threads makes the job a goodun. I was super careful drilling the holes and used lots of lubrication when cutting the threads.
Thanks for all the advice gentlemen.
13/10/2021 18:58:01 UTC
Ren - The Ed¹ said :-
I know what you mean regarding overthinking, it is a bind. BUT! Better to overthink things and tread carefully rather than rush thing and make a mess - of the wheel or even worse yourself. It's fine to rush with non-safety things like a seat cover or trim panel but not brakes. Glad you have a resolution and long live the Divvy.
Onto the next job now - what will that be, the carb heaters?
13/10/2021 20:01:36 UTC
Glyn said :-
I'm not sure what to do with the carb heaters as I can't get any right now. I don't even know if they will operate in our mild temps. Next job will be front forks, wheel and brake. I'm still waiting for the silencers to arrive from Italy so can't start the engine to set the carbs up yet.
13/10/2021 21:45:48 UTC
Glyn said :-
Finally all finished at the back end. Bleeding the brake was tortuous and took forever. The brake disc job went over budget, not only the price of the new disc itself but high tensile button head bolts, locktite (old one was solid), Helicoil kit and cylinder kit. I'm not a big user of the rear brake either but best it's there when needed. I managed to steer clear of the wavy disc in favour of the UK standard item. I'm not entirely sure why because I like the asthetics of the wavy item but am a little wary of the Eastern origin. They start out at 5mm and should be replaced when they get to 4.5mm unlike the disc I bought that should be replaced at 4mm.
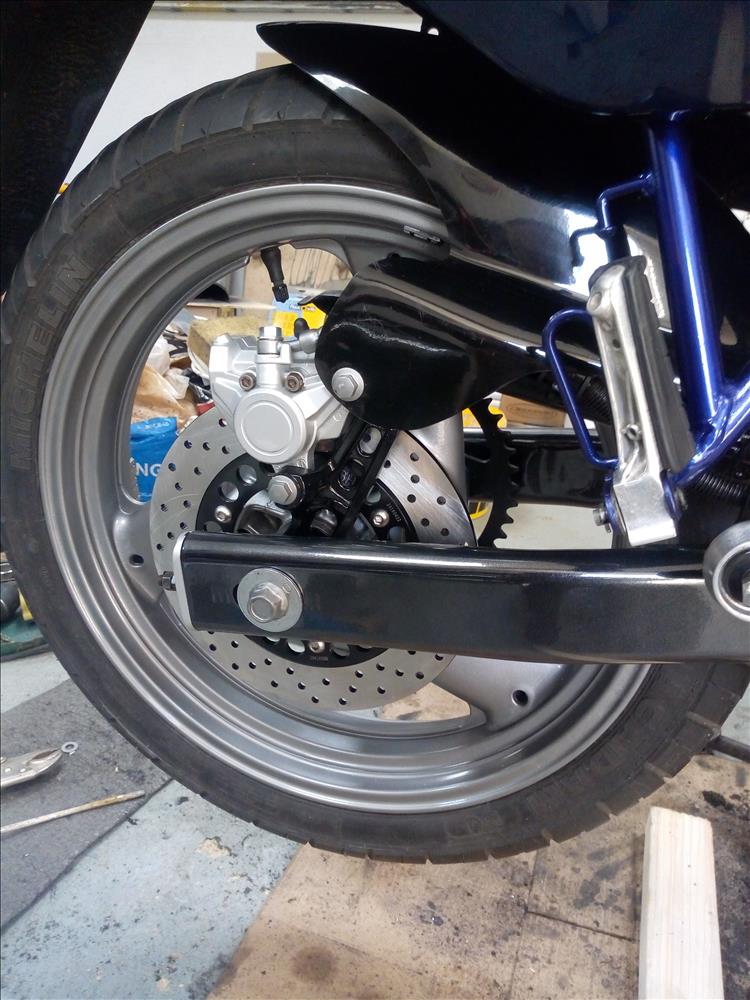 15/10/2021 12:32:59 UTC
Upt'North ¹ said :-
Nice looking work Glyn, I find brakes almost bleed themselves or they're the job from hell with no middle ground. I suppose the new fangled vacuum thingymabobs would make life easier. But where's the fun in that. Is that the piece of wood you were threatening it with.
Upt'North.
17/10/2021 18:45:06 UTC
Glyn said :-
I hadn't thought about thrashing it with a piece of 3 by 2 Upt but might have been an idea. I have the front caliper in parts on the bench now and have been warned that bleeding that will be even worse than the rear. There seems to be some tell tale oil deposits around the front forks so I'm building up to attempting to replace the seals and covers.
18/10/2021 07:51:53 UTC
Ren - The Ed¹ said :-
Bloomin craftsmen. With their fancy paintwork, proper repairs, actual measurements, eye for detail and patient diligence. Gives real bodgers like me a bad name I tell ya.
Like Upt' said, the front will either bleed itself just by adding brake fluid or fight you tooth and nail. Enjoy!
18/10/2021 08:51:05 UTC
Bill said :-
Glyn, for bleeding try pushing the fluid from the caliper to the resevoir using a syringe and tube attached to the bleed nipple.
The difficulty is a combination of small mastercylinder displacement and the caliper is lower than the master and air travel up easier than down.
18/10/2021 21:21:10 UTC
Ian Soady¹ said :-
The hardest I've come across was the linked system on the Guzzi V50 (and other Guzzis of a similar age). Absolute nightmare. I eventually managed using a cheap vacuum pump from ebay to pull the fluid through. Like the link although I think mine was cheaper.
https://www.ebay.co.uk/itm/313717223929?hash=item490b00f1f9:g:pXsAAOSwuIJhKIXY...
19/10/2021 12:23:56 UTC
Glyn said :-
I didn't think that price was that bad Ian, I was expecting more when I clicked on the link. Having done 50% of the job (rear calliper), I'll try the old method first and then go from there. I have the front Calliper all rebuilt now but can't refit it because I have the forks out replacing the seals, shims and covers. I had to make a tool to stop the the damper rod turning inside the lower assembly whilst trying to remove the bottom bolt and have managed one side so far. Considering theres only 375mL of oil in each leg its odd that I seem to have about 2 litres all over the garage floor and thats after I emptied the majority of it into the oil bucket that I have for such things.
626034...
23/10/2021 08:40:03 UTC
Ian Soady¹ said :-
I'm almost as much of a cheapskate as Ren.... The trouble is buying a tool for one job then never using it again. If you're anywhere near Redditch you're welcome to borrow mine. It is a bit flimsy but did the job.
23/10/2021 11:28:31 UTC
Glyn said :-
That's a nice offer Ian thank you. However, it does appear that you are a round trip of 300 miles from me down here in Hampshire and so, like you and Ren on the price conscious thing, I'm thinking £15 on the brake tool might be more cost effective than the price of the 35 litres of fuel in the car. It's only Ren that could travel 300 miles for less than £15.
23/10/2021 13:23:57 UTC
Ren - The Ed¹ said :-
300 miles for £15? Normally I expect 300 miles from the 125's tank and that's about £13-£15 at the moment. But that doesn't take into account the general wear and tear and running costs of the vehicle. At 94,000 miles I'd also need to include half a litre of oil into my consideration.
I'd suggest sucking really really hard on the bleed nipple. Don't try this in public or when your partner is watching. Don't ask me how I know.
24/10/2021 08:02:59 UTC
ROD¹ said :-
The linked brakes and servo on the BM are also a challenge.
I have had good results with a length of clear plastic pipe and an old ink cartridge refill syringe.
The same principal as Ren sucking the nipple!
I can't believe I just typed that...
24/10/2021 11:51:41 UTC
Glyn said :-
It's front fork refurbishment time. The damper rods can be a pig to remove but there's plenty of advice on the web. When removing the retaining bolt the damper itself just spins inside the lower fork arm so I made the pictured tool to restrain it. Simply a 24 mm bolt attached to a rod that drops down to engage in the top of the damper. There's a very little amount of force required, just enough to overcome the locktite on the bolt. It all came apart and was cleaned up. However, when I came to fit the new seals and covers, I had received the 41mm tube items instead of the 38mm used on my pre 2002 Divi. Now I have to wait to sort it out. It could be me ordering the wrong parts but I bought them from a well known supplier and I had to put the details of my bike in, I wouldn't have thought I'd get that wrong, would I?
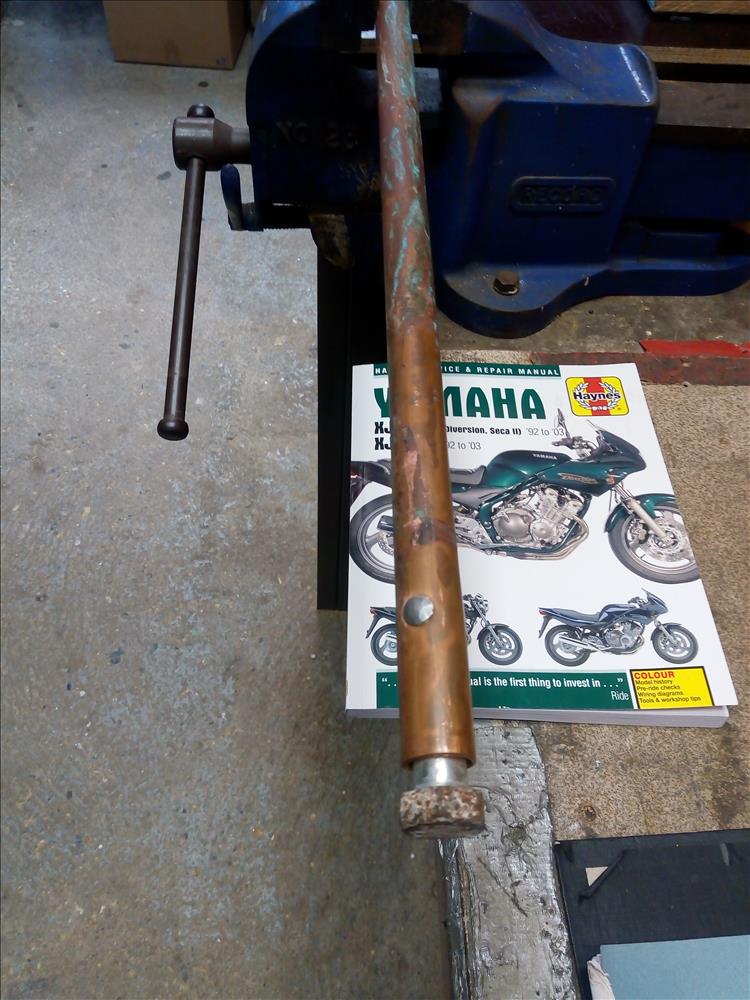 25/10/2021 12:18:27 UTC
Glyn said :-
The front forks are finally complete with new parts and oil. It wasn't quite as simple as the 3 spanners in the Haynes manual would suggest. The 3 spanners symbol (next to the task) would suggest 2 x O levels and a decent tool kit should suffice for this particular job. Perhaps when Mr Haynes takes delivery of a brand new bike from the dealer's, it doesn't have years of rust, water ingress and moulded together metal to prevent disassembly and reassembly the like of which I seem to experience. Next task is the ripped seat, does anyone have any experience of the multiple replacement covers available on the net and are they any good?
29/10/2021 11:46:03 UTC
Ian Soady¹ said :-
Not as such but if you want a good job doing R K Leighton is the place.
https://www.rk-leighton.co.uk/...
29/10/2021 14:36:38 UTC
Upt'North ¹ said :-
No experience of them, but they look OK.
Upt'North.
https://www.motorcycleseatcovers.co.uk/blank-l62lg/yamaha-xj600-diversion-seat-c...
29/10/2021 15:17:44 UTC
Glyn said :-
Thank you Gentlemen. I was aware of the JP Upholstery in Pagham, Sussex Upt as Ive seen various adverts of theirs. Using your link, I found that they do a more expensive item ( I was concerned that after all the expense, it might be obvious that I'd fitted a low price seat cover). The slightly upmarket cover is only a few pounds more expensive but has a textured area for the rider and is generally more pleasing to the eye. I duly placed the order and await the next chapter of upholstery fitting, a new skill yet to be learned. From my experience in the house building industry, I already have the heavy duty stapler and from her experience of being female, my good lady already has the hairdryer and so there will be no new tools required. I took a look at the RK Leighton site Ian, I started to worry that such a quality piece of work would cost hundreds and , as I've already surpassed the actual value of the bike in parts alone, I thought I needed to reel in a little. lets hope I don't regret that decision.
30/10/2021 10:05:49 UTC
Upt'North ¹ said :-
I can definitely see why you're going the way you are Glyn, but I'm glad I won't be the one trying to do it. I spose the interweb thingymabob is full of tutorials.
My own seat was done in South Shields at........Saddle Craft (?)........and it wasn't cheap, although for a couple of hundred squid or thereabouts the very nice job included two hand crafted gel pads. Which will hopefully pay benefits if we ever get to tour again.
Good luck with ya seat me o'd mucka.
Upt'North.
30/10/2021 13:29:42 UTC
Ian Soady¹ said :-
I've recovered a couple of seats although the results were functional rather than elegant. This was a grey import Honda 400 4:
I added some foam to raise the seat then carved it using an electric carving knife and used 2-way stretch vinyl to cover it.
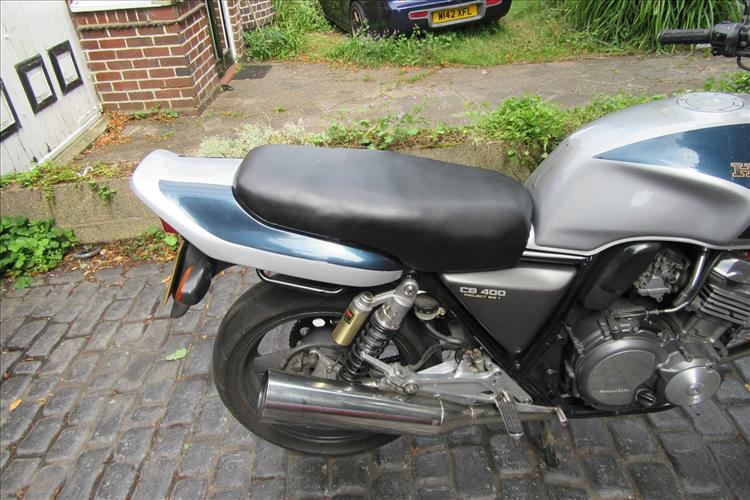 30/10/2021 14:21:01 UTC
Ian Soady¹ said :-
Original seat:
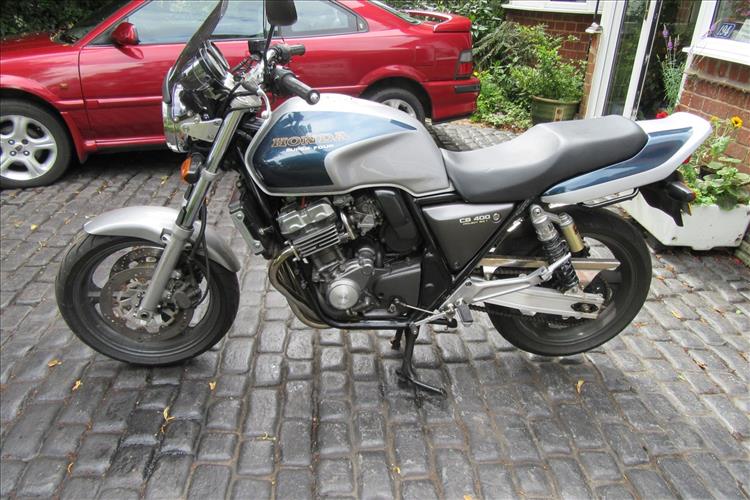 30/10/2021 14:20:17 UTC
Glyn said :-
Looks like you gained a couple of inches of padding there Ian. I can't afford that as my leg length is severely challenged. My Diversion seat is a very similar shape to the original Honda item in the picture with that sharp rise up to the tank. I think this will complicate the cover fitting as the vinyl will want to bridge the gap. Theres some interesting metalwork in those pictures, I always had a keen interest in the Honda fours and still admire them. Struggling to identify the two cars though, I'd guess Ford Escort for the red car but the wheels don't look right. The other blue ones got me beaten.
31/10/2021 10:11:09 UTC
Ian Soady¹ said :-
Yes, as I'm tall I found the little Honda just too cramped so that's why I modded the seat.
Escort - how dare you? It's the lovely Rover Tomcat coupé. My wife's car till I got fed up fixing it. She now has a Hyundai coupé which I have to admit is a better daily driver but not as pretty.
The other one is the next door neighbour's hot 90s Japanese motor but I have no idea what it is.
31/10/2021 12:07:32 UTC
Ren - The Ed¹ said :-
CB400 Super Four - be still my aching heart. Why don't they make bikes like that any more? They probably do but we don't gerrem 'ere in Blighty. That low seat might have been a guddun fer the Executive Hobbitses.
31/10/2021 20:57:24 UTC
Borsuk said :-
I bought my Interceptor framed diesel Motos in Shi0ley and he arranged for my seat to be reduced in thickness. It was done by a local company who's name I can't remember. Final price was free as Eddy forgot to ask them and he threw it in as a freebie when I picked the bike up.
I had my quad bike seat recovered in Spain. I supplied the material, 28 quid from Ebay and he charged a tenner for the work.
01/11/2021 09:18:07 UTC
Borsuk said :-
How in all that is holy does "From Eddy's" get changed to "framed diesel"
01/11/2021 09:20:44 UTC
Ren - The Ed¹ said :-
Auto Complete Borsuk. It's a curse doncha know.
01/11/2021 11:34:57 UTC
nab301 said :-
"It's the lovely Rover Tomcat coupé." , of the Tomcat race series ? although I guess it wasn't a Turbo....
The other reg plate seems to suggest a Nissan of some sort..
Nigel
01/11/2021 20:50:41 UTC
Ian Soady¹ said :-
No, not a turbo but a 1.8VVC K series. On its second engine due not to head gasket but disintegrating timing belt tensioner. I knew I should have investigated that squeal......
02/11/2021 14:24:25 UTC
Glyn said :-
Well I can't recommend that job as an easy fix but I finally managed to get the new seat cover fitted. Even though my stapler is a metal, above average unit, it's almost impossible to get any of the side staples in the correct place as they sit in a trough that I couldn't get the jaws into. Hence, there's more staples in the bin than there are in the seat. Sadly, still waiting for the silencers to arrive from Italy, otherwise I think the renovation is complete. So there you have it, total cost £1200, total value probably less.
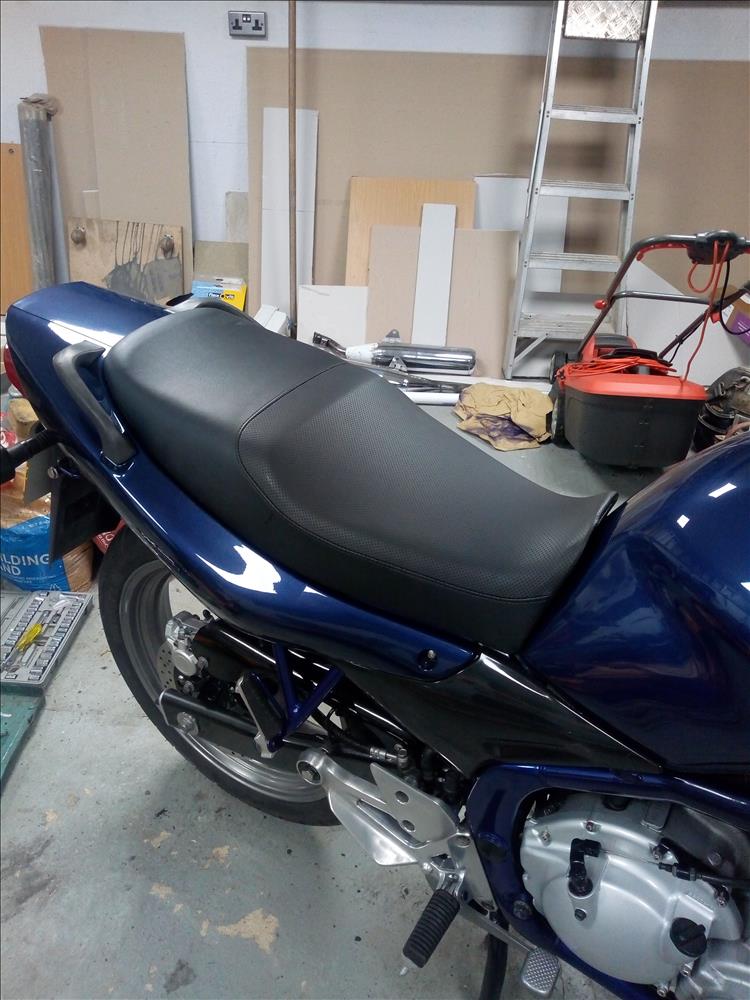 04/11/2021 18:03:33 UTC
Upt'North ¹ said :-
Glyn, 10 out of 10 for the seat job. She's lookin good.
Upt'North.
04/11/2021 19:04:00 UTC
Jim said :-
That seat looks very professional, Glyn, excellent job. You’ve inspired me to tackle my Bandit’s seat cover.
04/11/2021 19:05:02 UTC
Ren - The Ed¹ said :-
Right then folks, if you need your seat recovering it's obvious to that Glyn is our best option. It looks spot on from here Glyn. You have rather a nak for this restoration thing.
05/11/2021 07:01:57 UTC
Glyn said :-
Jim, heres a link one of the You Tube videos that I watched before tackling the job, Its on a bandit too, some useful tips in there because my foam had broken up at the front as well.
https://www.youtube.com/watch?v=5m2Xzc6Hdfg
Plus, Upt North kindly posted this link below and I can confirm they're a good bunch to deal with, hopefully they may do a bandit cover as well. Look carefully at their site because for a few extra pounds they do a better looking cover than their standard. I think mine cost me £28 plus a bit of postage;
https://www.motorcycleseatcovers.co.uk/blank-l62lg/yamaha-xj600-diversion-seat-cover-1992-to-2004
Cant wait to get the new silencers Ren cos I think this bike might just be a keeper due to its low £s value. You said a few months ago that I'd got myself a "mint Divvy". Underneath it all, it wasn't really very "mint", but its little closer now.
However, keeper or not, we're off to the Shepton Mallet bike / auto jumble tomorrow so who knows what I'll come home with. I'm a bit partial to a Fazer at the moment.
05/11/2021 10:59:22 UTC
Ian Soady¹ said :-
Vey nice. When I did the Honda seat I had to buy an electric stapler which is not as powerful as an air one but still miles ahead of the manual version. It has come in handy for a few other jobs as well.
05/11/2021 12:05:24 UTC
Gyn said :-
Ed, if If I do have a gap between projects, how about sending down your CBF125 for a little "10 years younger" make over? Two stroker brother (from the Pile of Wight), sorry spelt a word in there incorrectly, claims that not only was I able to "polish a turd" in the case of the Yam but also able to "paint glitter on it" as well. If there was any offence meant, there was none taken, I'm too old to care. I just need to perfect a system whereby the bikes are worth the same or perhaps more AFTER I've been over them to have the last laugh.
So a new project, any suggestions? How about a trike?
05/11/2021 12:39:05 UTC
Bogger said :-
Forget it Glyn. The poor thing (the bike that is) would collapse from shock from some/any TLC. It'd never run again.
In fact Ren the Ed would also collapse from shock. As you know he prides himself on his 'rat bike/biker image'. Nah forget it. the ensuing carnage would not be pretty.
Bogger
06/11/2021 14:09:19 UTC
Borsuk. said :-
I seriously think that after the cleaning and polishing was over there would be no bike left as most of the material holding it together is the grunge and muck that stops the frame totally dissolving.
07/11/2021 00:51:37 UTC
Upt'North ¹ said :-
There's an awful lot of disrespectful behaviour towards our Ed.
Keep it up, I like it. A lot.
Upt'North.
07/11/2021 10:12:02 UTC
Ren - The Ed¹ said :-
I've been insulted in far better blogs than this!!
Oh wait. Dagnammit.
Thank you for you kind offer Glyn. However I suspect the rude reprobates commenting afterwards do rather have a point. Even a man with your skillset may struggle with my long suffering 125. What you would end up with would be akin to Trigger's Broom save for perhaps the numberplate, and your wallet wouldn't survive the bashing.
As for you next project? I'm thinking CG125? Why? Because there's a lot of cheap Chinese aftermarket parts for such a machine (barrels, pistons, heads etc) and I'd be interested in your experience with such items.
07/11/2021 11:25:54 UTC
Glyn said :-
I took a look at the CG125"s Ed. Thats going to need some proper investigation. I saw bikes for sale from 1977 to 2007 so they've been in production for at least 30 years. Prices are all over the place but many have been written off and repaired. So, its a regular minefield looking for a suitable machine and which period of manufacture produced the better bike, Google is going to take a bashing in such a quest. Super looking little bike though.
08/11/2021 06:29:42 UTC
Ren - The Ed¹ said :-
It's merely a suggestion Glyn so please do tread carefully and don't feel obliged. I know you do this for the love but I'm also aware you don't have a bottomless wallet - and the CG125 is, as yet, not a high value machine. It's lack of value is due to it being as common as muck at one time so spares are indeed available.
I note that C90s are becoming "valuable" these days...
08/11/2021 09:18:25 UTC
Glyn said :-
Ahh the little Honda Cub, I spent a few hours on one of those when I were a lad. Have you seen the enduro Plop racing on You Tube, brilliant fun. Don't start worrying about influencing me Ed, it's not that easy to get me to part with the hard earned, I'll be doing the usual hours of research before entering into anything. I do appreciate the well meant suggestions. Good news came today that the 2 silencers have been despatched from Italy so the countdown to the UK customs farce is on.
09/11/2021 10:24:35 UTC
Ren - The Ed¹ said :-
Aaaah yes, remember when ordering stuff from Europe was no more complex than ordering from the local takeaway? Eeee them's wur't days. Do let me know how you get on.
I'm just learning about Plop Enduro on YouTube. Looks like far too much fun for a misery guts like myself. Also them Cubs would be far too fast for me. I'm gunna create the "Tight Enduro" where you see how far you can get on a gallon of regular petrol - I'm sure there's already something like that.
09/11/2021 14:43:57 UTC
Ian Soady¹ said :-
Of course there is. If you'll excuse the irony of a petrol company sponsoring an event to promote using less of the stuff. Greenwashing or what?
It doesn't seem to have happened for the last couple of years.
https://en.wikipedia.org/wiki/Shell_Eco-marathon...
09/11/2021 16:35:41 UTC
Ren - The Ed¹ said :-
Thanks Ian, yes I now recall the Shell Eco thingy. I think the traditional oil companies will be forced to "move on" from drilling holes in the ground and sucking out black stuff sooner or later. I'da thunk if they had any nous about them NOW (or 20 years ago) would have been the time to be thinking about how they're going to make money if/when the world reduces oil consumption.
10/11/2021 08:52:46 UTC
Glyn said :-
The Yamaha is finally finished. The new Italian silencers (made by Marvin) are not the best quality steel, welding or chroming which makes it even more authentic as per Japanese bikes from the 90's. Just need to ride it a little for identifying the snags, get it to the MOT station and then lay it up until warmer days arrive. I bought it a couple of small gifts, A full dust cover and a trickle charger.
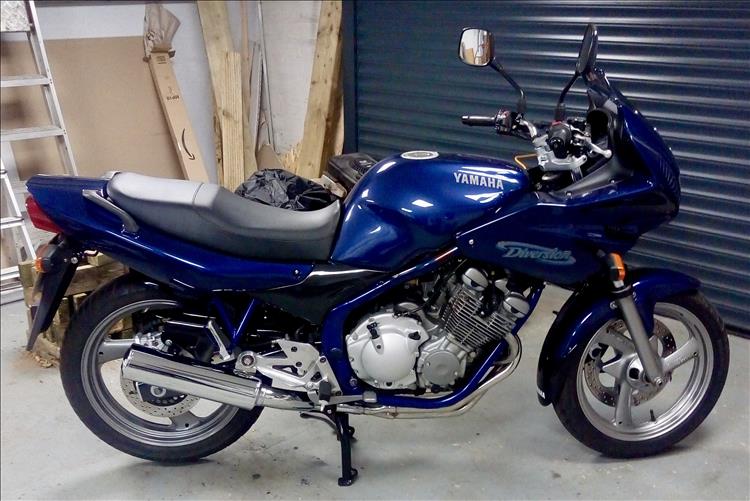 23/11/2021 20:18:32 UTC
Upt'North ¹ said :-
Well done Glyn, and I do mean that.
It looks out of the box fresh.
Upt'North.
24/11/2021 09:25:47 UTC
Ren - The Ed¹ said :-
Cor blimey! Like Upt' says it looks brand spanking new. Now Glyn, what's the long term plan? Ride it for a short while then sell it on to make space for the next project?
24/11/2021 13:32:38 UTC
Upt'North ¹ said :-
I forgot to say Glyn......get that garage tidied out. Standards, standards.
Upt'North.
24/11/2021 15:33:52 UTC
Glyn said :-
I'm just not certain where to go from here. I do intend to put some miles on it before even considering parting with it. The problem is I don't find working in a cold garage that inviting at the moment, I almost go into hibernation mode at this time of the year preferring to be a Couch slouch by the wood burner. The offcuts of timber in the rear of the photo will probably find their way into the log fire in the next few weeks.
24/11/2021 17:09:57 UTC
Ross said :-
Good job, Glyn, she looks 'mint'. If it rides as well as it looks you should enjoy it!
25/11/2021 10:39:07 UTC
nab301 said :-
Looks great Glyn, hopefully it rides as well as it looks.
Nigel
27/11/2021 20:50:56 UTC
Bob said :-
Looks very clean - well done.
Keep away from that E10 petrol, especially if you are planning on laying it up for a bit.
I've used Alkylate fuel in bikes that are standing, it's pure petrol with no ethanol or other muck and it doesn't go off like pump fuel. I think the shelf life is 4 years or so.
Aspen and Husqvarna do it, it's available from lawnmower shops - the downside is it's £20 for 4 litres (mind you at the rate we're going unleaded will be that price before long).
29/11/2021 20:41:28 UTC
Glyn said :-
Project number three has just arrived. I can hear the groan from Upt and the loud sigh from the Ed. I admit they will not find this one very cool. The requirement is mainly cosmetic as it runs and rides as it should but is suffering from a lot of surface rust. Shed find and acquired for £1k
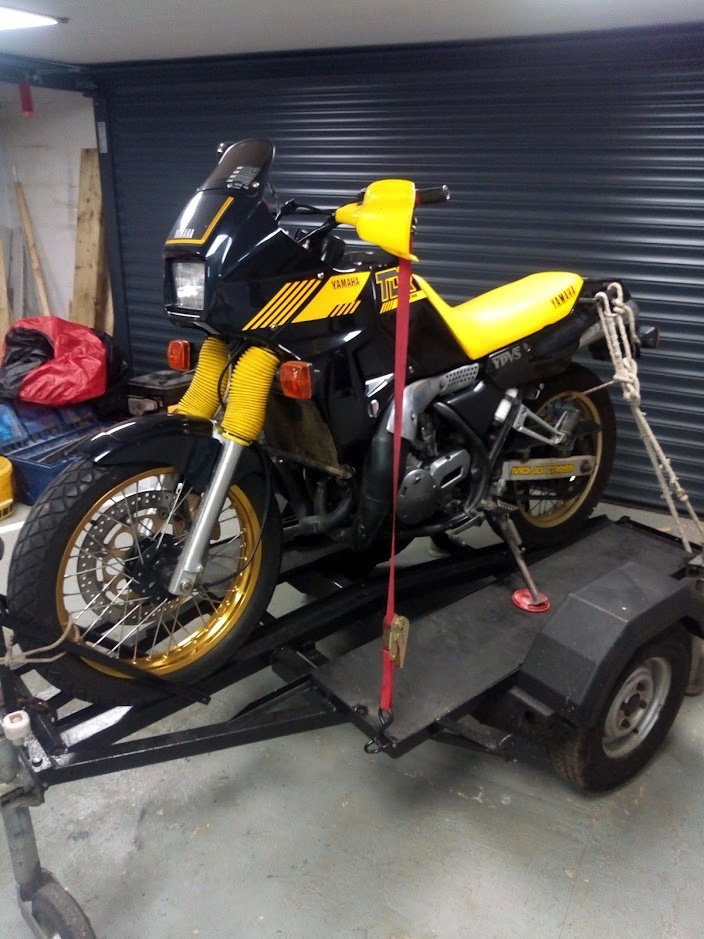 07/12/2021 06:28:23 UTC
Ian Soady¹ said :-
Could be a very nice project. It'll keep you busy for a week or three. I like the trailer with the side footboards - when I used one for my trials Bullet I was always scared of the whole lot capsizing on me.
07/12/2021 10:23:18 UTC
Ren - The Ed¹ said :-
The TDR (and TDM) were early forerunners of the whole adventure bike concept - not fully offroad crossers but with some off road potential. As such I like the lightweight road/offroad style of the TDR. It's just that goddam blasted ridiculous noisy smelly horrible nasty evil gas-guzzling ring-a-dinging hit-n-miss awful 2 stroke engine. I'm guessing you know it's the same motor as the RD LC's?
Now if you want a real project that bee-coloured 2 stroke monstrosity could be made absolutely fabulous with the delicate installation of a... hmmm... let me see... Mid 90's CB500 Twin engine. Similar period but far more reliable, economical and it makes a noise that normal human beings can enjoy.
07/12/2021 10:34:35 UTC
Upt'North ¹ said :-
Au Contraire mon ami.
Looks a peach and must be a good money spinning project.
But yes it will be smelly, but in a good way.
Upt'North.
07/12/2021 11:12:26 UTC
Glyn said :-
Sadly Ian, the trailer came with the bike and is always in my way. So probably will have to put it outside the garage where it will probably return to its natural iron ore metallic state in a matter of weeks.
The only thing I would say Upt is that the style is growing on me but the fork gaiters are not original (except for the colour) and the "Nora Batty" stocking look is not to my liking. New correct pair are priced at £70+. This is why the wrong ones are fitted I would presume.
True Ed, I can't run this thing with the garage door closed thats for sure. I wish I was the one that paid £1k for it as I've seen them for as much as £6995 on the used market. This one is a 1990 and has the infamous Power valve system. The owner has seen the work I did on the CBF and the Divvy and convinced me to do similar with this bike but cosmetics only. This has given me quite a dilemma because, with the potential value of this bike, if I tear it apart and respray the tanks and fairing etc, then it might reduce the value as there are enthusiastic people who are desperate for originality preferring to see every scratch and dent. Unfortunately, the owner wishes to leave these decisions to me and simply pay for the bits I need. It might be simple if all parts were available but they're not. As it is all legal, taxed, MOTed etc I have been told that I have free rein to take it for a ride around the local roads. That's quite a tempting offer but the state of the weather out there at the moment would certainly discourage such behaviour. I'm going to have to give this a little more thinking before picking up any spanners.
I took the Divvy out for a first little jaunt last week and have to say I really liked it. The only fault I could find was a non operational speedometer. Now I shall wait for a dry weather forecast and arrange the MOT.
07/12/2021 18:04:10 UTC
Upt'North ¹ said :-
https://www.wemoto.com/bikes/yamaha/tdr_250/88/picture/fork_gaiters_yellow...
07/12/2021 21:26:10 UTC
Glyn said :-
Thanks Upt. I think that's my problem, go genuine or use copy parts and what would be the implication of using the latter rather than the former on a more valuable machine? If it was mine it wouldn't be an issue because I haven't had huge problems with copy parts but do agree that some have not been very good.
07/12/2021 22:36:12 UTC
Ren - The Ed¹ said :-
Oh my word, what a quandary! While presently the notion of hacking bits off an air/oil cooled Bandit 600 and creating a cafe racer or bobber or whatever your fancy is, then fine. But in 40 years time your hacked and chopped Bandit will be worth a lot less than an entirely original model even if the paint is faded and the forks corroded.
This TDR, belonging to someone else, all you can do really is advise your friend (customer?). Ultimately it's their bike and their choice.
08/12/2021 13:56:24 UTC
nab301 said :-
Lovely ! It's a bike I've always lusted after but never managed to purchase before prices went north, it seems mad that it could be purchased for 1k...
Nigel
08/12/2021 19:53:02 UTC
Glyn said :-
It looks good in the picture but there's some large nasty rust spots on the Tank and frame. Front and rear mudguards are split as are the front and side fairings. There are several faded areas of paint and a very rusty swingarm. Several models had alloy swingarms but not this one. I think paying just £1k for this bike is one of those rare events that lucky others seem to get. The parts bill is not in yet though! I do like Ed's idea of a 500 twin engine transplant but the owner doesn't.
09/12/2021 10:43:35 UTC
Glyn said :-
Although project no 3 is still in progress, it seems I have a Luke warm offer of a 1999 Suzuki 1200 Bandit (in running order) for £1k ish. Now, the only thing I know about these wild beasts is that Ian has a bandit of some description so am asking advice on whether it's a money pit and, if not, what to look out for. There's not much detailed information on the bike right now as I have to register an interest first.
20/12/2021 09:32:58 UTC
Ren - The Ed¹ said :-
Good strong motor in both the 6 and 12 bandits. Common as muck so parts should be available. The exhaust was stainless EXCEPT for the 4 into 1 collector that always rusted away. I'd be wondering why it's ONLY a grand though.
20/12/2021 14:29:44 UTC
Jim said :-
I've got a GSX1250, essentially a Bandit, and the motor is still very sweet after 50,000 miles. Obviously you won't know till you get to see it, but pretty much everything is available fairly cheap, and there's a massive online community so you'll never be stuck.
20/12/2021 19:15:38 UTC
nab301 said :-
As above until you see it you won't know . I bought a mint low mileage '04 600 bandit a few years ago ( now moved on) and it was probably one of the best bikes I ever had.. Even so the collector rotted but I got it repaired locally.
What you don't really want is 8 header screws rotted in the head . ( mine were all easily removed)
The 1200 is more of a hooligan / wheelie bike so may have suffered in all departments and apparently the wiring can rot badly if the bike lives outside.
Nigel
20/12/2021 19:32:29 UTC
Glyn said :-
Thank you for the information Gents. There's a good chance I will not get the opportunity now as the guy that was going to put me onto it has decided to buy it himself so it must have been in reasonable order when he got to see it today. As you've said, there's a few of them around so I'll keep a look out and see what turns up. I was a little concerned about it being such a beast and thought the smaller engined options might actually suit me better.
20/12/2021 20:53:45 UTC
KiwiJeff said :-
Hi Glyn I have run a 2004 GSF600N Bandit for the last year and I'm very happy with it. They are basic machines with 4 carbs and CDI and screw and locknut tappets so easy to work on. The Haynes manual and plentiful on-line help videos make any work required straightforward and no need to go to dealers. They have plenty of grunt to frighten yourself with if you are in the mood but also happy to potter on backroads, even handle gravel roads (carefully). Good big seat for the pillion and power to handle the extra weight. Mine had a screen on it with airflow that battered me on the helmet so removed it, but still looking for a suitable screen to make 60 mph cruising more comfortable. NZ bikes are in better nick than UK bikes because we don't use salt in the winter so mine quite tidy. Ren doesn't rate Bandits so buy one to annoy him! Merry Xmas to all its 28 degrees celsius here today too hot to use the bike and we are about to be descended on by family and grandkids etc if Omicron doesnt escape from our quarantine hotels in the next 24 hours!
23/12/2021 00:40:59 UTC
Ren - The Ed¹ said :-
KiwiJeff said "Ren doesn't rate Bandits so buy one to annoy him!"
True, true. I know a million 600 Bandit owners can't be wrong but the one I rode was as inspiring as drinking tap water - you know it's perfectly fine but you wouldn't choose it over a nice cup of tea. Still, it has enough self respect to be 4-stroke and well made.
28 degrees is too hot? By 'eck, if it were 28 degrees I might just take my jumper off.
Omicron is running wild here KiwiJeff, we are awaiting our brave and heroic leaders to work out how they're going to line their own pockets before they call the next lockdown.
23/12/2021 09:28:53 UTC
Glyn said :-
I have finally finished the TRD 250. It was quite a task but not too expensive as it was mainly labour, in fact it all came in a smidgen under £300. The tank, the swinging arm and linkage and many parts of the frame were covered in surface rust and every plastic panel was damaged in one way or another. All I need to do is get it MOT'd and back to the owner. I took it out for a run and have to say the acceleration of a small 2 stroke engine is mesmerising even if any following vehicles can't see for the smoke emmited from the pipes. Now it's time to start on the mighty ZZR1100 that's been waiting patiently in the corner of the garage for my attention.
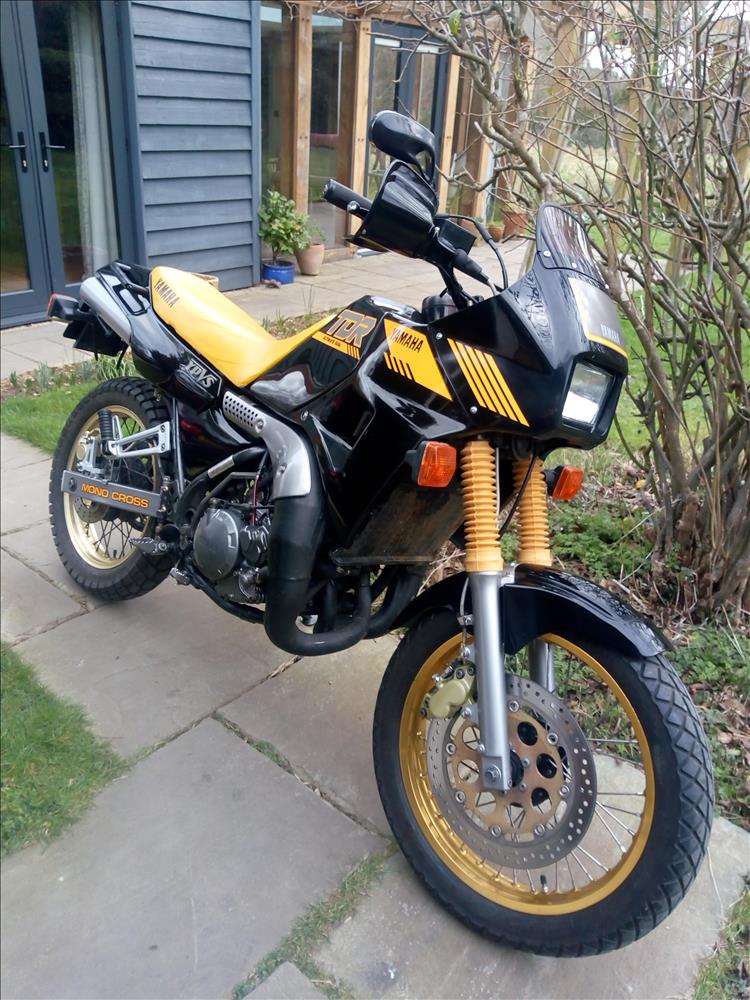 13/02/2022 20:18:07 UTC
Ren - The Ed¹ said :-
Good job as ever Glyn. You evidently have far too much time on your hands - how are you with fixing up rough-n-ready old houses belonging to random bikers in Bolton?
14/02/2022 16:05:29 UTC
Upt'North ¹ said :-
Glyn, lovely job. Could you please post a video, lots of blue smoke and noise. Ed'll love it.
Upt'North.
14/02/2022 18:18:32 UTC
nab301 said :-
Lovely !!
14/02/2022 20:38:27 UTC
nab301 said :-
Lovely !!
14/02/2022 20:38:29 UTC
nab301 said :-
Re the ZZR1100 , I was flicking through a book I found recently (The ultimate history of fast bikes) and the ZZR1100 gets a mention. There's a sidebar in the article that mentions at the 1993 launch of the revised model in Arizona three journalists were jailed for speeding!!
Nigel
20/02/2022 10:20:30 UTC
Glyn said :-
Not much chance of that for me at the moment Nab, there will be no laws broken because I'm still trying to make the thing run. Problems are carb based and I've had them off twice now and each time it get worse with not picking up, cutting out and massive backfires shooting flames out of the tail pipe. I've spent hours reading all about the trials of misbehaving Keihin Z584 set-ups and will be looking again when I return to the UK at the end of next week. I've ordered a small pile of parts including float valves and o rings which I will fit. I had the carb block off the Diversion twice before I sorted that out and, although they are Mikuni's, they are very similar in their design.
20/02/2022 11:24:01 UTC
Glyn said :-
Well the restoration of the ZZR1100 stumbles from pitfall to pitfall. After pulling the carb block twice and tearing it down to every single component, the thing still ran extremely badly. It wouldn't run without full choke and backfires when trying to increase the revs and again on the overrun. I decided to try the valve clearances which is not an easy task. After finding my way in all of the inlet valves were about 0.038mm or less when they should be 0.19mm. so clearly there's a problem there. Unfortunately, there's no tappet adjustment, the job requires shims. So far it's been a full day's work and all I've achieved is to list the new 8 shims required at £4 each and put them on order. The exhaust valves were all within tolerance. The slightly odd thing is that all the shims are the same size and are therefore the originals. The clearances should be checked every 12,000 miles and this bike has covered 48k. I would therefore summise that they've never been done. Have any of you done the shim thing on your bikes? I think the complicated procedure would put most DIYers and experts off.
03/03/2022 20:49:19 UTC
Ren - The Ed¹ said :-
The CBF250 ran like poop due to unserviced shims which then required the valve seats relapping - bear that in mind if it still runs rough even with correct tolerances. The whole sorry tale is documented on here.
Th CB500X is also shimmed. Nothing wrong with shims... If your workshop has a vast array of all sizes and thicknesses to hand... Even dealerships seldom have everything (or anything) in stock.
Your bike is 4 cylinders twin cam and if memory serves... Central cam chain? Also cam over bucket? If so that's the worst of the worst setups to shim up.
03/03/2022 23:19:02 UTC
Ren - The Ed¹ said :-
Aaah your cam chain is on the end, second worst then.
03/03/2022 23:21:33 UTC
Glyn said :-
Yes cam chain on the left. Getting the shims out without dropping them in the engine is a worry even with the use of a strong magnetic screwdriver, they also stick in the buckets making it even more tricky. I am worried about the valve seats because that's where the wear or damage could be the cause of the gaps closing and I think this has been going on for a long time. The ZZR forums suggest the gaps alter most in the first 12k miles and that was a long time ago. I'm not sure if I can get the head off with the engine in the frame, I thought getting the rocker cover off was a brave move.
04/03/2022 06:16:47 UTC
Ren - The Ed¹ said :-
Oh Glyn, my sympathies are with you sir. You have potentially 16 valves that may need lapping if not... urgh... the seats need recutting. Your skills in restoration are without question but I sense your engine skills are being tested?
Check out my considerably easier CBF250 valve job.
https://bikesandtravels.com/biker.aspx?ride=822...
04/03/2022 10:00:56 UTC
Glyn said :-
That link was very informative but also alarming. Lapping 16 valves that have not been seating correctly for 36k miles could take longer than I've got left on this planet. Maybe the recutting of the seats could be a bonus here. However, getting the head off, cams out and valves removed together with obtaining more shims is leaving me a little cold temporarily. Great post on the CBF 250 Ed.
04/03/2022 15:40:55 UTC
Ian Soady¹ said :-
I think I'd be tempted to look for another head. A few on ebay for around £100 - £150? Although you'll probably double that for gaskets etc.
04/03/2022 16:14:49 UTC
nab301 said :-
With my race car Imp I used to use wet and dry paper to adjust the shims , never had a problem although it only revved to 9k rpm, a quick google found someone who did the same on their ZZR using 800grade wet and dry (wet) rigged up I'm not sure how) to a table saw... the details of what I used are a bit hazy now after nearly 40 years but the first time,I rubbed the offending items manually on abrasive paper. I'm sure you can figure out some method of spinning them against abrasive , put it back together and see how it runs after a few hundred miles! I'll bet it'll be fine. Failing that use a cheap borescope to at least look down the inlet manifolds and see what condition the valves/ seats are in ?
I've pulled heads off perfectly running 8 valve fiats in the past only to discover that they must have in the distant past broken a cambelt and bent valves... But the valves hadn't been replaced.
Nigel
04/03/2022 20:35:20 UTC
ROD¹ said :-
Nigel, I have done the same on my z1000 back in the late 70s, early 80s.
In my experience you usually need a thinner shim, so rather than spend money I would grind the old shim down to the required size.
I also found that loosening the camshafts helped with removing the shims without special tools.
04/03/2022 20:57:24 UTC
Glyn said :-
Another sliver of light came into my life today when the TDR passed the MOT after a lovely 12 mile sunny trip into Ringwood. Similar sunny trip home with the Pass sheet tucked in my pocket. I have to say my hands were painfully cold after both trips. As soon as I put the bike back into the garage, the rain started. It's lovely to be on the other side of luck sometimes Ed.
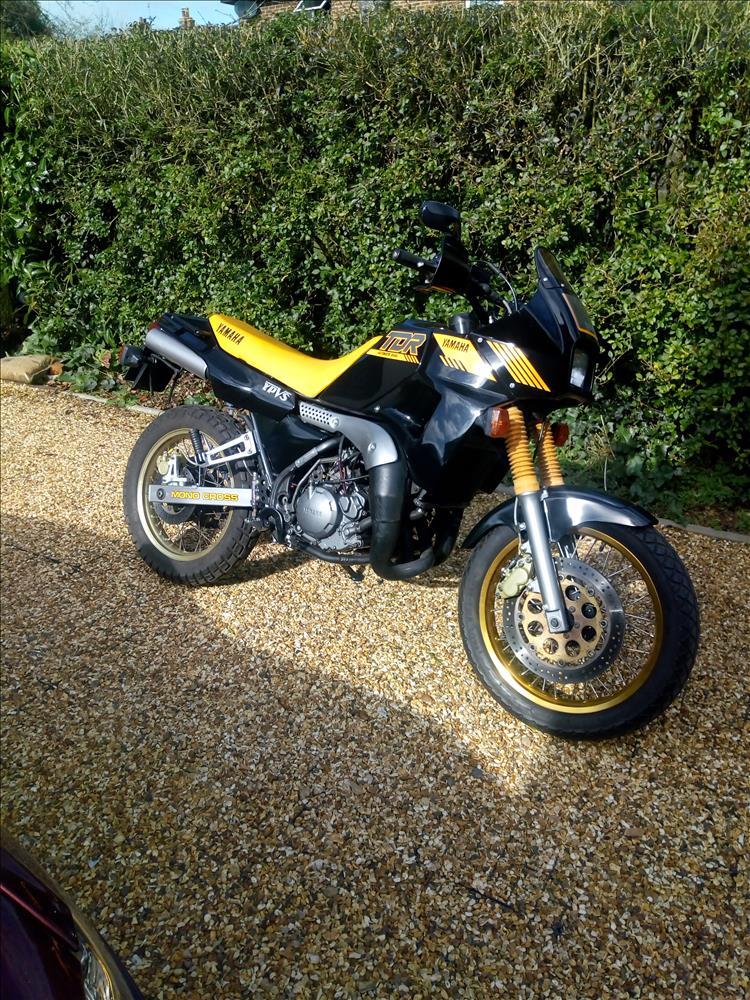 05/03/2022 16:48:08 UTC
Glyn said :-
Interesting comments on the ZZR valve shims gentlemen. I did previously read about the guy with the 800 wet and dry and gave it a go after making a holder for the shim then placing the w&d on a glass pane. After 15-20 mins of rubbing, the face only became polished without any discernable change in thickness according to my micrometer. I decided that new shims are the way to go. If it still runs rough, then I'll pull the head. Is there such a thing as a cheap borescope,I must admit I haven't looked? When I broke a cambelt on my XR3 25 years ago, it made such a horrible mess, there was no way that would run again. Ed is right, I'm probably more at home with the shiny bits but I have been inside a few engines over the years. I have to admit to being more confident with a 1095cc BMC A series than a Kawasaki 1100.
05/03/2022 17:03:39 UTC
nab301 said :-
Glyn , on the wet and dry , I can't remember what grit I used but I tried many and found one that was in the sweet spot, just as well because it was 10pm on a Saturday night and I had a rough running race car I was racing the next day, so no pressure !
I've never used one but you can get cheap borescopes/ endoscopes that run through a smart phone.
Nigel
05/03/2022 20:56:30 UTC
Ren - The Ed¹ said :-
Glyn - Totally off subject but - Ringwood? You're in the New Forest area? Sharon and I are heading there in May and I'd welcome any suggestions regarding the area. We're prolly there for a couple of days, be nice to have a heads up. Drop it in the general chit-chat page if you have any ideas.
My only, paranoid, overly cautious note regarding rubbing/grinding shims down is they are hardened. What I don't know is if they are merely surface hardened and if so, would it be possible to rub right through the hardening?
07/03/2022 11:26:13 UTC
Glyn said :-
Woo Hoo the mighty ZZR is alive. It took almost 2 days to do the valve clearance shims. If I thought getting them out was difficult, I hadn't imagined the pain of fitting the new ones. They have a diameter of 9.5mm and a thickness of 2.2mm and my fingers are like blind cobblers thumbs. I spent hours searching the nooks and crannies of the rockers for the little blighters that had escaped when I thought I'd got them in place. I was convinced for a while that one had gone down the cam chain space and thought about breaking the bike to sell as parts. However, when completed and started, it ran beautifully (not sweetly more sort of raspy) no backfires or slow pick up. The throttle response is incredible. Preparing for a test ride when I get all the fairing back together. The learning point is; valve clearance is a lot more important than I ever thought it was.
09/03/2022 19:42:44 UTC
Ren - The Ed¹ said :-
9.5mm!!! Thems ain't shims thems is DINNER PLATES!. The CBF250 and CB500X takes 7.48mm diameter shims, 9.5s are HUGE. Pfffft. For future reference when doing shims get a clean rag and ram it hard down the cam chain tunnel. It may still be fiddly to recover fudgy fingered shims but a lot easier than an engine out bottom end rebuild. Small magnets on the end of a stick also helps.
It would appear, hopefully, you won't need to remove the head and lap the valves? Good news squire, you lucky scabby swine.
Yes, valve clearance is important. As a younger man I always assumed valve clearances would get LARGER as the engine wears in (or out), but how wrong I was. When things wear out the gaps get bigger not smaller, surely? But no, the valves "recess" into the head bringing the "other end" closer to the camshaft (or followers).
It's worth noting this is normally worse during the initial run in period. It is ESSENTIAL that valves are checked and adjusted during the first few services. After say 20k it is my experience they tend to have settled in by then. Your machine appears to be OK now so here's my thinking on what happened. It probably had it's first services and valves checked and adjusted correctly. This has been ignored since and gone out of tolerance over the remaining miles. This has caused the poor running but hasn't been going on long enough to seriously damage the valve seats.
10/03/2022 08:43:29 UTC
Glyn said :-
Another smug grin on my face following the second ride down to Ringwood in 7 days. This time it was the Yamaha Diversion's turn for an MOT. The difference was that this time it was in heavy rain. The near immaculate Yam is now filthy. The tester commentated the the bike has only covered 12 miles since the last MOT in 2010. That was the 12 miles I rode it there this morning. I'm home now (another 12 miles) with the pass certificate. Life's good.
12/03/2022 12:15:34 UTC
nab301 said :-
Quote Ren " As a younger man I always assumed valve clearances would get LARGER as the engine wears in (or out), but how wrong I was."
Years ago on the likes of Mk1 Fiestas (OHV) I was always adjusting slack valve clearances , I wonder was it as a consequence of leaded petrol leaving deposits on the valve seats ? Never thought about it at the time , I'm sure someone can correct me if needed!.
Nigel
12/03/2022 17:03:28 UTC
Upt'North ¹ said :-
Nigel, I don't think the thickness of the lead would cause what you describe.
Ed intimated that the reason for an ever tightening clearance is valve seat recession, I don't disagree, but I think the lead on the old Ford crossflows would have prevented this.
I think the reason they opened up was wear and tear on rockers, camshafts etc.
But you are right Nigel I can never remember finding tight clearances and you always knew when they were ready by the blummin rattlin.
30 minutes and they were done, a new cork gasket with a smear of grease and job jobbed.
Upt'North.
13/03/2022 08:57:15 UTC
Ren - The Ed¹ said :-
Now, please don't go thinking I'm some kind of expert but... old Ford crossflows etc with pushrods and rockers have sufficient moving parts such that the wear from recession of the valves is MORE than compensated for with wear in the.. let me see... followers, rocker pivots, ends of the pushrods and the tappety bits. With OHC, in particular bucket over shim, there's little to wear out there so the valve recession is the overwhelming factor.
Cork gaskets! Such were the times eh. By'eck they wuz cheap n easy fert fix, but they sure needed a lorra fixin'.
13/03/2022 20:21:31 UTC
Glyn said :-
You have to question everything these days. I was reliably (it appears not) informed that the gallon of fuel in the Kawasaki tank was put there just a few weeks ago. Even better than that, it,s AFgas ( high octane petrol for light aircraft and used in race bikes). After running perfectly on my little Aux tank, I put the main tank back on and the bike ran no more. The picture shows what came out of the tank prior to me taking the entire thing apart yet again and the carbs off for a 3rd time. Lesson learnt.
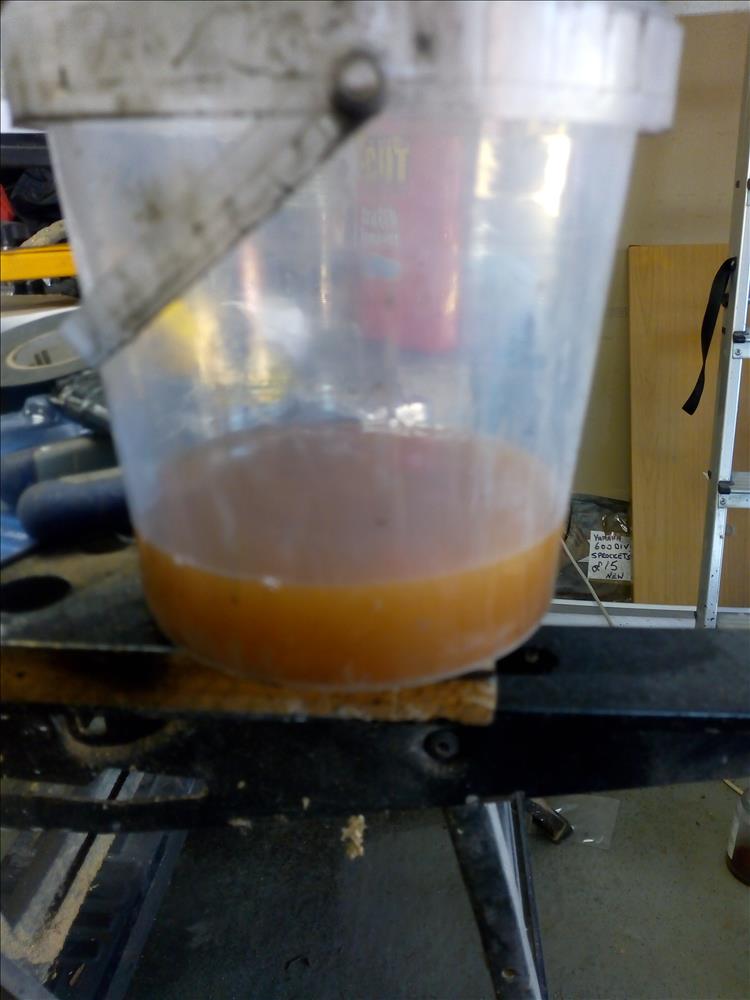 21/03/2022 14:31:41 UTC
Borsuk said :-
Glyn, that luke very similar to the toffee sauce my wife puts on her ice cream, not surprised the carb couldn’t handle it.
21/03/2022 15:23:56 UTC
Upt'North ¹ said :-
Glyn
I wouldn't try to run it on swamp water or toffee sauce. Not even High Octane toffee sauce.
Upt'North.
21/03/2022 16:16:39 UTC
nab301 said :-
" and the carbs off for a 3rd time"
Look on the bright side , that must earn you a place in the Guinness book of records...
Nigel
21/03/2022 22:59:12 UTC
Glyn said :-
I am certainly getting better at removing / refitting the push and pull throttle cables from the twist grip. This is a tricky job that has to be done to get the carbs off. Just in case there is a lot of rust in the tank it's currently at the back of the garage filled up with white vinegar for a few days. There was a small scab of rust just inside the filler cap. I've also ordered new Neoprene fuel pipes, is that ok with E10? I do only use E5 now so it won't be my problem.
22/03/2022 11:48:21 UTC
Glyn said :-
I'm happy to report that the ZZR1100 passed the MOT with no advisories. I thought it'd be nice to have a bit of a rest and allow the fingernails to recover from the rigors of bike maintenance and then this arrives!
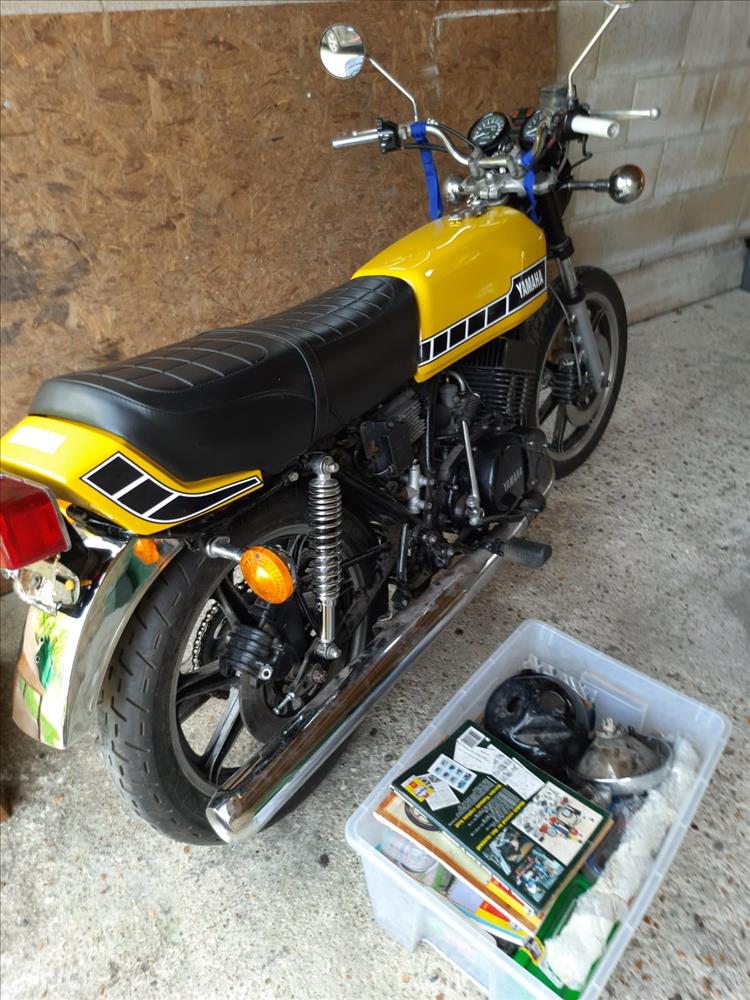 09/05/2022 06:00:48 UTC
Upt'North ¹ said :-
250 or 400?
Your fan base wants to know.
Very yellow.
Upt'North.
09/05/2022 12:38:12 UTC
Ian Soady¹ said :-
Ren won't like it......
09/05/2022 14:04:21 UTC
Ross said :-
Looking good in that picture, Glyn! Looks fairly complete and un-messed with, too...is it an import? I often wonder where they've all gone to, back in the '70's & early '80's I used to go to Snetterton and Brands Hatch a lot and the car/bike parks were FULL of them! "I love the smell of 2 stroke in the morning" to misquote from Apocalypse Now!!
09/05/2022 15:53:44 UTC
Glyn said :-
Yes up't it's the 400. 1978. It arrived in bits with packets of new spares. Biggest issues are the brakes (look carefully at the rear caliper to see there's no hose fitted and the retaining pin is a mild steel bolt, there are several parts missing). The wiring is in a right mess with most switches doing nothing or doing things they're not supposed to do. The autolube pump is not connected so I can't try to start the engine until I've set that up. You might be right about Ren Ian but he did seem somewhat interested in the TDR 250 I had a few weeks ago so you never know. The most extraordinary thing is that, in its current state, it's worth many thousands of the folding stuff. A good one will fetch a 5 figure sum not counting the pence numbers.
09/05/2022 15:56:31 UTC
Glyn said :-
It didn't come with a number plate fitted and I have to say, it's not mine. There seems to be a rumour circulating that I have a mild (cheap) talent to fix bikes. The story is that the current owner had a call to say that this person had and old bike in the shed if he wanted it. There has been a restoration started but the re-paint does not reach the standard I would set. The brief is to make it rideable and fully legal for immediate use at the most reasonable cost.Even though no MOT is required for this bike, it still has to be safe for the rider and other road users so corners will not be cut to save a few pennies.
09/05/2022 16:05:28 UTC
Ian Soady¹ said :-
I don't bother with MoTs for my exempt bikes but would do so if I was building one for someone else - or indeed selling one.
09/05/2022 16:41:14 UTC
Glyn said :-
The RD400 fought back. I tried to check the autolube pump out. (For those of you that have valves in your engines as well as in your tyres, the two stroke engines of this era lubricated the pistons, bearings etc with 2 stroke oil, not mixed in the fuel tank but jetted into the air intake by an autolube pump fitted inside the crankcase by taking oil from a reservoir tank under the seat). This pump has to be bled to remove any air. However, on examination, I found the bleed screw only half in with the threads stripped and some oil oozing out. Some time later I realised that there was the remains of a previous bleed screw, that had sheared off, about 4mm down in the hole. A new pump is £120 plus and you have to split the outer crankcase to get it out. Strangely, the pump appears to be new and I now strongly suspect this was the issue that halted the previous restoration. How did I get it out? Well I put a turn of insulation tape around the shank of a rivet to isolate the threads and pushed it into the hole until it was firmly against the remains of the screw. Then I splashed 12 volts from a bike battery on the head of the rivet which tacked the two together. The welded assembly then unscrewed with pliers. It was risky because I could have welded the screw into the threads but I had nothing to lose.
 10/05/2022 11:02:32 UTC
Upt'North ¹ said :-
I seem to remember the pumps were a little difficult to set up. Although it's ** years since I had a RD400 so I don't remember too much about it.
Although my memory of spreading piston aluminium all over J17 of the M6 is still surprisingly clear.
Strange innit.
Upt'North.
10/05/2022 11:15:13 UTC
Upt'North ¹ said :-
10/05/2022 11:15:36 UTC
Ian Soady¹ said :-
Good roadside trick with the battery - I've heard of it in theory but never actually from someone who'd done it. You'd probably be OK re welding it to the casing as I assume that's alloy? What's wrong with good old petroil anyway? You get almost no smoke with modern synthetics at 50:1 or so.
10/05/2022 12:10:25 UTC
Glyn said :-
The throttle cable splits 3 ways, one to each Carb and one to the autolube pump. As the throttle is opened more oil is pumped into the intakes. I guess Yamaha figured this was a more precise way to administer engine lubrication. The system takes away the faff of premixing fuel but, I understand that with even the mildest tuned engines, they always blanked off these pumps and went back to premix. just in case the Autolube pump didn't work, I put some premix into my Aux tank (after cleaning the carbs) and it started almost straight away after at least 8 years of standing idle. The pump did work and the engine most have been running at about 20-1 fuel/ oil with both premix oil and injected oil added together. 24 hours later and the smokes almost gone.
11/05/2022 06:14:55 UTC
Upt'North ¹ said :-
If the smokes gone after just 24 hours Glyn, the pump'll need turning up.
Upt'North.
11/05/2022 11:53:14 UTC
Glyn said :-
I'm with Ren, orrible smelly things. I don't much like the look of the bike and the iffy build quality is not inspiring. The simple reason for their current ridiculous value is that the spotty yoof of the 1980s has finally got surplus money in his 2022 piggy bank. So he pays his money and, after a short spell in the saddle, realises that there has been some great advances in bikes in the last 40+ years. He'll play with it for a while and it'll go back into a different shed for the next 20 years.
11/05/2022 18:32:54 UTC
CrazyFrog said :-
I've never understood the paranoia a lots of people have about 2T oil pumps. Of all my years of riding stink wheels I've never had a single issue with an oil pump!
11/05/2022 19:21:47 UTC
Ian Soady¹ said :-
I don't think it's paranoia but I do believe that they're not well understood. For some (most?) of us 2 strokes are simple beasts and things like oil pumps, disc and reed valves etc although technically a good idea, are more than we can cope with.....
12/05/2022 16:20:54 UTC
nab301 said :-
My '93 EM Zed 301 (currently residing in the shed...) had an oil pump which ran glitch free for 10 yrs and approx 50k miles, definitely easier than adding oil like I had to on my old 80's Supa 5 back in the day.
Nigel
15/05/2022 09:43:37 UTC
Glyn said :-
Fuel pipe..
Crikey lads and ladies, a word of caution. Having completed the rebuild of the RD400 I put some fuel in and took it for a 6 mile round trip. It all went well for me but may not have entertained the following motorists (caught in the smoke haze) quite so much. Happy with my work I put the bike away. The next day and there was a strong smell of petrol and a small pool on the floor under the bike. There's is a rubber link pipe under the tank to balance the two halves that had swollen up and split. "Now young Glyn" I hear you say " this is a basic thing to check". However, the fuel pipe was brand new (supplied with the bike in a Yambits box full of parts) and was fitted with new correct size clips. The fuel I use is E5, what could be wrong? The worst thing about this story is that the fuel pickled the new paint on the frame that appears not to have been lacquered by the person that put the colour on. On the plus side, I covered over 100 miles on the ZZR over the weekend, life is good.
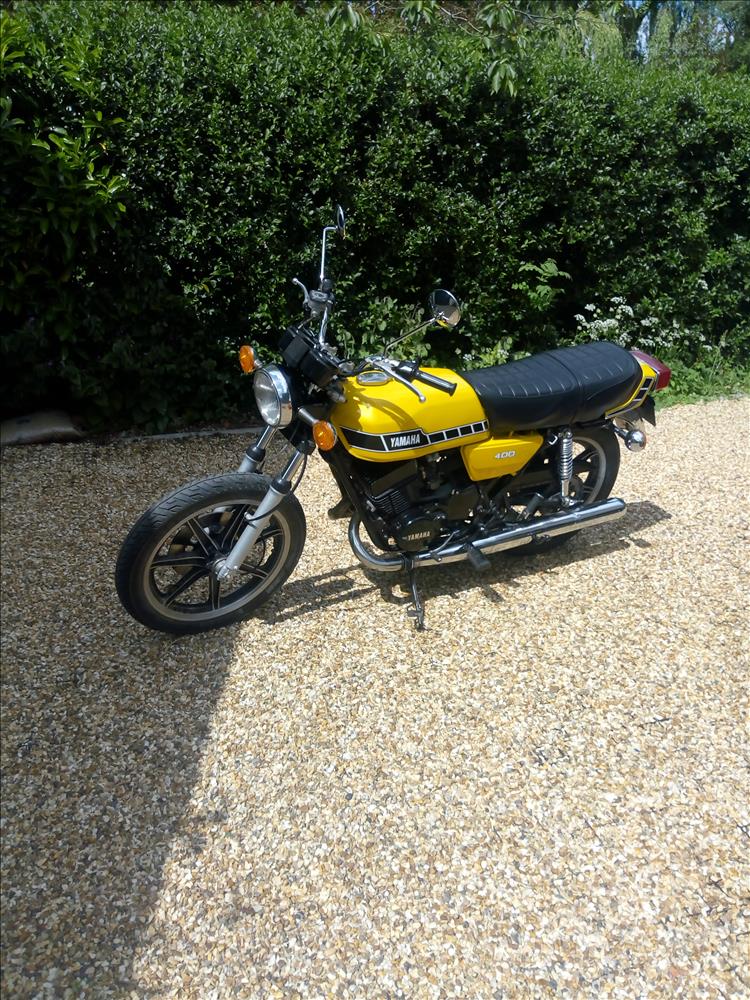 30/05/2022 11:23:47 UTC
Ian Soady¹ said :-
Although I don't subscribe to the view that ethanol is the devil's brew especially as modern petrol is stuffed with all sorts of other stuff, I fear that is likely to be your problem. I do agree that rubber does not take kindly to E5 neveer mind E10.
30/05/2022 12:09:54 UTC
Upt'North ¹ said :-
E5? I wouldn't have thought that would be an issue with 70's rubber. Unless of course it is literally rubber from the 70's.
I'm now trying to run solely E5 in the BeaST and so far in the B. The B to clear it's throat and with only about 5 new pence difference per litre it's probably a bit of a bargain.
On the bargain fuel note, I filled the BeaST for the first time since last October on Saturday at the local garage emporium.
£41.21 and the fuel light wasn't even on......... I better ask for more allowance.
Upt'North...... and remember to be careful with your rubbers.
30/05/2022 12:29:53 UTC
Upt'North ¹ said :-
Also on a fuel note,
I'd forgotten how cold fresh petrol is. Its blummin freezin on ya legs.
Upt'North.
30/05/2022 12:31:34 UTC
ROD¹ said :-
Why is Upt' pouring cold petrol down his legs?
Is this some sort of fettish.
30/05/2022 13:51:45 UTC
Ren - The Ed¹ said :-
He's from Northumbria ROD - it's a case of "if you have to ask you wouldn't understand".
30/05/2022 19:25:23 UTC
Glyn said :-
It's been a couple of weeks since the RD400 was returned to its rightful owner and I've been commuting to work on the ZZR. Not ideal due to being hard on the hands, forearms and wrists. Due to its staggering performance it's not the easiest thing to ride in traffic either. I took the wife on a 40 mile jaunt to Sammy Miller's motorcycle emporium to attend the Vintage Jap day. She found the pillion uncomfortable so found me something she liked. It was a Suzuki 1100 Intruder. Always happy to encourage my wife whenever she shows a modicum of interest, I bought a 2002 Yamaha XVS650. Bit of a mistake there as it is in a much worse state than I originally thought so instead of motorcycling I am now knee deep in yet another restoration. The owner claimed it to be "one of the best ones you'll find" and "in remarkable condition". As it was over 100 miles away from us I asked a friend to takes look for me. He said it looked ok and so I was committed to purchase. Sadly I now am seeking a whole heap of new parts and a new bike spotter mate.
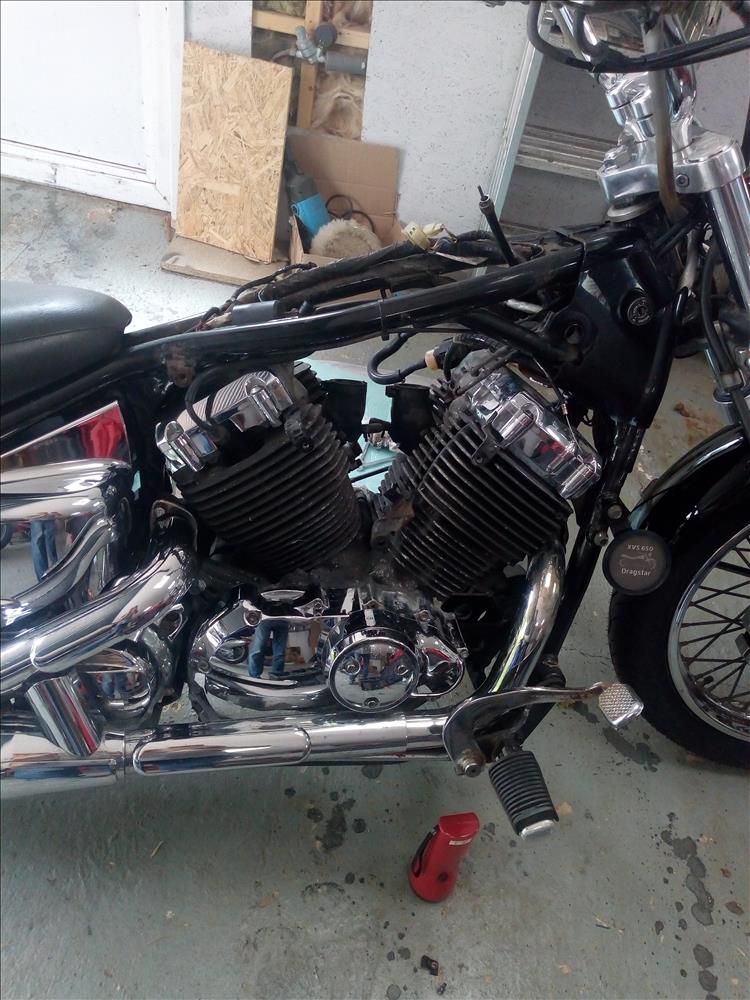 13/06/2022 10:06:16 UTC
Ren - The Ed¹ said :-
I'm led to believe the Dragstar 650 is a fairly solid bike so at least you've got something to work from. While I read that you're disappointed with your purchase secretly I'm sure you'll relish transforming it from a shed to a gleaming example with perfect mechanicals.
Stop whinging, if it were perfect you'd be bored. Enjoy.
13/06/2022 13:50:37 UTC
Glyn said :-
Tis true Ed, I do like the challenge. However, the reason for the moan is that this was a little more than my sub £999 bikes of the past. That said, the bike filled the collection van with more than a mild whiff of petrol which was found to be dripping from the front carb. I was informed that the carbs had been stripped, wrong! I don't think so!! The only thing that had been stripped was 2 of the cover screws (sheered off in fact see picture). I ordered the rebuild kit and fixed em up all nice. Whilst they were off, I thought I'd do the valve clearances. Not easy to get to but easy..ish to do. I think I must have misunderstood the instructions as the front cylinder has a very loud tapping sound emanating from where very little used to emanate. Oh well let's take it all off again and do it all again.
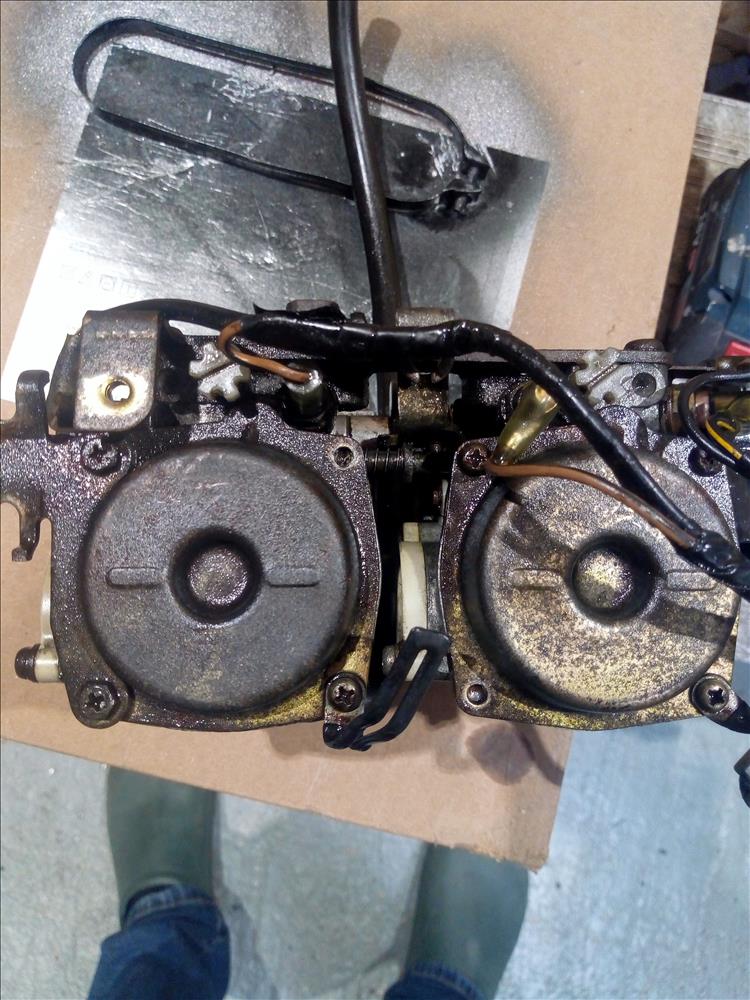 17/06/2022 10:45:39 UTC
Ren - The Ed¹ said :-
I hope you get them tappets sussed Glyn! Can't be having you rattling around that posh area disturbing the locals can we. If memory serves the speedo is in the tank and I can see what I figure is the speedo cable sticking up in your earlier image. If so how fiddly is it to get the tank off with the speedo and presumably cabling as well?
18/06/2022 09:25:58 UTC
Glyn said :-
None of it is too troublesome to take apart and I can even use most of the bolts again so build quality is better than some earlier bikes I've played with. The main issue is the amount of stuff you have to remove to get to the tappet covers, things like airbox, Carburetors, 4 chrome covers that sit on top of the heads, cam pulley covers etc. It's a fairly simple job (10mm spanner and allen key to do the adjustments). The problem is getting the crankshaft markings lined up to coincide with the markings on the camshafts and this is where I think I made an error because they didn't line up on the forward cylinder. I know that you can be 360 degrees out as you need to do the checks at top dead centre and that happens twice in a full cycle. However, wouldn't the camshaft be 180 degrees out if that happened? Will try to look tomorrow as I have the dreaded COVID and not feeling 100% right now.
18/06/2022 16:34:59 UTC
Glyn said :-
I took it all apart again and sure enough the front cylinder exhaust valve clearance was double what it should be hence the rattle. I have a theory, my feeler gauges are keep nicely oiled and there's a possibility that two of them were stuck together. This would explain the almost double size gap,,,, silly old fool.
Incidentally, this wretched virus is hardening its grip, I reckon one clean shirt could see me out.
19/06/2022 18:17:40 UTC
Ren - The Ed¹ said :-
You not gotten the Covid have ya Glyn? Any news? Hope you recover... but one clean shirt?
When doing tappets the correct and prescribed method is to set the engine to top dead centre between the compression and power strokes - but you know that. Me? I look at the lobes of the cam and turn the engine till the lobe faces away from the place where the tappet/shim/bucket makes contact with the cam. Then I set the gap.
Easily done that, getting 2 feelers together! "Thar's ya problem".
19/06/2022 21:58:10 UTC
Glyn said :-
Feeling much improved today thank goodness. On the Dragstar you can't see the lobes on the camshaft as the 4 tappet covers cover only a single valve and there is very little to be seen other than the adjuster and the locknut. So you have to expose the cam pulley and chain to see the timing marks to know where the lobes are. It's all back together now and hoping to fire it up later today.
20/06/2022 14:00:51 UTC
Ren - The Ed¹ said :-
Glad to hear you're on the mend Glyn. Yeah if it's not part of the task to uncover the lobes then it makes much more sense to just get the engine to TDC - subject to getting it to the CORRECT TDC.
21/06/2022 12:34:45 UTC
Glyn said :-
I've been commuting the 50 miles a day on the ZZR1100 without incident except for the fact it's not comfortable around the New Forest roads (as described by the Ed in his recent scribes). The problem is that is heavy, a little bit on the high side for my short legs and tends to be a little too quick for any real comfort. That said, it's still enjoyable. However, last Friday I was on my way home in horrendous traffic and although able to weave a little I was pretty much caught up in the stop/start as much as the other road users. I finally had a half mile opportunity on the A31 to open up a bit despite being surrounded by cones due to the works. The bike started to bog down and become increasingly sluggish. I pulled in the clutch and it almost came to an instant stop. Luckily, I was on the inside lane and able to pull across. The rear brake disk was blue and smoking. The wheel was locked solid and getting the beast onto the centre stand was hell with the wheel like that.The caliper was red hot. Realising the brake had severely overheated I stepped back hoping (praying) that it might cool and free off enough to travel the 300 metres to the slip rd. Within a few minutes a recovery man arrived by foot informing me that he had ordered the recovery vehicle. I explained that we would be better to wait a few minutes for it to cool off rather than to haul a heavy bike with a locked wheel onto the truck which would have blocked at least one of the two lanes. He agreed and 15 minutes later the wheel freed off and I made the short trip to the exit and from there the final 10 miles home without incident. Now the caliper is all apart, the seals and pads are in the bin and new parts are on order.
13/07/2022 09:16:35 UTC
Ian Soady¹ said :-
Not enough clearance on the operating rod? I had a similar experience with my Norton Commando to which I'd fitted another front master cylinder (can't remember off what). I was going across Wales to the coast when it started to slow downdramatically and the handling became peculiar. It was a very hot day and I think everything had expanded just enough to take up aht clearance there was. I cracked the bleed nipple to let some pressure out which allowed me to continue the journey and to later adjust said clearance.
13/07/2022 10:12:07 UTC
Glyn said :-
Actually Ian, since taking it all apart, one side of the floating caliper was stuck fast and so I have one worn out pad and the other looks fine (apart from being overheated). You have to slide the bracket in to get the pads out which was impossible when I started. After I'd used various methods of force it started to move allowing access. The two pistons had a build up of rust on the outer edges and so I imagine they were not freely going back in. I think it was probably all of these things plus the heavy traffic that led to the resulting issue. When I ride normally I very much favour the front brakes but, in traffic, where the bikes a little too high to allow me the flat foot on the road, I use the left leg on the ground whilst the right holds the bike on the brakes leaving the right hand free for throttle operation. The heat must have expanded the fluid with the caliper in close contact with the disk and a sort of chain reaction took place.
13/07/2022 11:10:51 UTC
Upt'North ¹ said :-
I don't think the pistons would have contributed much to the issue Glyn. As they were getting ever further out due to pad wear. But I think with the Seized caliper you've found the culprit.
I use moly assembly paste on the sliders to good effect.
Good luck.
Upt'North.
13/07/2022 13:09:25 UTC
Ian Soady¹ said :-
I've never liked those sliding calipers - my recently acquired Honda CB250RS has one on the front. Fortunately it was free having been recently rebuilt. For some reason people recommend using copaslip on the sliding areas - no idea why as it's an anti-seize compound not a lubricant. I use a thin smear of ordinary high melting point lithium grease and provided you don't get it on rubber parts or pad surfaces it's fine. And much easier to get off than copaslip.
13/07/2022 14:09:10 UTC
Ren - The Ed¹ said :-
Sliding calipers are cheaper to manufacture than reet proper pistons on both sides ones - that's why they're so common.
Now - you folks what use their velocipedes for pleasure will find lubricating the sliders will "help" but not necessarily "cure" the sticking slider issues. The plebs here (me) find that any application of grease or copperslip or moly paste or even vaseline merely collects the road dirt (one encounters this in less the perfect riding weather) into the precisely machined parts. Due to the tight tolerances this soon jams the sliders up rapid style.
WARNING! This is BAD ADVICE - do NOT try this at home. I find "easing" those tight tolerances causes the brakes to rattle and clatter in a most annoying fashion. This also has the benefit of reducing the stiction of the sliders and allows the road dirt to escape. This is definitely not a good idea though.
13/07/2022 16:36:50 UTC
Glyn said :-
It's all rebuilt and back on. It took only a few minutes to bleed and seems to work fine on the centre stand. I'll admit to using lithium grease on the bracket sliders and copperslip on the back of the pad in contact with the pistons. It's got a good pedal feel and I'll have a little run round tomorrow to check it's operation. I probably need to consider overhauling the front pair as well although I read that the front brakes are transformed if you fit the GSXR750 4 or 6 pot calipers, that's why they're £200+ for used ones on eBay.
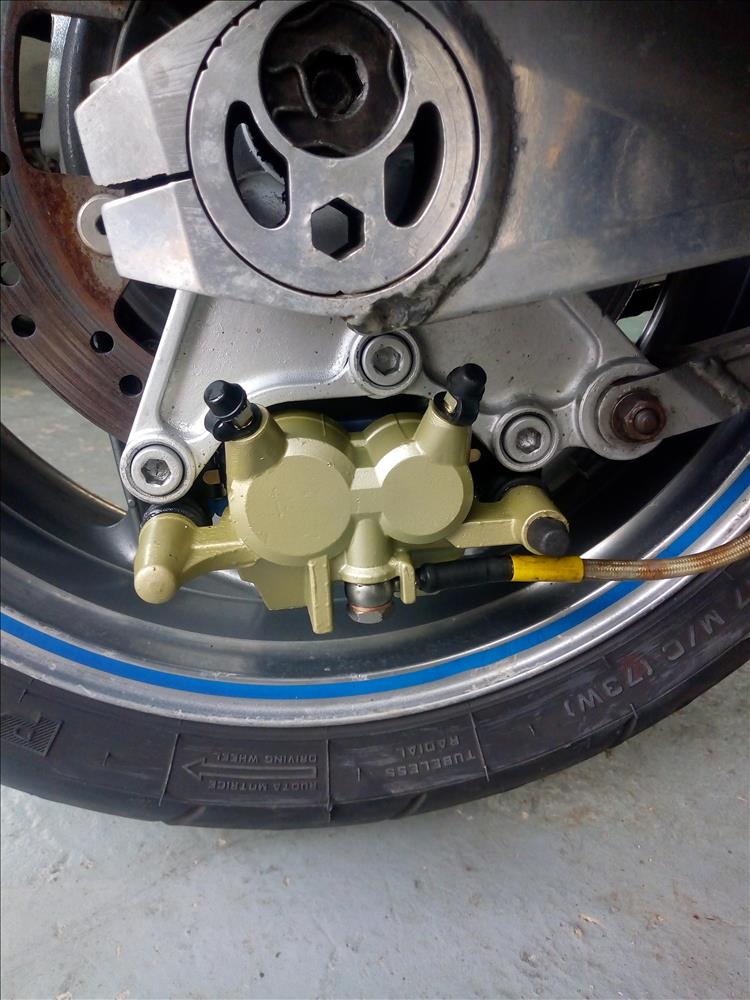 13/07/2022 21:09:47 UTC
Ian Soady¹ said :-
One disadvantage of the caliper being underslung (unless it's an inverted photo?) is that it's hard to see the pads so a quick check round is unlikely to spot the seizure. The caliper on my 250 is missing the cover so the pads are very visible - not that I expect to wear them out any time soon.
14/07/2022 16:23:42 UTC
Glyn said :-
Yes it is underslung Ian which (in my experience) also means all the brake dust plus bits and pieces all end up in the bottom of the caliper and between the pads. This doesn't happen when the caliper is on the top as all the crap falls out. My pads wore out very quickly due to the binding.
15/07/2022 12:50:14 UTC
Glyn said :-
More misery has embraced me. I'm afraid to report that recently purchased Yamaha Dragstar 650 is in disgrace. Took it out for a ride and suddenly it started to make the most fearsome grinding noise in 5th gear. Regardless of engine or bike speed it makes the noise, all other gears are fine. Now this is going to be a right royal journey into the unknown. Consulting Google and it appears to be a weakness in bikes built for 3 years until 2001. The job to get the engine out and all apart will be a pretty big and heavy task. Unlike their 2 strokes, Yamaha split the crankcases vertically so turning the engine upside down to get at the gearbox is not possible and heads, cylinders,cam chains etc all have to be removed. I only managed to get 25 miles on the bike before the disaster. The guy that sold it to me (privately) is sitting firm on his "sold as seen" policy. Time to get out the spanners I guess.
15/07/2022 13:03:51 UTC
Ian Soady¹ said :-
Looking on the bright side, something to keep us all entertained.
It is bad luck however, and I suspect that sort of noise is likely to be expensive. Did you pay a lot for the bike?
15/07/2022 15:32:41 UTC
Ren - The Ed¹ said :-
Ooooooooh... eeeeeeehhhh... argh! Dagnammit and curses. Well Glyn I seem to recall you don't consider yourself an expert regarding the workings within the engine. I suspect that is going to change over the next few weeks. Good luck squire.
15/07/2022 16:08:23 UTC
Glyn said :-
If the truth is to be told, I'm devastated. I bought the bike for £2,300 which is a fair price for a fair bike but when I got it home and looked much closer I found it to be at the lower end of "fair". The previous owner said he'd replaced the dead battery but, when I took all the covers off, I found he had replaced it with a second hand battery. Things that were said to be done, service wise, were not done or had to be done again properly. There was no way of telling this at the point of purchase unless I stripped it apart which I wasn't able to. I genuinely think that he was unaware of any issue with the gearbox because the noise only started after I had covered 26 miles. However, if I strip it apart and find grease and sawdust inside I shall be extremely unhappy.
Now to the usual dilemma; I have seen a bike with 5th gear gone for sale for £1500 so that is probably the price level I currently sit at. It is also the price I was quoted for the gearbox job from a local bike shop with clauses about what is found when they open it up which could have further price implications. Should I therefore do the job myself? All information available seems to suggest this can take between 3 and 5 full days work. The two different 5th gear pinions are £110 and £140 and the major overhaul gasket set is £113 so a minimum parts spend of £363. Should I decide to change the bearing shells and rings etc whilst it is all apart, will add more cost. There is an engineering issue as well. The 5th gear input shaft pinion is located behind the second gear pinion which has to be removed and refitted using a hydraulic press (I don't have one) and the gear alignment and distances between the end ears are to be set up to 130mm +/- 0.2mm. I have to further admit anxiety about such a job given the hundreds of small parts likely to go flying as I remove them. 40 years ago I would have had it all apart by now and not even worried slightly about lost, rusty circlips and the like. However, things have changed, moreover I've changed and feel the need to meticulously study everything even remotely related to such a job. I have read the Haynes manual describing engine removal and gearbox clusters 4 times and still don't feel confident. It will be quite some journey but, if after spending maybe a minimum of £400, I will then have a bike thats worth about the same as I paid for it> Te alternative is to lose a minimum of £800 and try to get rid of it (unlikely scenario that). So, it's head down and tear it apart. How many pictures do you want Ed?
16/07/2022 09:42:31 UTC
Ian Soady¹ said :-
If it was mine I'd cut my losses and sell it on for whatever you can get - of course telling the new owner about the main problems. I lost about £500 when I passed the mYamaha maxi-scoot on - there was nothing wrong with it but I had bought in haste only to repent at leisure. It was no use to me cluttering the place up and its replacement Honda was substantially less than what I got for the scoot anyway.
16/07/2022 12:12:18 UTC
Glyn said :-
The trouble is Ian that I love the looks and ride. A top notch one is about £3.5k. If I do the job I'll know what's inside the oily bits and will do the best rebuild job I can. I thought I'd just try it again in case the strap was loose on my helmet and there is nothing wrong with the bike at all (foolish boy). It got even worse due to the fact that it wouldn't start because that infamous "replacement" battery has failed. I jumped started it, rode it up the road and 5th gear is just as bad, fortunately there's nothing wrong with my helmet strap..
16/07/2022 13:00:22 UTC
Upt'North ¹ said :-
Look on the bright side Glyn, at least you don't need a new helmet.
Feel for you fella. I've stripped and rebuilt a lot of engines, gearboxes and diffs in my far distant past, but I really wouldn't be looking forward to ripping into a modern Jap bike engine.
As for pictures, thousands please, but please start a new thread, it takes ages to scroll through this tired old thing.
If you want a chuck with anything let me know, I'm only a day away and I work for tea and biscuits during the day, Jameson's and fruit cake in the evenings.
Upt'North.
16/07/2022 14:06:20 UTC
ROD¹ said :-
I rebuilt a few Japanese gear boxes in the past.
When the gearbox gives you trouble there are usually a few bearings that have some play in them and will need replacing when the gearbox is apart. These are not usually expensive but care is needed.
My advice is try not to force anything. Heat to free things up is your friend. If you need a puller, buy it.
There are no short cuts with a gearbox, and the tight tolerances are there for a reason.
16/07/2022 20:46:39 UTC
Glyn said :-
Start a new Thread Up't? I'm not sure how to do that but it makes sense, perhaps yourself or the Ed can help. Are you sure you want an area of the site dedicated to the workings of a Yamaha V twin gearbox?
It's been a very long time since I was inside a gearbox Rod and then it was probably a Triumph Spitfire or similar and it came off the back of the engine, I didn't have to go through the engine to get to it. My brother has done some gearboxes on his various Yamaha LC250's but he turns the engines upside down and the sump comes off revealing the workings. I'm just preparing to start today with a clean up of the entire area and arranging all the little bags, boxes and envelopes I can find for storing the removed bits, I even have a roll of stick on labels and a sharpie pen.
17/07/2022 09:54:51 UTC
Upt'North ¹ said :-
Come on ED, get ya finger out.
He's probably weekending in a 5 star hotel luxury somewhere. Washing his bike kit in the Jacuzzi.
Oh the shame of it.
Upt'North.
17/07/2022 10:12:21 UTC
Ian Soady¹ said :-
Best of luck and I look forward to reading the saga. I've rebuilt several gearboxes but all on relatively antique machinery - none of these .0005" tolerances. The problem is likely to be, as you said, that once inside you'll find lots of other things that should really be fixed and the trick will be deciding how far to go.
17/07/2022 10:12:42 UTC
Ross said :-
Good luck with it, Glyn...I think I would have gone with Ian's previous suggestion to cut your losses and 'get shot' for what you can, it looks like you've done well on some of your previous projects so just put this one down to experience! Having said that, if you're giving it a go, I'll looking forward to reading your exploits!
17/07/2022 11:36:23 UTC
Ren - The Ed¹ said :-
It wasn't a five star hotel Upt' - it was a campsite near Settle. I'll tell you all about it one day.
This site was never designed as a forum hence the lack of ability to "start a new thread". I shall this day hopefully create a page for Glyn to document his trauma, sorry, experiences.
18/07/2022 09:07:14 UTC
sean said :-
okay so where do i start with this one. i own a honda cbf125m 2011 plate. and since getting cold its been getting harder to start. also i wont idle and then cuts out again until i blip the throttle a few time. once its warmed up it is perfect. now iv done the valve clearance and that wasnt the issue. iv changed piston and rings with new head gasket and polished the valves/seats since its done 25.000 miles. also changed for peice of mind. but anyway still the same issue hard starting rough idle. so went on to replace throttle body with new sensor and IACV. with new injector too. still the same issue. but as soon as i spray easy start into the intake it start and idle perfect for a few seconds then gets rough again until i spray more in. fuel pump seems to be working as it should be. i did motorcycle at college so im not a nube at this. i kind of regret buying this bike. im more of a carb guy but the bike is like new showroom condition so i though id go for it. i just cant get my head around this issue. any help please cheers.
sean
18/01/2023 03:59:08 UTC
Upt'North ¹ said :-
Sean, Ed and others will be along who know these bikes and I.......well I don't.
There must be a sensor which tells the fuel delivery system the temperature of the engine/ambient. It would appear you are under fuelling in the warm up phase. I think this sensor would be to blame. But like I say others will be along soon.
I don't think you will have, but is there any manual cold weather enrichment on this bike.
Good luck.
Upt'North.
18/01/2023 09:22:30 UTC
Ren - The Ed¹ said :-
My first test would be a compression test - because it's easy and cheap. I don't have the expected figures for the CBF125 but I'm sure a google search would help.
However - the squirt of easy start *suggests* that the compression may be OK. Don't depend on this though, easy start burns super easy so it might run even with low compression. Unfortunately I agree with Upt'. It could be a temperature sensor issue. If the oil temp sensor is showing "warm" or more likely "nothing" so the computer defaults to "warm" then the fuelling will be weakened for a warm engine, whereas it should be running rich for cold start. Once warmed up the "warm" feed or default temp is fine.
I'm leaning toward the oil temp sensor (back of the cylinder head). Check wiring, clean connections, see if google suggests any meter reading values.
Air intake temp? The throttle body has an air temp sensor (I think, I haven't got my manual to hand). If this was wrong it'd still be wrong even if the engine was warm
There's no manual enrichment Upt'.
18/01/2023 11:27:39 UTC
nab301 said :-
Possible air leak on the intake side?
Nigel
23/01/2023 20:35:55 UTC
Name
Comment
Add a RELEVANT link (not required)
Upload an image (not required) -
Uploading...
Home