Home
Repair And Restoration
CBF125 Rear Brake Shoes
Job Date 13 July 2018
By Ren Withnell
Why oh why oh why oh why?! In my previous post (Bodging Weather) the weather was excellent. As such I did a few little jobs that weren't desperate because it was too nice not to. Now the rear shoes on the 125 need doing and the non gender specific post person has posted my new shoes and the rain is here.
Oh well at least it is merely wet, not cold and wet. Cheer up Ren, it'll soon be winter and I can return to struggling to bend my arms because I have so many layers on. Just think, I might even get to use the duvet once again.
You'd think having a rear drum and shoes that replacing the shoes would be much more tiresome than changing the pads on a disc setup. Erm, no, not really, not on the CBF125 anyhow.
With disc brakes you can just swap the pads. But I always remove the calliper and clean the pistons before pushing them back. If I don't I risk pushing dirt into the seals which won't do them any good. While I'm at it I clean the calliper and the hanger as a matter of good servicing. Throw in a little wire-brushing of the sliders and you've got a couple of hours work.
Give everything a clean before you push the pistons back.
Typically with drums I'd expect to have to remove the wheel. Not so with the CBF125. There's a long spacer on the brake side between the brake plate and the swingarm. If I partially slide out the wheel spindle the spacer comes out. If I pull the spindle a little further there's enough room to get the brake plate complete with the shoes out.
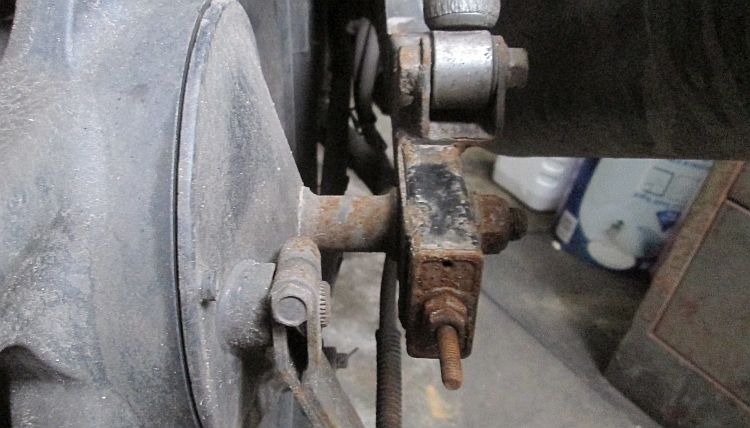
There's a spacer and it's a biggie.
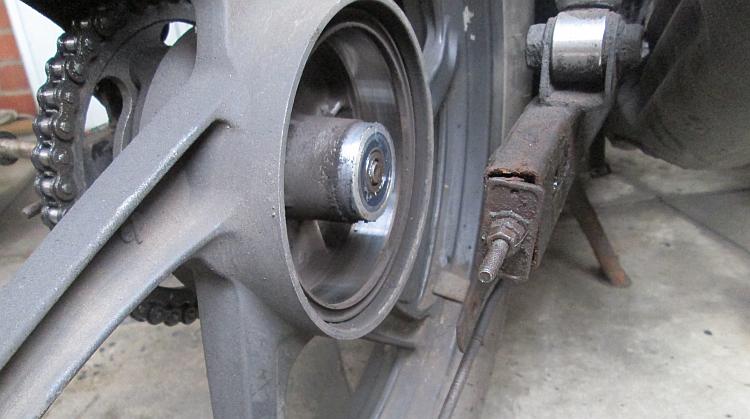
There's plenty of room now to get the whole brake system out.
With the plate out and the old shoes removed I'm still going to clean everything. The hosepipe and a stiff bristled brush sorts out the brake plate, a kitchen cleaner squirty bottle filled with water sorts out the drum.
Nothing is siezed, everything is moving, nothing is broken. I put the new shoes on the brake plate, put the brake plate back into the wheel, slide the spindle through the plate and the spacer then re-adjust the chain.
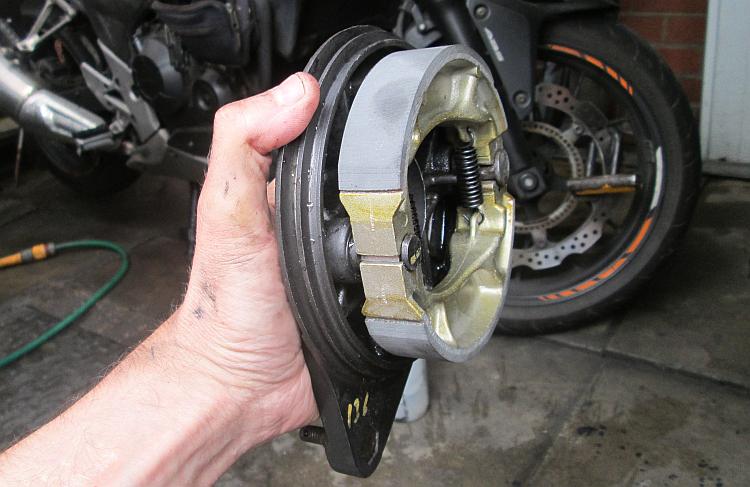
New shoes, clean brake plate and ready to refit.
It's stopped raining, I can even take the bike out for a shakedown ride in the dry! Just for my own records the speedo is reading 74,600 miles.
If you'd like to see your advert here contact ren@bikesandtravels.com
Reader's Comments
Ian Soady said :-
That's handy, having that long spacer.
It would probably be helpful for novices if you described how to get the relined shoes onto the pivot and cam.
The youtube link below gives a good idea of how best to do it - look at 7 minutes onwards. Not sure about the rest of it though.
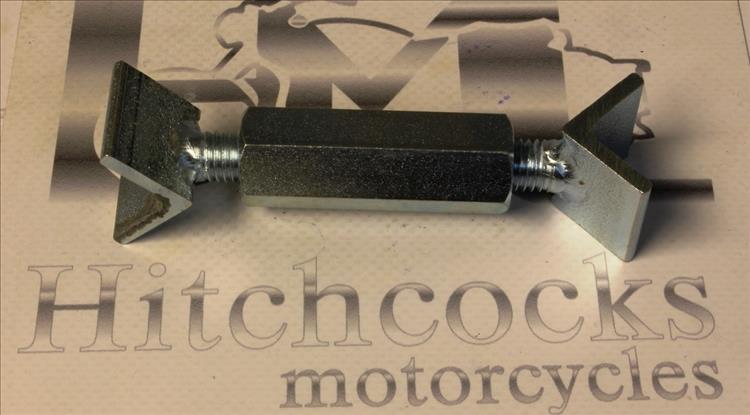
Sometimes flanges on the pivot / cam prevent this (or even on some brakes like my Norton there are separate pivot posts) so that technique isn't possible. These can be difficult and result in lost tissue / fingernails / fingers. For those timid souls amongst us a useful tool is the one in the pic which can be used to spread the shoes out.
 www.youtube.com/watch?v=udjmpirjyTs...
14/07/2018 09:28:19 UTC
www.youtube.com/watch?v=udjmpirjyTs...
14/07/2018 09:28:19 UTC
Ren - The Ed said :-
I might just do that Ian. I hope we don't end up with a fail video with my fingers trapped that's all.
14/07/2018 12:13:56 UTC
Name
Comment
Add a RELEVANT link (not required)
Upload an image (not required) -
Uploading...
Home
Repair And Restoration