Home
Repair And Restoration
The DIY Camchain Tensioner
Bodge Date 2023 and 2024
By Ren Withnell
Camchain tensioners eh. Pffffft
Chains wear, that's a fact of life. In the wind and the rain and the road salt and the dirt of your average British highway a final drive chain will not last all that long. Inside the oily and warm confines of an engine a chain can/should last a long time. Despite being perpetually oiled and protected even cam chains wear though.
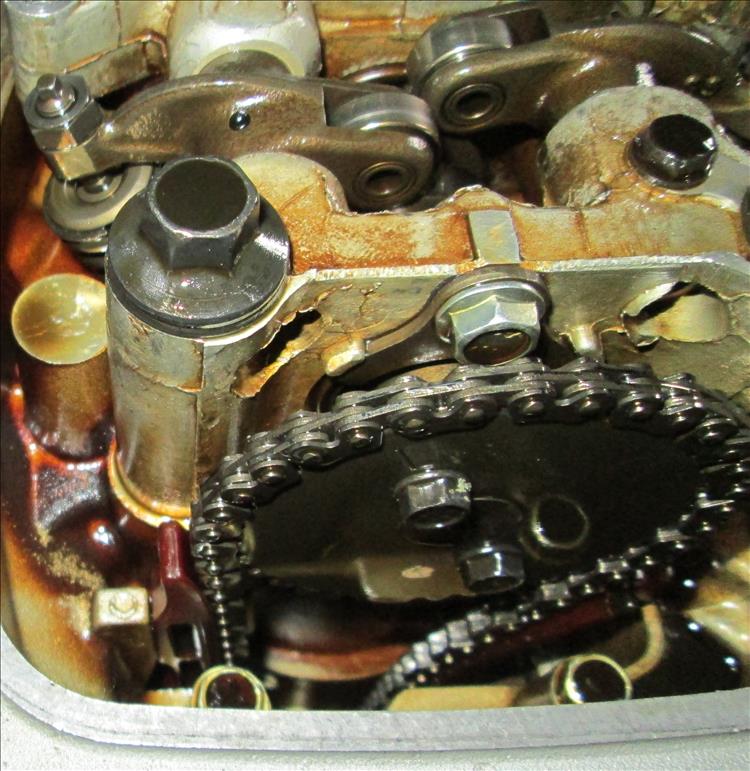
This skinny little camchain lasted for 100,000 miles.
Once upon a time, many many MANY moons ago, it was expected that part of owning an engine with a camchain was for the owner to adjust that chain periodically. Of course this meant getting one's delicate pinkies dirty like a commoner or having to pay someone else to get their pinkies dirty. Or, like most folks, you never do the job and the chain jumps off the sprockets and bricks the motor. This situation is of course a disaster and needs to be automated. Ever since then automated camchain tensioners have been a thing.
And they've never really worked have they.
Disagree? Engine history is littered with tales of failing or weak or (occasionally) over-strong tensioners, and not just in motorcycle engines. It's enough to make you want a CG125 (gear driven cams, pushrods) or a Harley (although some odd designs have camchains AND pushrods). Just google camchain tensioner problems and you'll see it's both cars and bikes.
The CB500X doesn't have this problem because Honda's learned their lesson... right? The first CB500X I owned was fine but this one's always seemed a tiny teeny bit rattly. Ever since I fitted my home made camchain tensioner (CCT) as an experiment it's been a tiny teeny bit better. As such I've just left it in place, the experiment became a fixture.
Sharon's Z250SL at 35,000 miles is fine... except at 5,000 revs there's a distinctive and harsh, really harsh rattle. Oh no! Small end, big end, mains... Then I found a youtube video of a KLX250 (same engine, different tuning) making the same noise at the same revs. "CCT mate" is the resounding response and fixed with a manual tensioner.
Having made one for the CB500X as an experiment - I made an experimental one for the Z250SL. Yup, quiet as a church mouse now.
So how do I make manual CCTs?
First you need a strip of thick metal. B&Q sold me an 8mm thick length of bar for a reasonable price. You need a thick chunk of metal because we're going to drill and tap this metal and you need sufficient thickness for the tap threads.
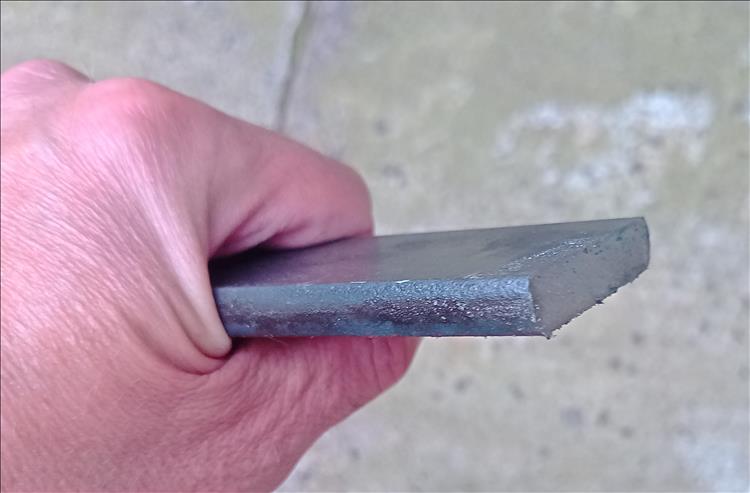
B&Q lump of metal
Next you cut this metal to size. Cutting it with a hand hacksaw will see your arm muscles pumped and the veins in your hand sticking out.
Then you drill 3 holes through the thick metal. This sees your drill bits dulled and burned, your arms sore and swarf all over the floor right by the tyres of your motorcycle. Be sure to spend 2 hours crawling around the area with a small magnet trying to ensure none of the swarf leads to a puncture.
Then with a piece of 1200 grit wet-n-dry on the kitchen worktop spend another half hour polishing one side of your chunk of metal in the hope of getting a flat surface which won't leak oil.
Tap the central hole with an M8 tap. This will lead to more swarf on the floor and another 2 hours of magnetic surfing.
Now fit an M8 bolt and locknut and a nyloc nut. Offer up the new CCT to the motorcycle only to realise you've managed to drill all the holes in the right places, but not for this model of motorcycle. Spend another hour trying to reshape the holes with a drill, realise you've failed, then repeat the whole process from scratch with another thick chunk of metal until you get the holes in the right place for this model of motorcycle.
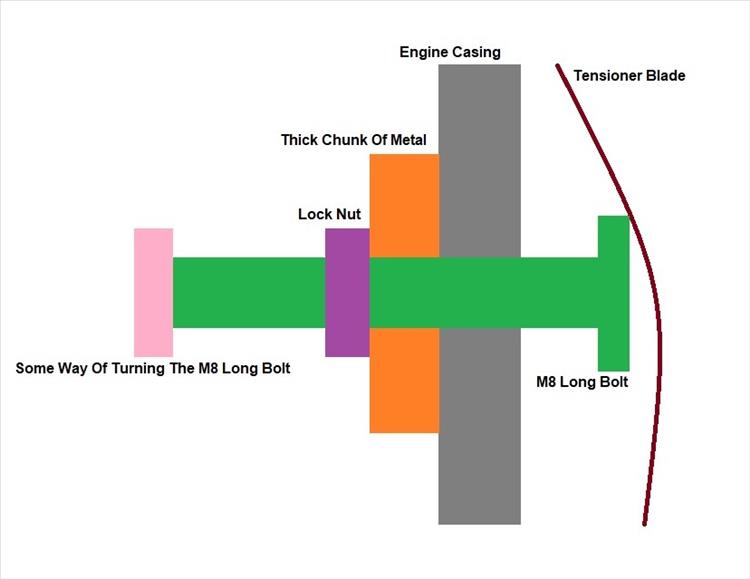
Thar we is. Explained.
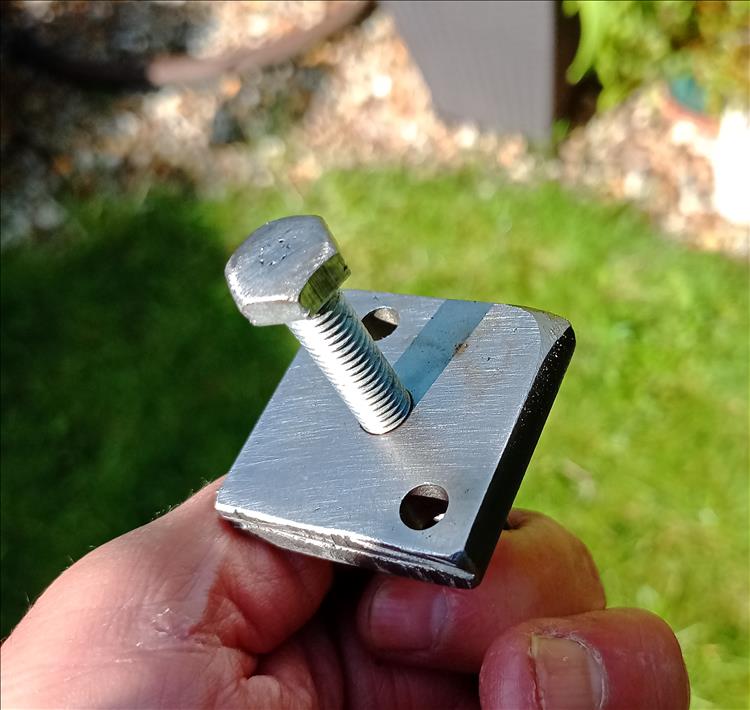
Polished flat surface and this bit goes inside the motor to push the tensioner.
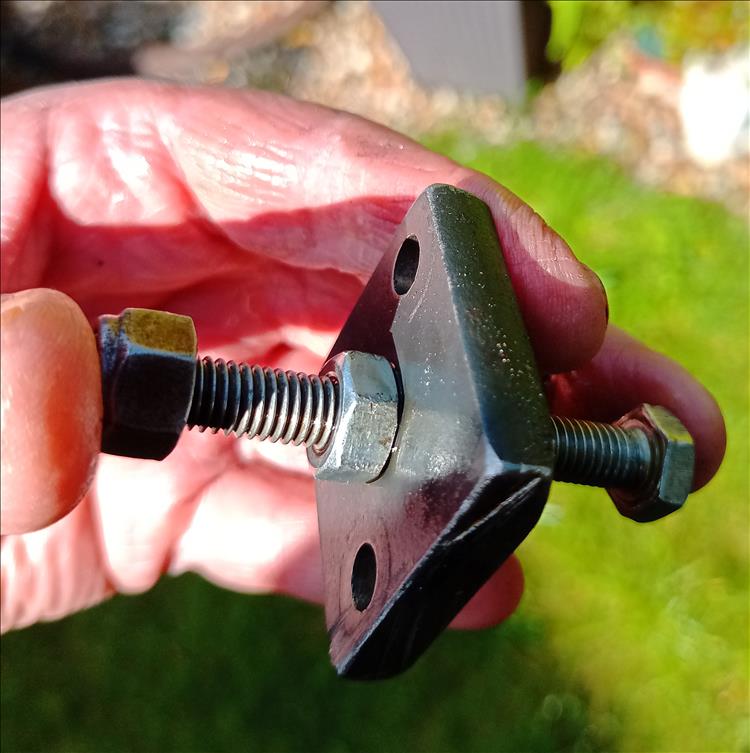
The locknut - remember the chunk of metal itself is threaded.
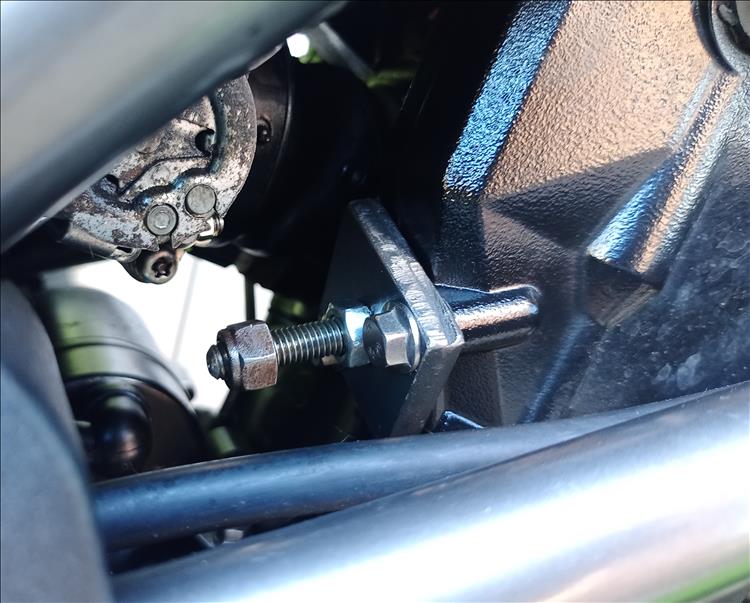
Fitted and functioning.
Sorted!!
Send Ren a manual CCT for testing :-) ren@bikesandtravels.com
Reader's Comments
Upt'North ¹ said :-
Note to self.....don't forget to submit text.....muppet.
You're a genius, you are, a genius.
Did you do it in ya lambin jacket?
But.....how do you set the tension correctly?
Upt.
29/07/2024 15:47:52 UTC
Ren - The Ed¹ said :-
Genius?
Setting the tension correctly is a matter of much much MUCH MUCH discussion online.
Errrr, personally I turn the bolt with my delicate pinkies. Oh you mean how much is too much, not enough, just right? The consensus is as follows. Do not DEFINITELY DO NOT start with the tensioner too loose. Turn the tensioner in - just with your fingers - until there is a significant amount of resistance. Don't use a spanner, you could easily snap the chain with the amount of torque you could apply.
Start the bike, loosen the adjuster until it starts to rattle, then turn it in just a hair. Tighten the locknut.
I await the input of others who will have a different point of view.
29/07/2024 16:10:16 UTC
Upt'North ¹ said :-
I anticipated that it would be a subject of some debate. Tight? Loose? Too tight/loose?
Were the original auto adjusters you have changed Ed hydraulic or spring types.
Upt.
29/07/2024 16:46:57 UTC
Ren - The Ed¹ said :-
Spring Upt'. I am, presently, unaware of any mainstream motorcycle that has hydraulic adjusters although I'm sure some fancy pants BMW or Ducati might.
29/07/2024 18:53:42 UTC
ROD¹ said :-
I believe that KTM, BMW, and Harley Davidson use hydraulic tensioners.
29/07/2024 19:58:01 UTC
Ren - The Ed¹ said :-
Thanks ROD, I'm learning every day.
30/07/2024 07:51:13 UTC
Upt'North ¹ said :-
I had presumed they were spring type adjusters but was intrigued as to how you'd overcome the oil issue if it was hydraulic. I am a little concerned as to the longevity of some of these altered engines at the hands of weekend you tube mechanics (I don't include you in that category Ed). I can imagine many are delighted at the quietness of their newly altered motor, just before the snap and caboom.
Didn't some Fireblades and Blackbirds have hydraulic adjusters?
CABOOM! There's another one.
Upt.
30/07/2024 08:33:19 UTC
Ian Soady¹ said :-
I assume you've also made a gasket / used (a very thin smear) of RTV to stop oil leaks? And I'd probably also use a Dowty washer under the locknut for the same reason. I'd also make the hex head of the setscrew (which is what it is being fully threaded - a bolt has a plain section*) rounded off so that it turns smoothly on the back of the adjuster. But that's easy for me with a lathe.
Otherwise looks like a good mod.
*as a pedant would say
30/07/2024 12:33:30 UTC
Ren - The Ed¹ said :-
Gasket... GASKET!!! Oh Ian Soady I did sincerely hope you had a higher opinion of me.
When 2 surfaces are totally flat then you don't need a gasket. With my extremely precisely flat kitchen worktop and my 1200 grit wet-n-dry I achieved such a high level of precision flatness I don't need no gasket or no RTV. You may also wish to read that as "The 500 ain't leaking, if the 250 does we'll make a gasket".
You may care to peruse the images above. While I don't own a lathe I do own a file. And some sandpaper. The head of the bolt has been filed and sanded to at least a gentle curve with no sharp edges for the reason you state, to turn smoothly and to reduce damage to the guide.
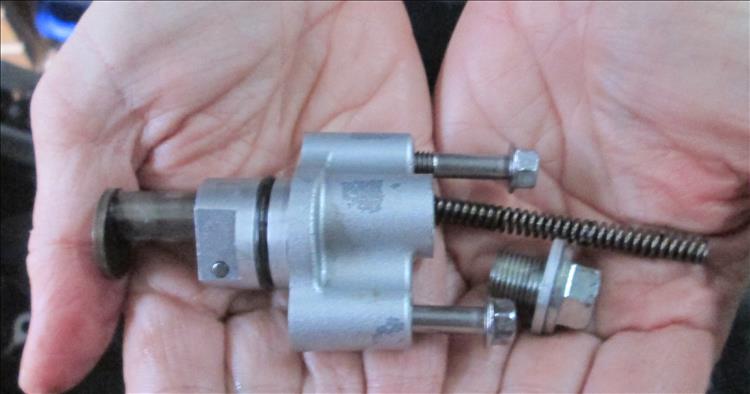
You may also notice the original CCT from the Kwakker only has a regular "flat" pushy bit.
 31/07/2024 08:08:11 UTC
Upt'North ¹ said :-
I think your dedication to flatness is commendable, although rather surprising given your hit it with a hammer prowess. Do you know if there are aftermarket springs available for oem tensioners?
Upt and impressed, although I am easily impressed.
Av ya seen the wife?
Ouch!
31/07/2024 09:18:25 UTC
Ian Soady¹ said :-
"You may also notice the original CCT from the Kwakker only has a regular "flat" pushy bit."
So it does. I also seem to see an O ring on the cylindrical part that fits in the cylinder block....
You'r right I didn't note the rounding. And still can't see it. One thing that has struck me is why not just put the setscrew in the other way round and use the end of the threaded part to push the tensioner? Smaller surface area and no need to round off.
31/07/2024 10:15:22 UTC
Ren - The Ed¹ said :-
It would have been easier to put the "setscrew" (the correct name, sure, but most folks will see a bolt) in with the thin end touching the camchain and the hexy fat bit (not the correct name, sure, but most folks will know what I mean) outside which can be used for turning the setscrew.
However - I'da thunk the pointy bit might put too much pressure on one particular point of the camchain guide. Having the hexy fat bit there spreads the load out as best as possible. And having the hexy fat bit being properly part of the bolt should, I hope, reduce the risk of the hexy fat bit falling of the setscrew into the engine and causing havoc.
There's no right or wrong, just different thoughts on the best way of doing stuff.
02/08/2024 07:15:54 UTC
Cidney said :-
We went to look at a Volkswagen camper, quite smart, we wandered off to look at other saw a salesmen carrying a lump hammer approach said nice camper, he kicked the wheel cover off, turned his back and lent against the body and proceeded to adjust the wheel bearings of said nice camper with his lump hammer.
He approached us and asked are you interested in something,no, with the service history of your camper and we are off somewhere else. Beware vehicles that have amateur mechanics 'fixing' them.
03/11/2024 20:46:34 UTC
Ren - The Ed¹ said :-
Errrrm. Thanks Cidney. I'm trying to figure out if your observation is simply a warning about amateur mechanics or a dig about my own rather "hammer based" DIY bodge jobs. I shall give you the benefit of the doubt.
There is ABSOLUTELY no doubt that some of my "repairs" (ie bodges and fudges) have been far from the right thing to do. I have made mistakes and I have had things go terribly wrong due to my foolhardy assumption that I know better than Honda/Kawasaki/Yamaha etc etc etc. They have multi million pound budgets, engineers who know the difference between a grade 8 bolt and a lump of spaghetti, millions of miles experience from millions of customers, and they have a reputation to think of too.
It would also be fair to say they're profit driven, perhaps build in some obsolescence and are not impervious to mistakes.
If you want your bike to be right do things right, the way the manufacturer did them in the first place. And as you rightly say if you want things right - don't trust amateur idiots like me!
04/11/2024 12:16:47 UTC
Glyn said :-
I sort of agree Ed but, if Yamaha we’re not trying to make maximum profits then they would have built their bikes using stainless steel fixings, stronger plastics, a decent coat of primer and top coat on their painted parts and sintered brake pads etc. I also sort of understand the enthusiastic owners that want everything to be as factory finish. However, I believe that it’s possible to improve on the bikes and don’t have much time for those who speak with sustain of my braided brake lines that are “not right” and that cable clip shouldn’t be there and that nut is not original. All hail the home mechanics be they badgers or brilliant engineers.
07/11/2024 22:10:24 UTC
Ren - The Ed¹ said :-
Yeah, a good painter can get a much better paint job done than a Yammy or Kwakker robot set for maximum profit. And I suppose if someone wants "concourse" I believe it's called then fine, that's their thing. You can probably guess my thinking on "concourse" though.
My problem is I'm seldom improving my bike, rather fudging it. But that's a matter of opinion too - while I know you all hate my handguards I believe they greatly improve my bike's cold and wet weather comfort levels. I'll admit they aren't visually stunning but when you're as handsome as I am you can get away with it.
They are magnificent aren't they.
 08/11/2024 12:22:10 UTC
Upt'North ¹ said :-
They are indeed unique, and only surpassed in ingenuity by your packing skills.
You're welcome.
Upt.
08/11/2024 16:11:10 UTC
Glyn said :-
In your picture the bike appears to be leaning to its left on the stand. However, the right hand guard appears to be lower. Is this a design feature or are your fingers longer on your right hand?
10/11/2024 09:16:09 UTC
Glyn said :-
Oh I forgot to say; they are indeed an embellishment that have a nice visual and practical advantage.
10/11/2024 09:18:10 UTC
Ren - The Ed¹ said :-
You're right Glyn in this image the handsome guards do look a little off kilter. I can only figure some kind of optical illusion is in play as they are, within my operating tolerances, even and level on the bike. As for my hands being uneven - not that I'm aware of. However having my left arm screwed back on at both the radius and ulna, and an intramedullary nail in the left humerus there might well be some difference in length of the arms.
I do have arthritis, but that's in my big toe on my right foot so I don't think it's that.
11/11/2024 08:01:50 UTC
Name
Comment
Add a RELEVANT link (not required)
Upload an image (not required) -
Uploading...
Home
Repair And Restoration