Home
Repair And Restoration
CB500X Getting To The Tappets
Guide Date - 10 February 2017
By Ren Withnell
After removing the tank (CB500X Tank Removal) The next and most daunting task is to strip away all the parts between the underside of the tank and the rocker cover itself. There are a lot of items here and getting them out is no mean feat.
Firstly disconnect the clutch cable at the engine end.
You'll need to move this cable out the way soon.
Next remove both throttle cables from the throttle bodies.
Yeah, these have to removed too.
The 2 throttle and the clutch cable run over a retainer on the plastic tray. It will take some heaving but push the 3 cables off the retainer and away from the tray.
Push the cables off the tang and away from the plastic tray.
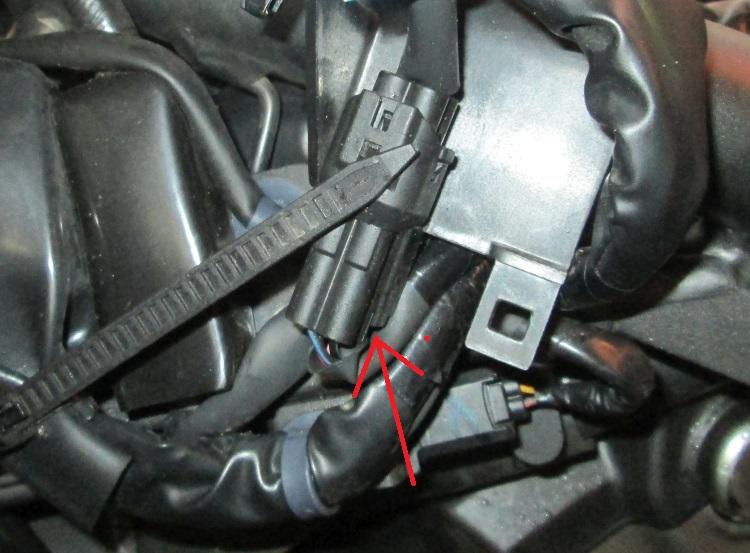
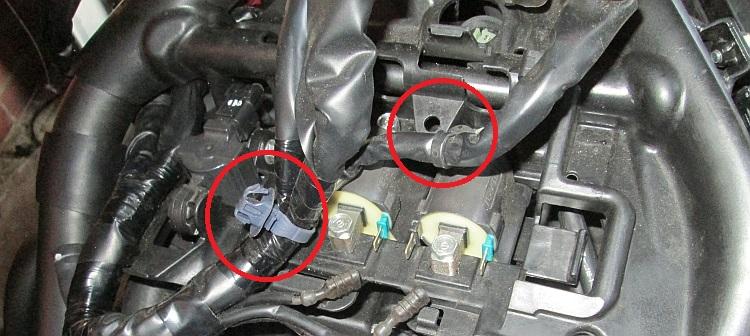
Now we can start on the electrics. On the left of the upper frame there are 2 connectors that need to come apart and the connectors also need to be removed from their plastic mounts.
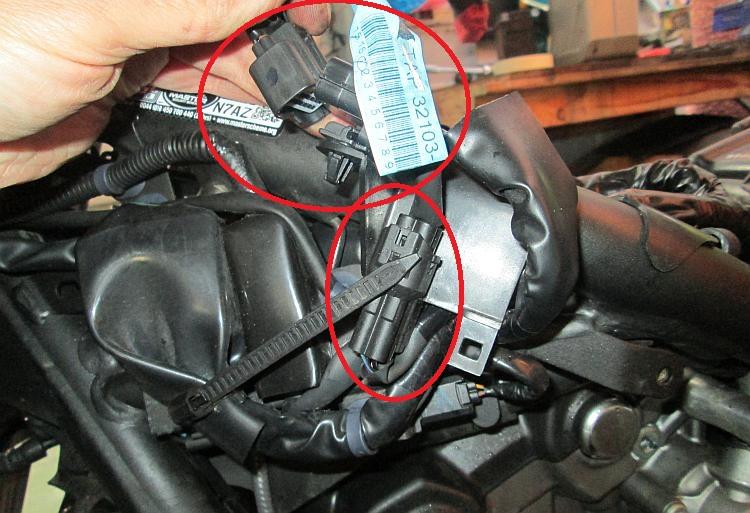
Disconnect these 2 connections.
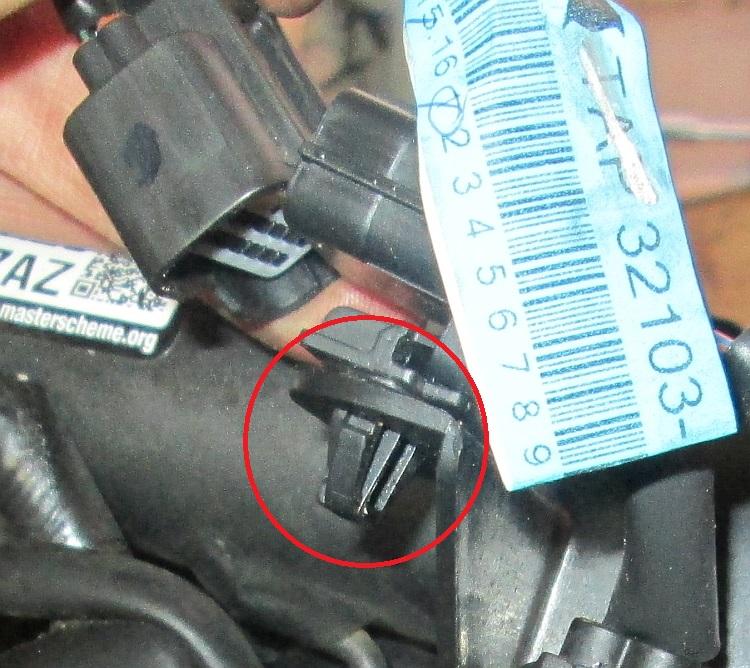
Squeeze the connector mounting clip tangs to remove it.
FIDDLY! Carefully insert a narrow small screwdriver where the arrow points to release the connector from the plastic plate.
Next remove the ECU and the indicator relay from the top of the tray.
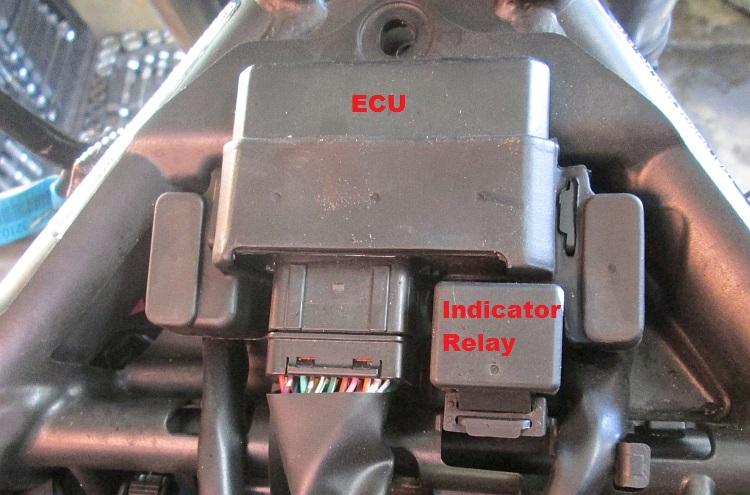
The ECU and indicator relay need to be unplugged and removed.
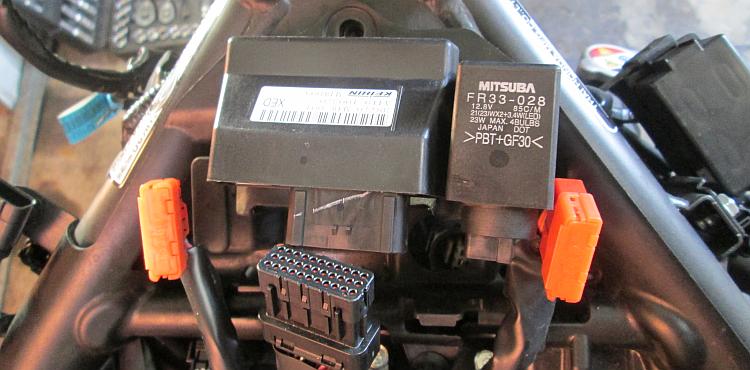
Be sure to note what goes where. I have no idea what the orange things are.
We can now start to pull the wires away from the tray. There are several clips holding the wires onto the tray. If possible squeeze the botton of these clips with long nose pliers to ease them out. Access is awful though, I pulled one out which did damage the clip.
Also the coils can be unplugged. Ideally each connector should be numbered with some masking tape and a pen, fortunately they are cut to size so it does remain obvious which one goes where.
Remove these clips and the wires from the tray
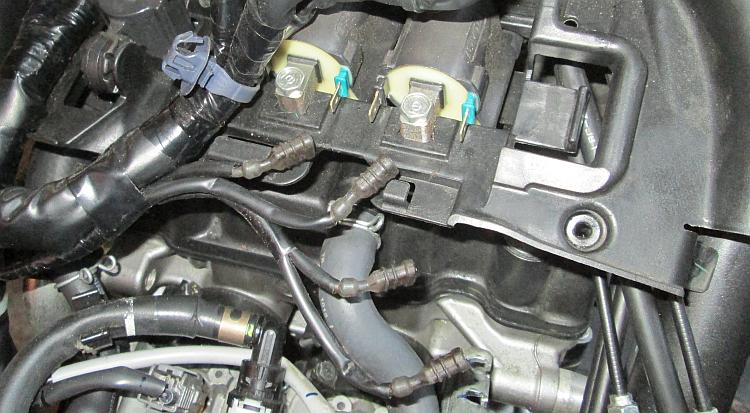
The wires to the coils are cut to length
There is one more wire clip on the tray and this caught me out. To the far left the wires run over then under the tray. The clip is awkwardly located here.
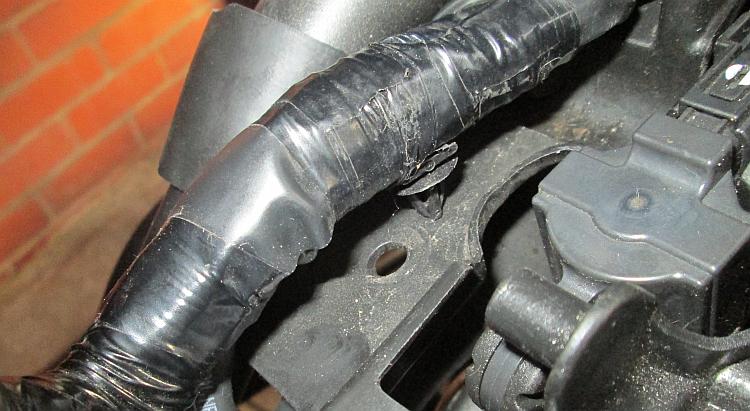
Don't forget this one.
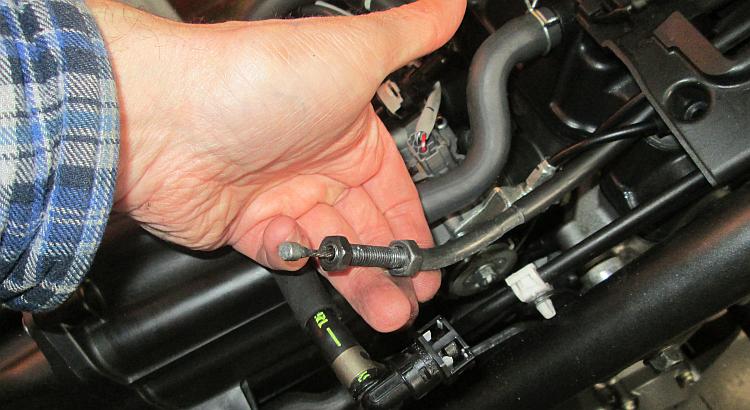
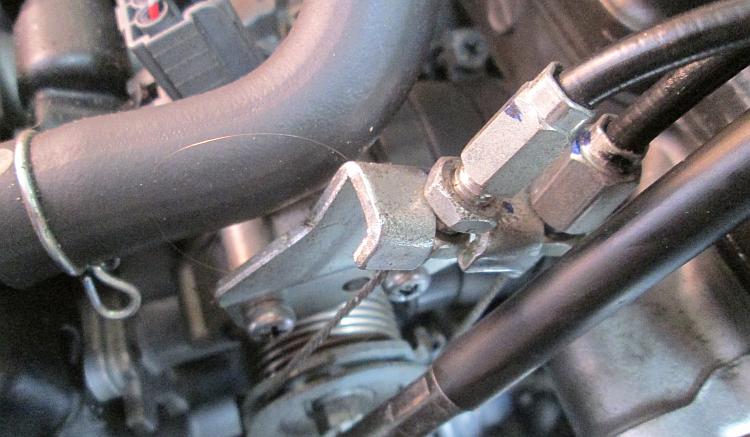
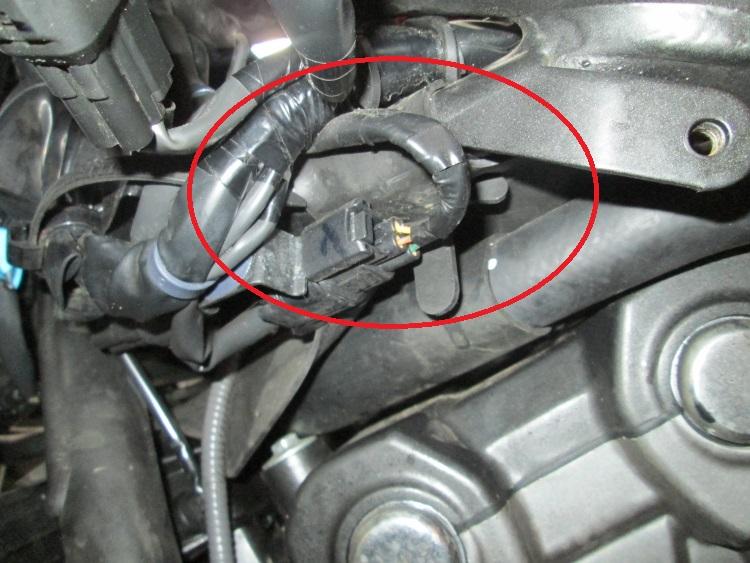
Now disconnect the PAIR Valve from the tray. At one end is a 10mm nut and bolt with fiddly access. Once this has been removed the other end attaches to a spigot and can be slid off.
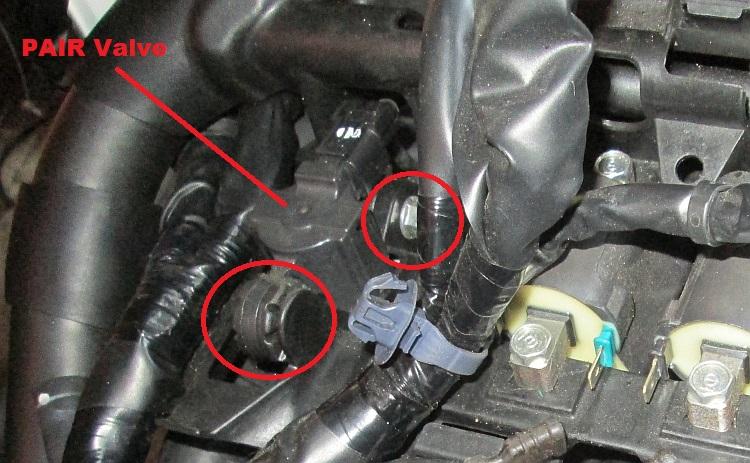
Undo the nut/bolt circled, slide off the spigot circled.
At this point I chose to unplug the wires leading to the PAIR valve too although other similar guides don't seem to think this is required.
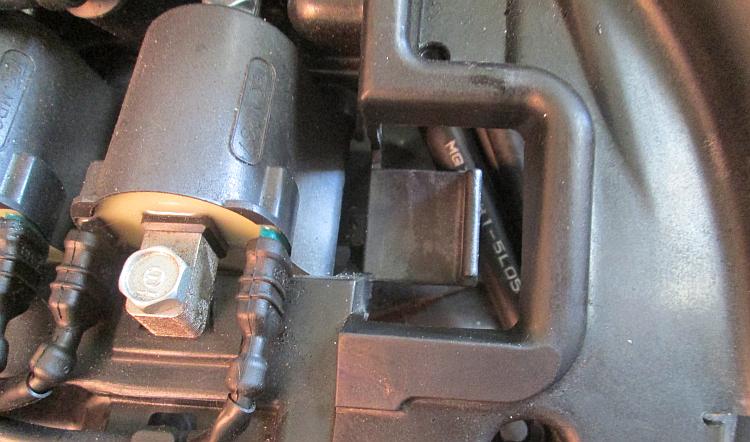
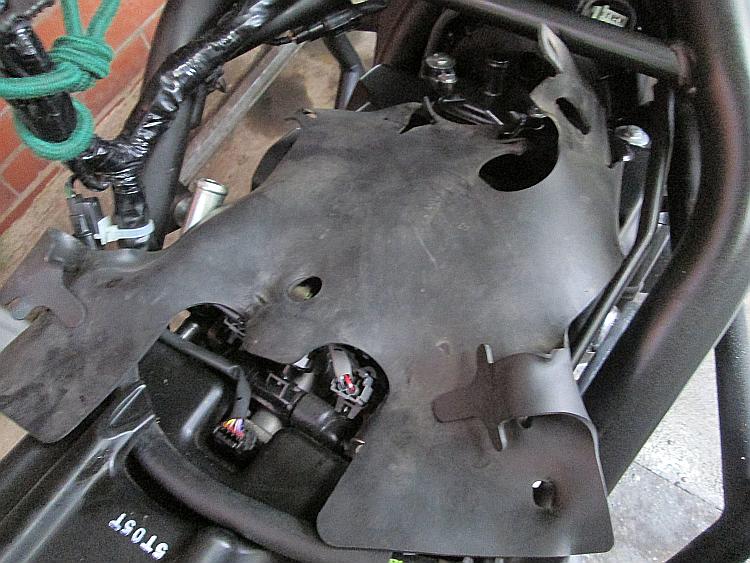
Theoretically now everything is ready to lift the tray off the frame. PROCEED WITH CAUTION! Keep a constant eye out for remaining wires, pipes and other such items. Undo the bolt at the top of the plastic tray.
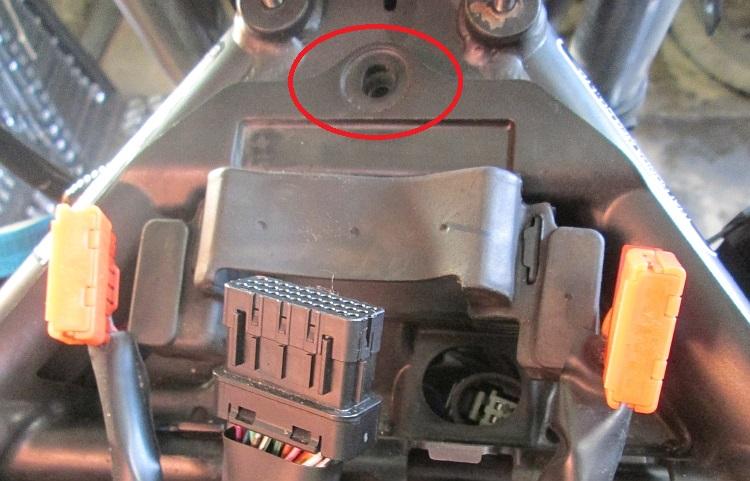
This is where the bolt erm, was.
Start on the right of the frame, the plastic tray should lift a few centimetres. When there is enough space you can reach in and pull the spark plug caps off the spark plugs. This is fiddly. Continue to lift the tray being careful not to pull wires. The thick bundle of wires to the left runs over then under the tray and the tray partially wraps around the frame.
Regrettably I have no better advice than to delicately wrestle the tray, upwards at the front and then twisting around to unhook from the frame and clear the wires. This is hellish fiddly so take your time, do not get angry and start yanking. Keep at it carefully until the tray comes away from the frame. Patience dear friend, you've come too far to spoil things now.
When the tray comes away now is the time to run up and down the street screaming "I DID IT" holding the tray aloft like a trophy.
Now you can remove the PAIR valve by simply unclipping one pipe from the rocker cover, the other end from the air box. Oh, you still can't see the rocker cover? There is a rubber sheet covering the rocker cover. This is held on in many places. First undo the top radiator mount, push the radiator forwards just enough to unhook the rubber from the mount.
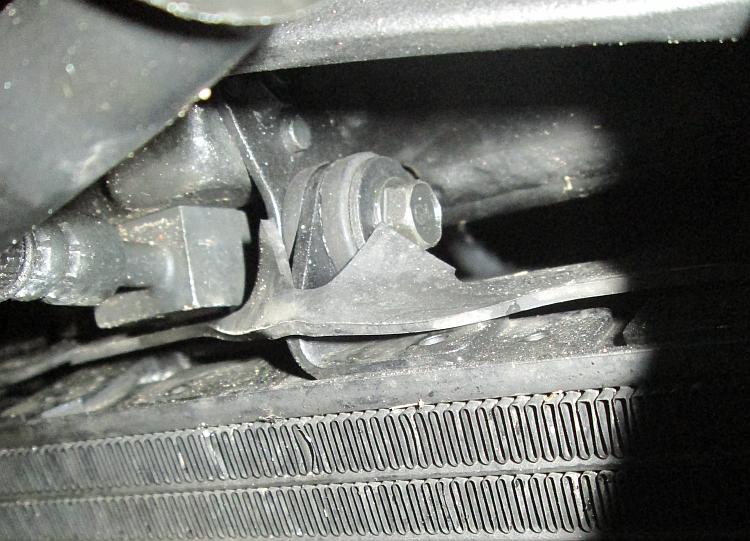
Undo this bolt and remove the rubber sheet around the mount.
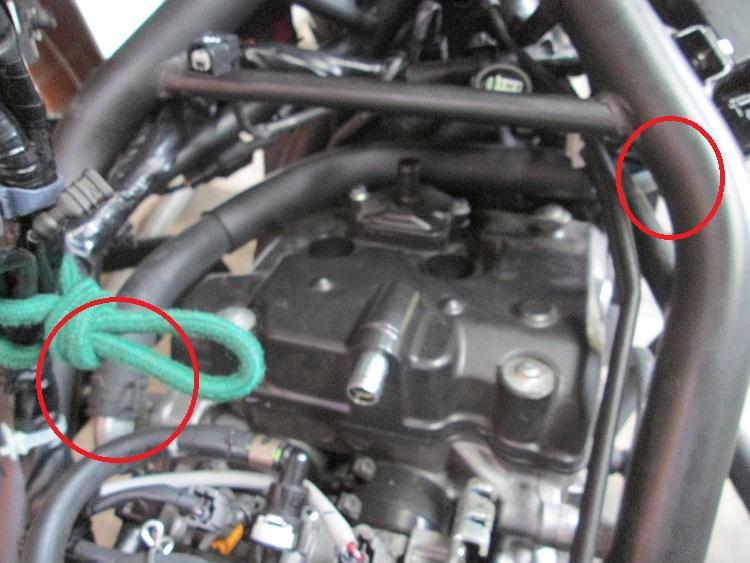
The rest of the rubber sheet (apparently some kind of heat sheild but I suspect it also keeps dirt away from the electrics) is fixed in various places to hooks and by wrapping around the frame.
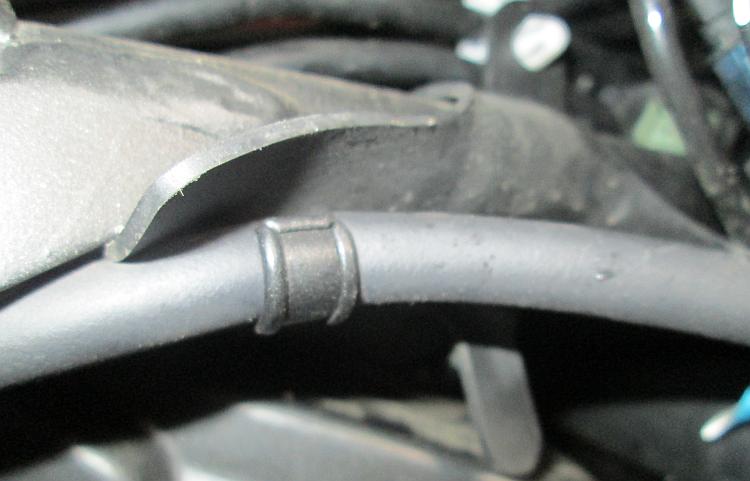
Rad to expansion tank tube...
Wraps around here...
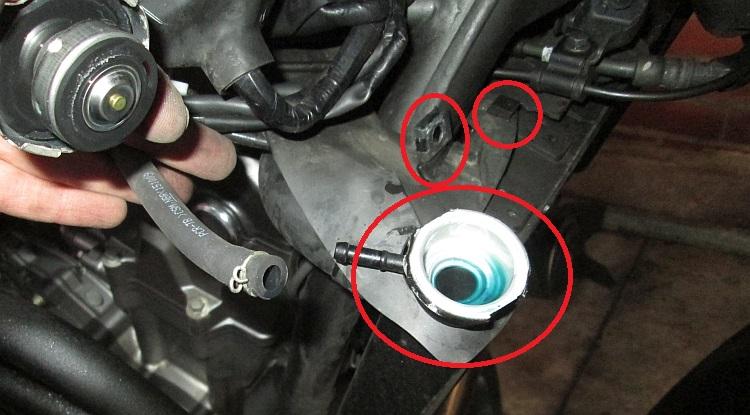
And here and here and here...
And once more around the frame on the right hand side. And another lug on the left of the top of the radiator. Phew! Pull the rubber sheet away, again carefully in case I've forgotten somewhere else.
I'm sure there's a couple of other locations too.
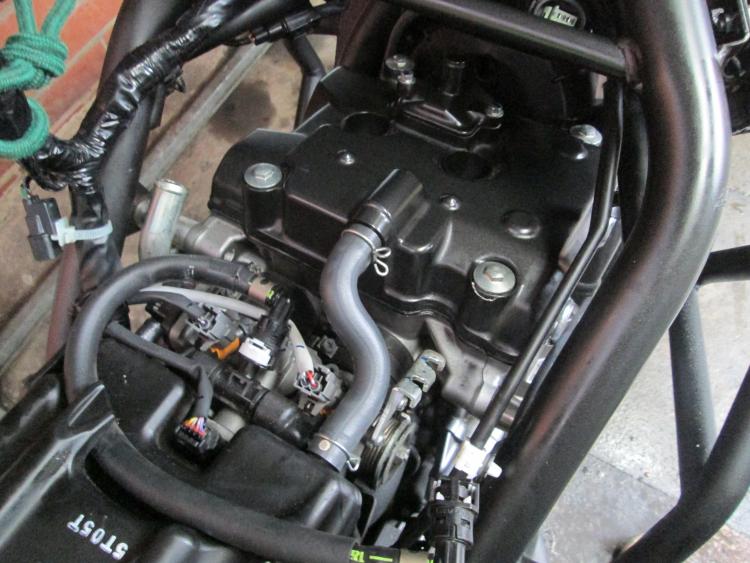
Some guides suggest unclipping the brake lines to allow access. Personally I wasn't too happy about moving solid metal pipes especially as these are brake lines. Instead I removed the top coolant hose from the radiator to the rear of the rocker cover.
The clips are easily removed. Be prepared for coolant to come out of the pipe and the top of the radiator.
Apart from the small pipe from the airbox to the rocker cover - you are done! Give yourself a pat on the back, go and make a nice cup of tea and announce to the world that you are a mechanical genius. Adjusting the tappets next...
Well done for coming so far. That's the hard part over.
Have you got a great guide to some natty motorcycle mechanical task you'd like the world to know? Is there a better way to set the Fernarkel Valve on a Grumpet 740? Is there a magical way to change a motorcycle tyre without using big levers that scratch your wheels? We'd love to hear it and put it on this website. Click Here.
Reader's Comments
pocketpete said :-
My GOD arnt you worried it wont go back together again. I simply dont think I could ever have the confidence to strip my like this.
20/02/2017 17:06:26 UTC
Bob said :-
For a modern bike that's not too bad. My old KLE500 required the coolant drained to get the tappet cover off!
Sorry to keep banging on about it, but my Honda Vigor has just two bolts for the seat, one for the tank then the tappet covers unscrew with a 24mm spanner - bliss
21/02/2017 12:07:18 UTC
Ian Soady said :-
Two bolts for the seat? Pah, the Super Four seat comes off with a rwist of the key, then 2 (easily accessible) bolts for the tank. I do remember those SL650 bolts being a bit of a pain to get at as well especially with hot exhausts....
21/02/2017 14:23:15 UTC
Ren - The Ed said :-
There were a few times Pocketpete where I was rather concerned that I might not get everything back together. One handy tip - take lots and lots of pictures. I did this to create this post but those images proved INVALUABLE in getting everything back together as it ought to be. There's so many little details that can be forgotten.
I remember the 2 bolts under the seat on the SLR650. I spent an age trying to figure out where to put my key to lift the seat all to no avail. I couldn't believe there were two little bolts. Of course being under the undertray and in direct line of fire for all the dirt from the rear tyre mine were seized solid and rusted in place. The Dremel was required to get the blasted thing off.
21/02/2017 16:11:39 UTC
Chris said :-
Thanks! Massively useful, compared to trying to figure it out from the factory manual. Don't know if I'm going to get that black sheet back in place right, though. Amazingly bad design, Honda. Try taking apart a BMW one of these days.
16/12/2018 04:57:54 UTC
Nico rodriguez said :-
After like a week of doing little by little Im finally close to finished rewiring, I suggest taking pictures of the wires before taking it apart and I also suggest taking pics of the throttle and clutch cables so you onow where to adjust them back to
11/06/2022 17:57:36 UTC
Nico rodriguez said :-
After like a week of doing little by little Im finally close to finished rewiring, I suggest taking pictures of the wires before taking it apart and I also suggest taking pics of the throttle and clutch cables so you onow where to adjust them back to
11/06/2022 17:57:37 UTC
Ren - The Ed¹ said :-
Good call Nico rodriguez - a picture can tell a thousand words. My newer 2018 model has a evaporation cannister on it whereas the 2016 model didn't. It's not a complex part nor is the fitting... if you can work out the exact routing of the pipes. I spent far too long trying to suss this out and a few moments taking some pictures would have helped a great deal.
13/06/2022 13:57:31 UTC
Name
Comment
Add a RELEVANT link (not required)
Upload an image (not required) -
Uploading...
Home
Repair And Restoration