Home
Repair And Restoration
Leaky Tyre Bead Repair
Repair Date 9-4-16
By Ren Withnell
In my previous post Leaking Tyre Bead Temporary Fix I explained how my tyre started to lose air and how I temporarily fixed it. Today with the help of SL, my bessie mate 'cos 'es got all the gear innit, we have affected what I expect will be a full and proper solution.
My concern was the seal between the tyre and the rim was poor not only due to the ingress of dirt but potentially because the alloy of the rim had corroded. If that was the case then we would need to look at either repairing the corrosion or possibly replacing the wheel. To make a proper inspection the tyre needed to come off.
Over the last few years SL with a little help from myself has been working on DIY tyre removal and refitting. His latest incarnation is a kit purchased from Ebay which I have not seen in action. With minimum guidance and the application of a little tyre lube my tyre was off the rim in a jiffy and I must say I was most impressed with the way the kit works. Now to inspect this here rim.

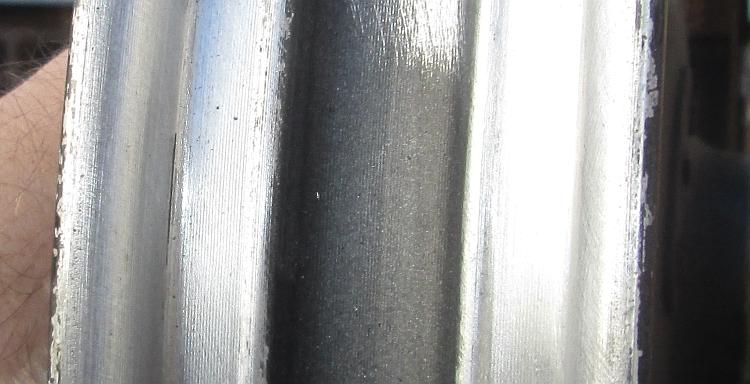
It's not a disaster and the corrosion has not eaten into the material.
The paint is poor and flaking off, luckily the corrosion on the face that mates with the tyre wall is very light indeed. To be honest we could simply wipe down the face of the rim and tyre, put the tyre back on and I'm sure everything would be just fine. But hey! The tyre's off, the day is young and we're 2 tinkerers in a garage filled with tinkering stuff. Rather than leave it all flaky and faded I used SL's nylon filament wire drill brush to clean things up. Once more I am impressed, the nylon is harsh enough to remove the paint but gentle enough to leave the alloy rim intact. A wire brush would have been too harsh.
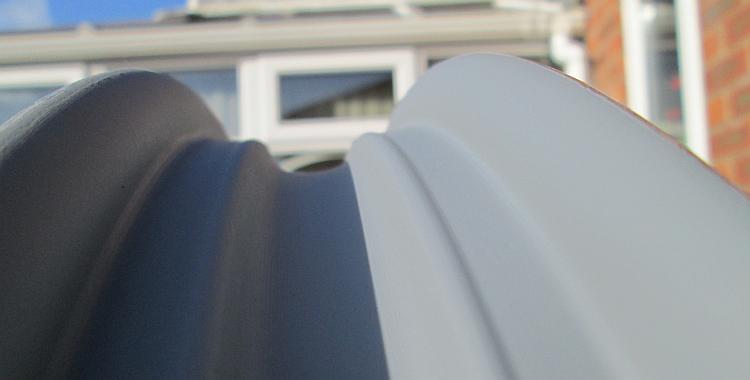
That's better, much better.
So I have shiny rim walls. Rather than leave them bare SL roots around in the garage and finds what he assures me is top quality primer in a rattle can. After 5 minutes of rattling along with jokes about how rude the rattling action looks SL starts to spray. 1 coat followed by a dose of heat gun then another coat for good measure sees the inside of my wheel looking better than it did when it came out of the factory. SL wants to spray the whole wheel and make it all look nice, I decline his kind offer, it's taken me years to get the "patina" of the 125 just right.
Wow! That's happiness right there. That should see me right for a while longer.
The second part of the tyre fitting kit is a complete revelation! No heaving on tyre levers that dig into the new paintwork, no jumping up and down on tyres and wheels, just a simple sweeping action and a clamp then the tyre pops in as easily as ziping up a coat.
So big thanks once more to SL for his assistance, advice, tools and spray hand. I shall at some point in the future create a video of the tyre removal/fitting kit he has created. Right, I'm off to replace the front wheel and make a brew.
Reader's Comments
S Latchford said :-
Tally ho another happy customer, sorry there were no cake or biscuits but you had two free cups of tea
09/04/2016 13:33:14 UTC
Ren - The Ed said :-
Yes the lack of cake and biscuits has been noted. Shall I start work on that "SL Tyres" website? What are your opening hours?
10/04/2016 07:06:12 UTC
Alan said :-
Mr Latchford. What is the name of this magic tyre putteronnerandoffer and would it work with quad bike tyres. Tyre replacement here is done by the local ironmonger/blacksmith, he does a good job but it is done in Spanish time which can take several days depending on the time of year and how many fiesta's are back to back. I am getting about 5000 Km out of a set of quad tyres and if I can fit them myself I would save the nearly the price of a tyre each time.
08/01/2017 19:54:18 UTC
Ren - The Ed said :-
Hi Alan. I'll put a link to the tool Latchy uses. It works very well although to make it work so well Latchy used his woodworking skills to create jigs to hold the wheel firmly.
m.ebay.co.uk/itm/Tyre-bar-lever-Manual-machine-changer-alloy-wheels-car-motorcyc...
09/01/2017 10:29:25 UTC
Ren - The Ed said :-
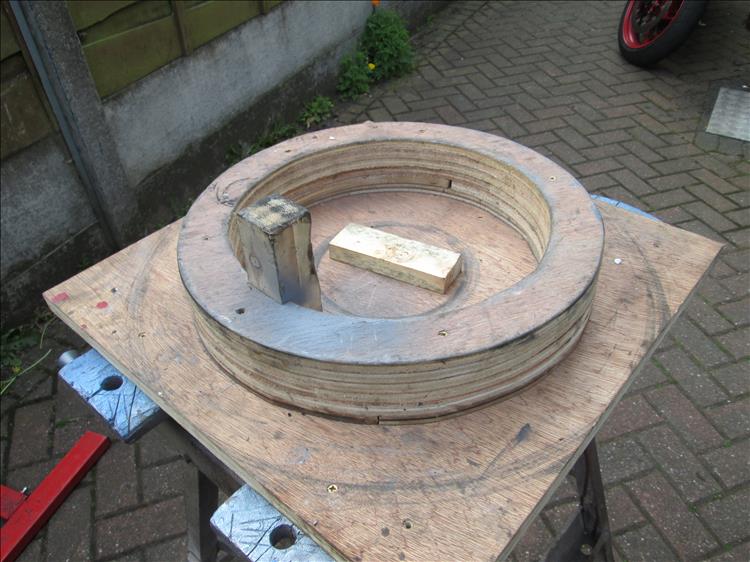
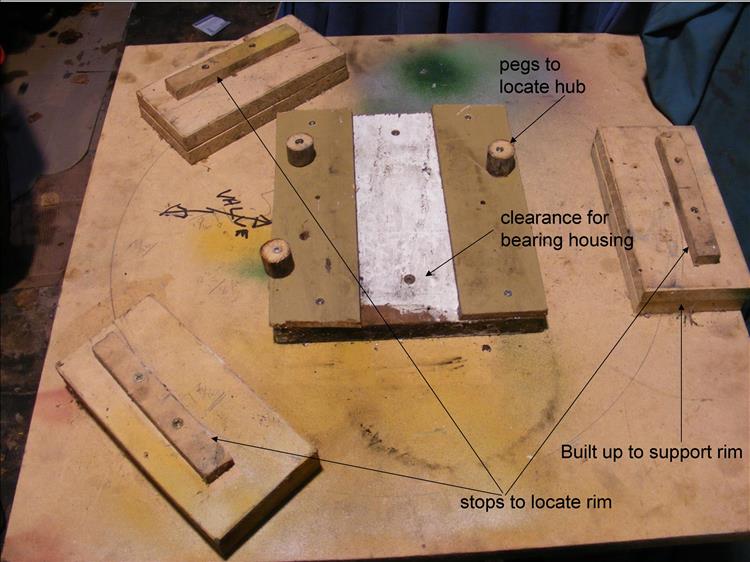
Hopefully this is an image of the jig to keep the wheel in place. Wood is the best material as it greatly reduces the risk of scratching the rim.
This is for 17inch rims which are common on the bikes Latchy has. For other sizes and rim styles you'd need to engineer your own solution.
 09/01/2017 10:37:01 UTC
Ian Soady said :-
Very impressive.
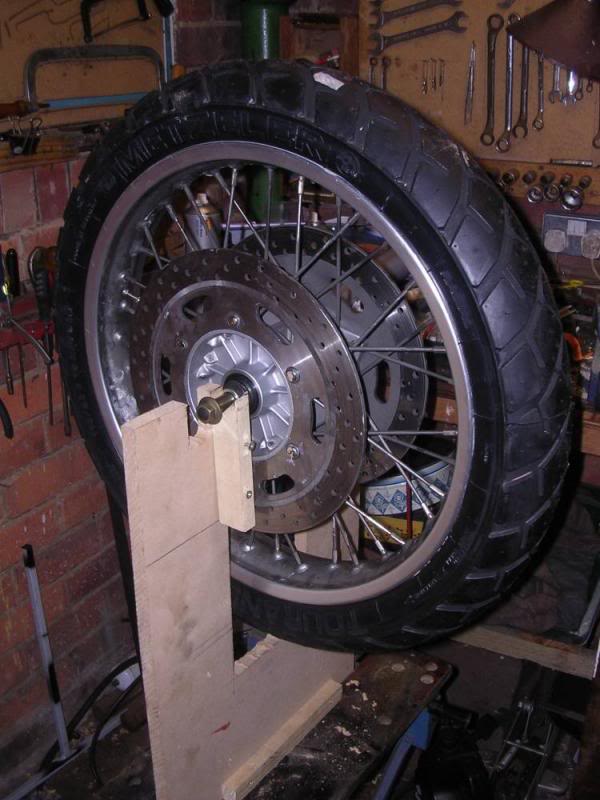
However, the one I made (which was adequate for the mighty Tiger 955i tyres) was much simpler - merely a square of 4x4 with one leg extended.
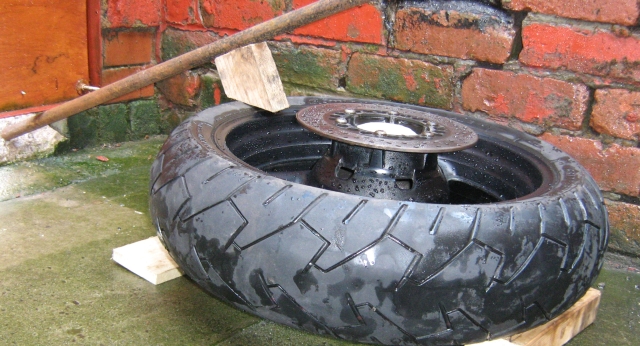
I can't be bothered to dig the jig out of the garage but here's a pic of it in action. The strap is a bit on the feeble side!
 09/01/2017 12:23:12 UTC
Ian Soady said :-
And this is a jig for wheelbuilding / balancing - made of mdf:
 09/01/2017 12:24:03 UTC
Ian Soady said :-
And just in case anyone fancies trying their hand at wheelbuilding, this is another MDF creation (with grateful thanks to Radco's Vintage Motorcyclist's Workshop):
 09/01/2017 12:28:49 UTC
Ren - The Ed said :-
Oh Ian you just have to have it all don't you! Breaking the bead is a bitch...
 09/01/2017 14:31:43 UTC
Ren - The Ed said :-
...but balancing a wheel with DIY Wheel balancers is easy. See the link.
www.bikesandtravels.com/biker.aspx?ride=349...
09/01/2017 14:32:29 UTC
Ren - The Ed said :-
I hope Alan has enough to be going on with there. Alan...you're in them there Spanish mountain thingies...is it you or another Alan that also works on the ship? Am I speaking to one or two Alans here. We need a nickname system.
09/01/2017 14:33:57 UTC
The lurker said :-
Oh no we don't........
09/01/2017 14:49:38 UTC
Ian Soady said :-
I like your balancing system but feel the bearings on the stands may be overkill. I found that the wheel bearings themselves were OK although that may be the Pareto in me talking.
09/01/2017 14:51:16 UTC
Borsuk said :-
Previously known as Alan in Spain, Alan in Huddersfield and Alan on big boaties in Brasil.
:-)
Thanks for the links. This may bear looking into in the future, probably in another 5000 km or so. My mechanical skills are passable, my metalworking and welding are dire but unfortunately my woodworking skills are somewhere between abysmal and nonexistent. But as the bar costs the same as ATV tyre and a few old bits of wood I am sure I can come up with something.
09/01/2017 15:30:04 UTC
Ren - The Ed said :-
So Alan now Borsuk is one in the same, PHEW! Yeah Latchy actually fabricated the actual bar himself then bought the fittings as a kit, it's a bit cheaper that way. You *could*, with a fight, probably use the bar and the wheel spindle or something similar without the wood to mount the wheel but it would make the task very fiddly. I'll see if I can find a video of one in action as that will make it all much clearer.
Overkill Ian? Pah! You can never have enough bearings anyhow wheel bearings ought to have seals and grease in them, all of which "dull" the freedom of the bearing. With my set up I could balance to 0.00001 grams. Needless to say I don't.
09/01/2017 15:54:25 UTC
Ren - The Ed said :-
This video shows the bar in action. NOTE! His bar seems massive, the one in the advert and the one Latchy uses is smaller, perhaps 2-3 feet long
The stand in the video is ideal...for wheels with a decent size centre hole. I have seen them advertised for motorcycle wheels too but you'd need to be sure of the wheel spindle hole sizes before you buy.
www.youtube.com/watch?v=ms8Fbi-p-Gk...
09/01/2017 15:59:07 UTC
Name
Comment
Add a RELEVANT link (not required)
Upload an image (not required) -
Uploading...
Home
Repair And Restoration