Home
Repair And Restoration
Sharon's Headlamp Saga Continues
Post Received 19th May 2021
By Bogger
Indeed it does continue, but the end is in sight. Possibly.
Ren/Bren/Ed has been bleating on for ages about the headlamp in Sharon's Kawasaki. Basically it was a mess. Personally I put it down to lack of care? But Ren refuted this claim and pointed out the error of my assumptions.
He’s tried to get a freebie out of Kawasaki UK, but they are obviously wise to his Northern tricks and basically palmed him off with some excuse or other as to why they could not replace the headlamp free of charge. Anyway, because I’m a nice bloke(?) I somewhat foolishly offered to ‘have a go’ at rectifying the problem. Like a rat up a drain pipe he was round our house in a flash. Copious amount of tea were drunk and Mrs Bogger bought out the posh biscuits. The headlamp was left in my care. The fool.
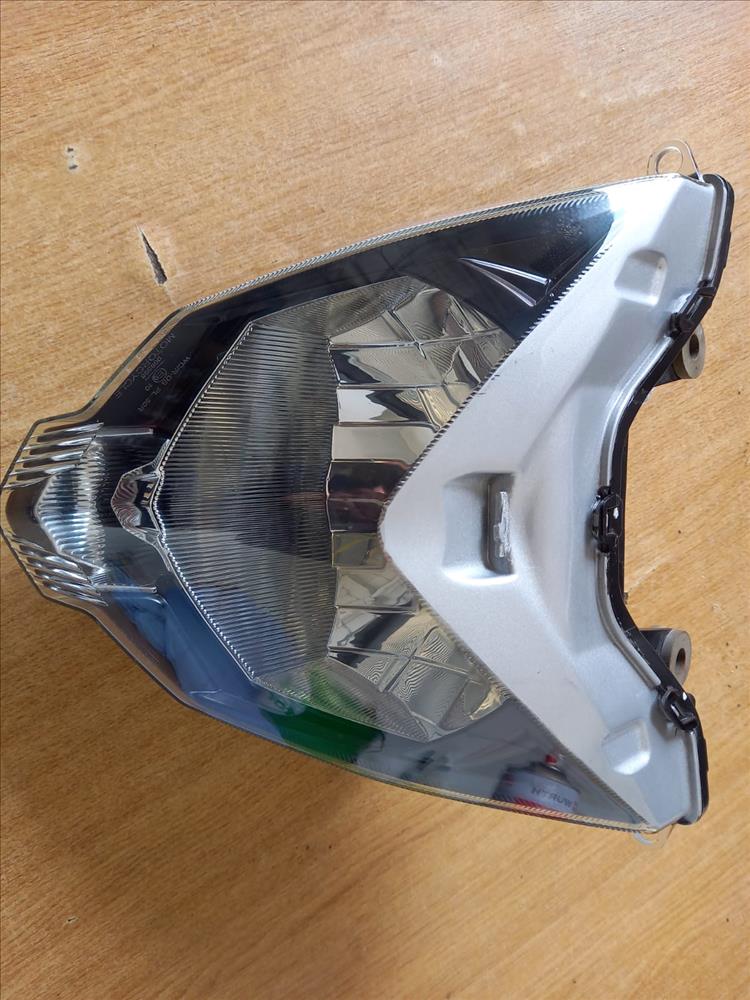
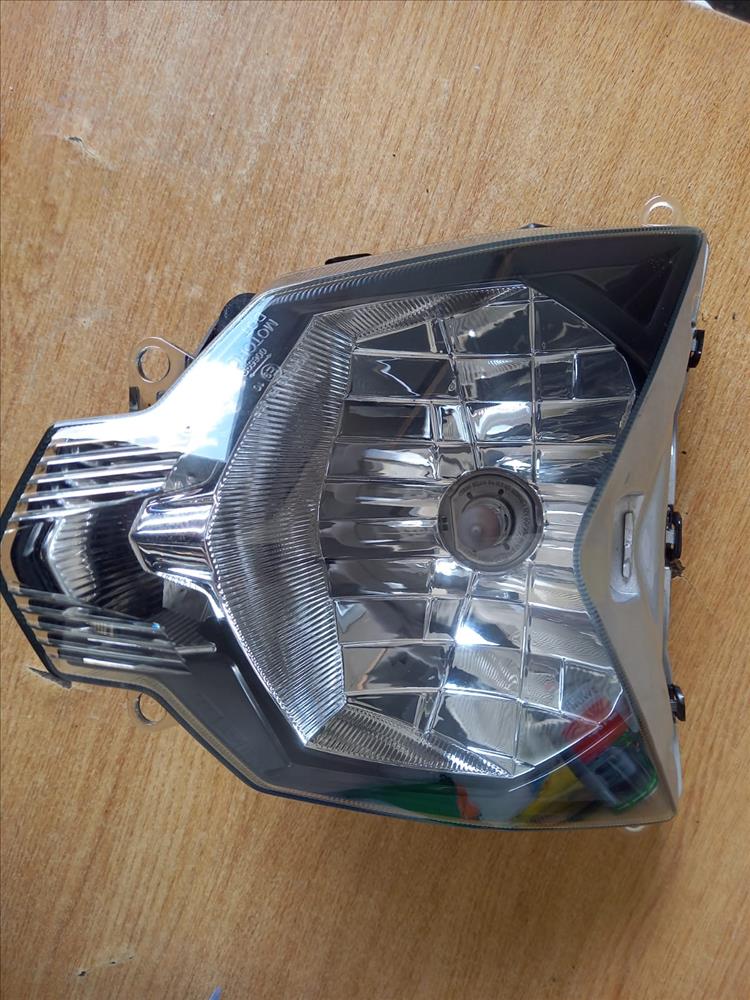
I had a good look at the lamp and it seemed that the lacquer coat was lifting from the lens itself. I took the lamp to work. The first thing to do was to sand down the lens in stages. I started (Oh, when I say I, I mean one of the painters) with a 180 grit sanding disc. This took off most of the lacquer coating and underneath the plastic lens actually looked OK. We had been wondering whether the plastic lens was also fracturing. It wasn’t. Happy days.
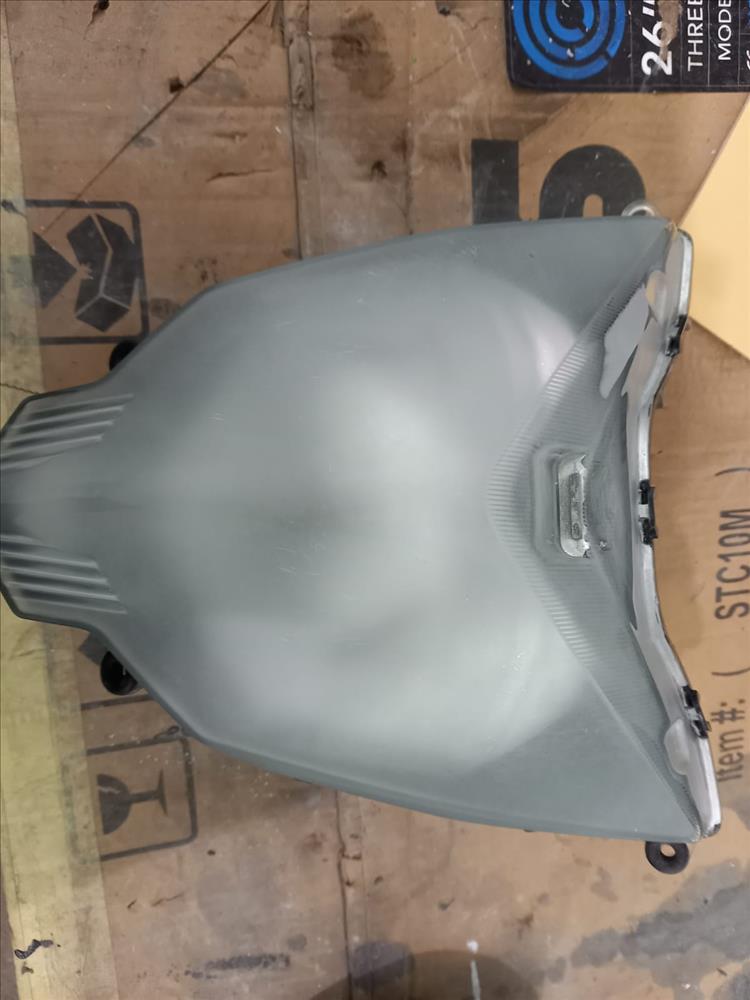
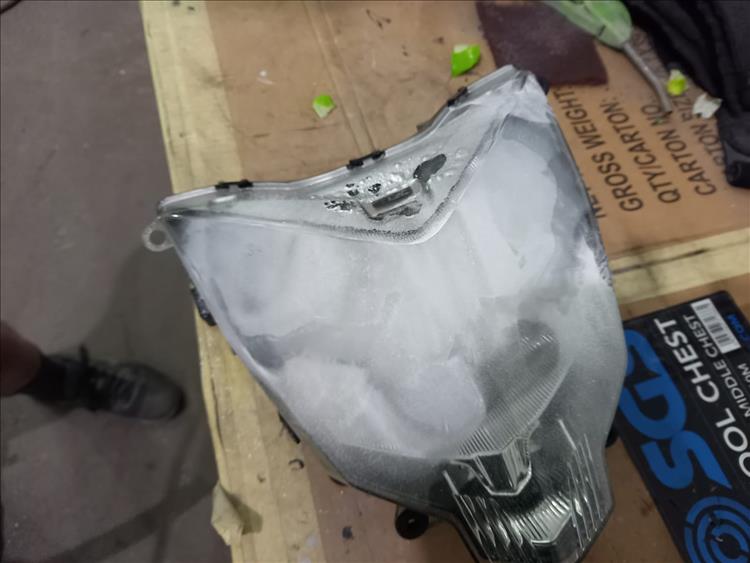
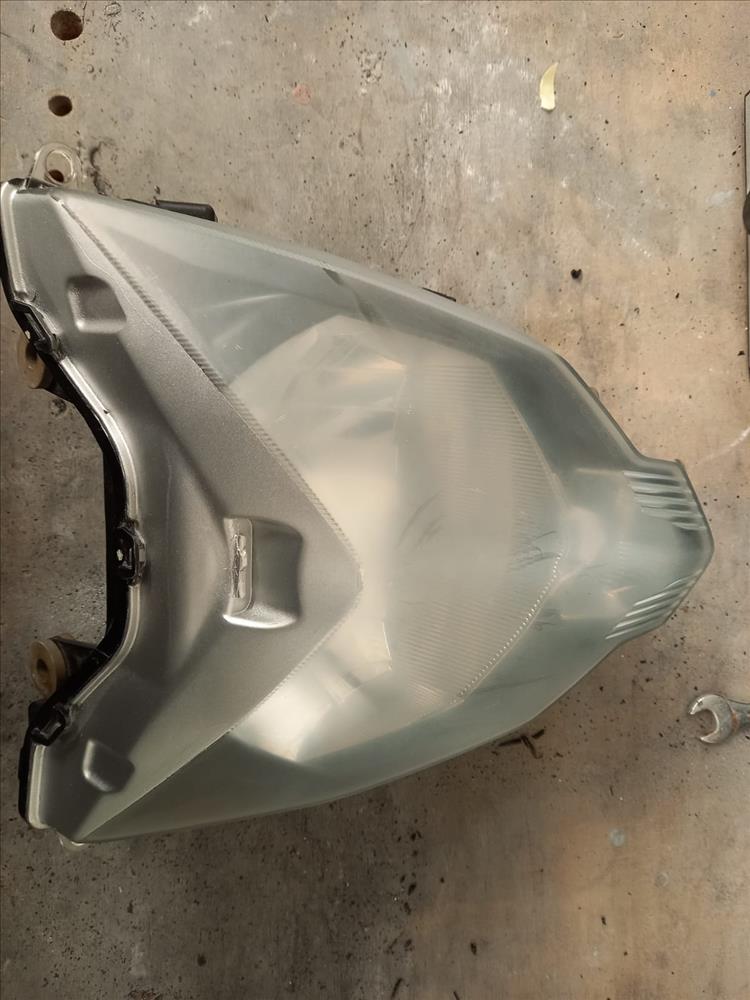
The next stage was 320 grit sanding discs. Then onto 500 grit, 800 grit, 1000 grit, 1500 grit and finally 2000 grit. That sounds like a massive amount of work but in reality took about twenty minutes. This was using an orbital sander.
The finish on the lens was now very dull but scratch free with a good proportion of the original lacquer sanded away. When the lens was de-greased and the lens was wet with the de-greaser, you could see that once the fresh lacquer was applied the end result would be OK as long as the ‘finish’ was good. I.E. no runs sags or dirt inclusions.
I and I really do mean me this time, fine lined and masked the upper portion of the headlamp. This section was originally silver but had also started to suss up and flake. I gave it a few coats of an aerosol silver we had knocking about. The lamp was then de-masked and re-masked so as the complete facia of the lamp including the silver part could be lacquered.
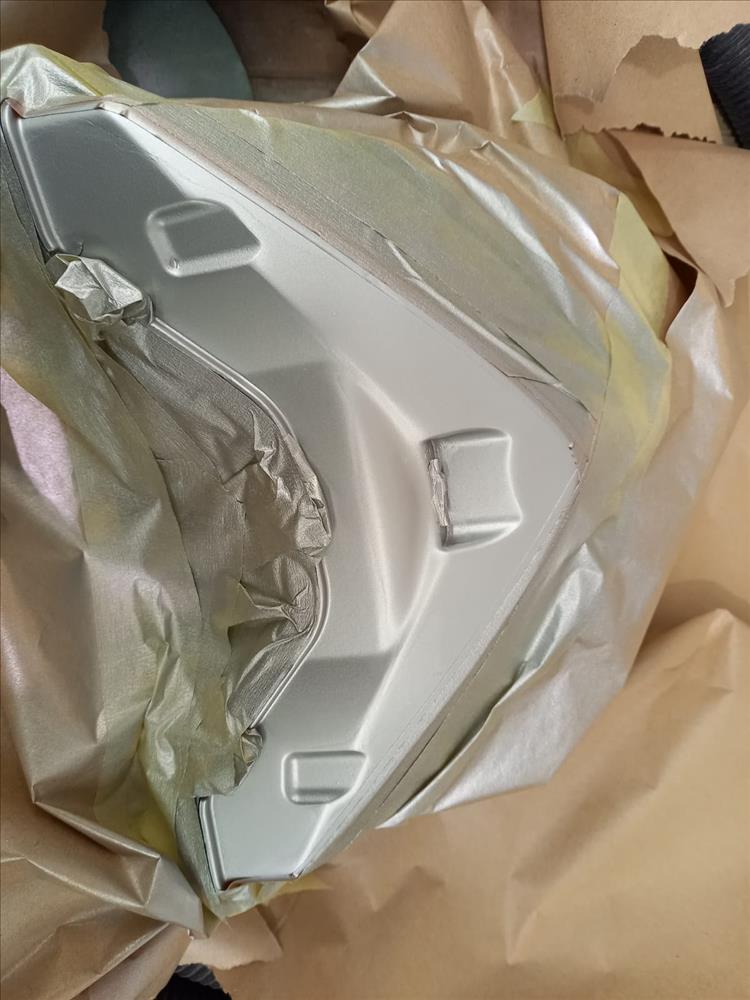
I left this for a painter to do. He didn’t let me down, he managed a really good flat finish with just a couple of very small dirt inclusions. The lamp was baked for forty minutes at 60* C.
The only thing left to do was to de-nib the dirt inclusions first with 2000 grit then 3000 grit and finally 6000 grit soft pad flatting discs and buff up. I did that bit, honest.
Personally from what we started with, I think it’s come up rather well.
Bogger
See also Z250SL Headlight Crazing
If you want to fix all of Ren's bodges contact ren@techsolus.co.uk
Reader's Comments
Bogger said :-
Fix all of Rens bodges? There's not enough time in the world, ever.
Bogger
27/05/2021 07:22:30 UTC
Ren - The Ed¹ said :-
Thanks to you and your team for the fabulous functional light. Now, about these handguards...
27/05/2021 19:13:37 UTC
Upt'North ¹ said :-
Well done Bogger.
Upt'North.
27/05/2021 23:04:26 UTC
Bogger said :-
I fear I may have made a rod for my own back.
Bogger
28/05/2021 13:38:33 UTC
Upt'North ¹ said :-
I think the "Rod" probably started Bogger when you gave him your address.
Then posh biscuits.
Then apparently good work.
But of course a large bill + VAT may scare him away.
Half an hour of your time +
Half an hour of painters time +
Paint and materials +
Scare Ren away tax +
VAT.
I'm thinkin £350.00 + VAT. If paid within 14 days.
Seems fair.
Upt'North.
28/05/2021 16:40:42 UTC
Ren - The Ed¹ said :-
£350 + VAT?!?!? Do you mind Upt' I'm trying to avoid heart attacks at my age. A new headlight is around £315 - this being said I daresay since the old one's been "Boggered" it's likely better than new.
29/05/2021 17:31:26 UTC
CrazyFrog said :-
What did I miss? I thought you replaced the headlight with one from a Z125?
29/05/2021 19:49:43 UTC
Ren - The Ed¹ said :-
We did CrazyFrog, we did. However I remained curious as to whether the lens itself was cracked or simply the top layer, the lacquer. Bogger answered my question and also provided Sharon with a spare headlight to boot!! Oh, and lots of tea n biscuits and a tour of Bogger's shed.
Also Bogger has indeed made a rod for his own back while shooting himself in the foot. He'll soon learn to dread the sound of a 471cc twin outside his house as that blasted annoying website plonker hangs around in search of biscuit, tea and mechanical assistance. Poor Bogger.
29/05/2021 22:20:31 UTC
CrazyFrog said :-
Oh, I see, all in the interests of scientific investigation, well done Bogger...
30/05/2021 18:54:22 UTC
Bogger said :-
I'm gonna keep my head down.
Bogger
31/05/2021 13:51:29 UTC
nab301 said :-
Excellent job Bogger , a quick technical query , when you removed the lacquer did you polish the plastic lens until it was clear and then lacquer it ? I'm thinking car headlamp restoration kits here , where you polish cloudy lenses until clear .
Nigel
09/06/2021 21:33:50 UTC
Ren - The Ed¹ said :-
Yeah I'll second that nab301. For those readers without access to their own team of sanding and polishing and lacquering minions, for those who don't have a heated paint bay and for those who don't have a local Bogger willing to do the work.
10/06/2021 08:30:41 UTC
Bogger said :-
Nab it was as described. Keep flatting it back with ever finer wet or dry. Then lacquer it. The third image down on my write up it just prior to de-greasing and Lacquering.
You could easily do this at home. This is as long as you use a 2k, as in an activated lacquer. You can buy proper full on 2k from the likes of Evil bay. The one I have used and had really good results is named 'Pro-XL'. Each tin costs about £25.00.
I'll say it again, make sure it is the full on 2k product (they do a 1k lacquer and the tin looks almost identical). The Pro XL one has a twist and pull ring on the bottom of the can. This punctures the hardener contained inside the can. Thus the activation of the lacquer begins. Sounds a bit complicated, but basically it's pull, twist, shake then spray.
The only thing I will say is that the Pro XL lacquer is VERY high build. If you try and get a 'finish' in one hit it will run and sag for Britain.
So two light coats with a ten minute flash off in between. Then finally a wetter coat to get the finish. If you take your time the results are excellent.
There is a lot of product in a can and it's surprising how much you can lacquer. You could easily lacquer a full bumper off a car. If you want any more info let me know.
Bogger
10/06/2021 13:23:13 UTC
Upt'North ¹ said :-
What a knowledgeable chap this Bogger lad is.
Seems quite out of place here.
We need to keep him on board Ed, any ideas?
Free life BATTIE membership perhaps?
That's a threat obviously not a gift.
Upt'North.
10/06/2021 14:33:11 UTC
Ren - The Ed¹ said :-
I'm afraid I have nothing of use to keep Bogger here Upt'. The best I can suggest is a threat - if he doesn't return I'll go and camp on his lawn. I know where he lives now...
10/06/2021 15:11:00 UTC
nab301 said :-
Thanks Bogger
Nigel
10/06/2021 22:57:38 UTC
Sharon said :-
Bogger what magic is this that I hold now in my hands. Thank you I am totally amazed by your wizardry. You deserve a gift so I have made you a little BAT gift. It is nothing to get excited about but just wanted to say thanks. It will be delivered to your abode at your convivence. In other words Ren will get in touch to arrange a day we can pop round. I am afraid the gift will not cover the costs of tea consumed by Ren etc so apologies in advance.
Sharon x
14/06/2021 13:15:35 UTC
Bogger said :-
Sharon, I read you first sentence and to be honest I really worried about the content of the second sentence. All to no avail, thankfully.
This small BAT gift. It's not a pair of Rens homemade handguards, fashioned from an old washing up liquid bottle. Is it?
No? good!
I await with baited breath and the kettle is on standby with the finest Doulton crockery already set out. Mrs Bogger is at Waitrose in the biscuit and cake aisle as I type.
Bogger
p.s You couldn't just come on your own, could you?
14/06/2021 15:11:59 UTC
Ren - The Ed¹ said :-
Would you like me to simply deliver Sharon to your place Bogger and then I'll sod off for an hour or two? With enemies like this who needs friends?
14/06/2021 21:08:32 UTC
Jacob said :-
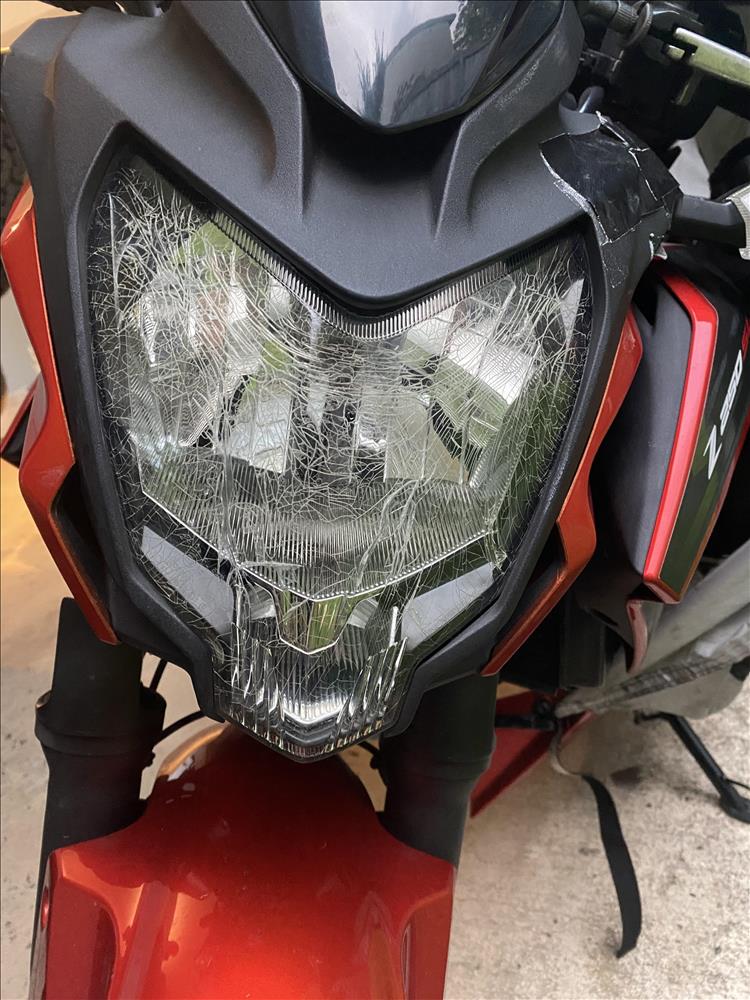
G'day from Australia, I'm a new rider with the same model (2015) and issue with these damn headlights, I bought the bike about 5 months ago with the headlight already having "spider cracks" and I've finally built up the courage to fix it myself (considering the $540 (£280) set back on an OEM headlight) and wanted to ask Bogger a few questions,
1. Is the "baking" important to the lacquer setting or will an overnight rest do the job (in australian 25 degree nights).
2. There's a video on youtube (our lord and savior DIY "ChrisFix") telling us to sandpaper horizontally at the end to reduce the beading because of the surface tension on the ridges, does this seem reasonable?
3. Is it worth it to just send it to someone else to fix up the headlight to get a better finish with actual tools than me just hand sanding it and spraying it with a can?
Bonus Question. My dad (a fixer uperer) and brother (Mechanic) thinks that a simple "headlight restoration kit" consisting of some sandpaper and spray on coating will "do the job", as someone studying engineering I had to hold back a lot of anger because these "kits" are literally just kits to restore a yellowing headlight and not a headlight that is peeling off its whole undercoat. What do you think of this? (I'm welcome to some very open criticism to prove them wrong)
P.S this website has been an amazing read and as a 2000s kid I love the nostalgia of scrolling through a forum of people talking about their own story.
 02/02/2024 09:43:34 UTC
Ren - The Ed¹ said :-
Jacob Said - "P.S this website has been an amazing read and as a 2000s kid I love the nostalgia of scrolling through a forum of people talking about their own story." Thanks Jacob, you're making an old man feel REALLY old. You do know we've only just brought the website up to colour this last few weeks...
I'll drop Bogger a message, see if he can answer your technical questions.
05/02/2024 07:32:27 UTC
Jacob¹ said :-
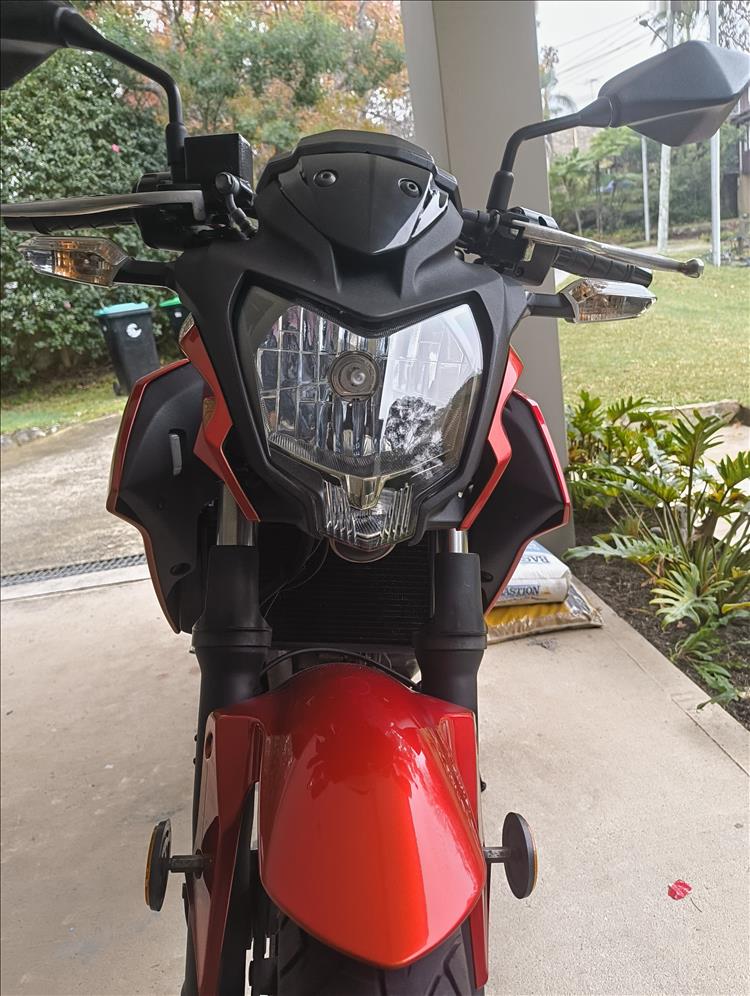
G'day again, after months of back and forth I finally built up the time and courage to try this for myself and wanted to share it for any other people who don't have a bogger or minions to do the job for them.
I started off carefully removing the loose flakes with a razor blade then got to wet sanding with 400 grit by hand, I learned real quickly how tough the lacquer was to remove so 140 grit sanding it is. After removing the lacquer I could finally start to smooth out the surface, wet sanding with 400, 600, 1200, then finally 2000 and 3 hours of my time, but boy was she so smooth the water was beading off the surface.
Gave it a quick clean with some alcohol and off to spraying! I bought a can of 2k (yes real 2k) clear coat and off I went to my backyard, 3 quick coats waiting 5 minutes in between each spray seemed to do the trick, very little orange peel but ill still have to sand it back with some higher grit paper.
All said and done, I splashed a bit more cash for a brighter bulb and put it all back together, and I gotta say, she is looking 9 years younger.
Thanks for the in depth guide Bogger.
Jacob
 17/06/2024 05:04:59 UTC
Bogger said :-
Excellent result there pal. Sorry I didn't reply to your queries, I just didn't see them.
You made the right choice by ignoring the family advice (who listens to family anyway?).
I've now retired WOOHOO but tinker all the time. My lads car headlamps are going to get the treatment soon. I'll probably do them in-situ.
Bogger
17/06/2024 07:39:39 UTC
Ren - The Ed¹ said :-
Cor blimey! That looks spot on Jacob. Well done you, colour me impressed.
18/06/2024 07:53:51 UTC
Name
Comment
Add a RELEVANT link (not required)
Upload an image (not required) -
Uploading...
Home
Repair And Restoration