Home
Repair And Restoration
RKS 125 Seat Removal And Refitting
Job Date 7 April 2021
By Ren Withnell
I got an email asking for "tips" for getting the Keeway RKS 125 seat back on. Those greasy fingered long in the tooth hacks among you may scoff but to the uninitiated the RKS seat can be fiddly to get back on the bike correctly. How do I know? As an experienced hand I too have had a couple of struggles until I got the gist of it.
Please bear in mind this is a 2013 RKS125 - I know there's been updates to this model and I do not know if anything has been changed with the seat mounting system.
Removing the seat is the easy part. Insert the key into the lock below the rear seat in the panel on the left side. Turn 90 degrees clockwise to release the catch. Lift the seat at the rear and pull back and up at the same time.
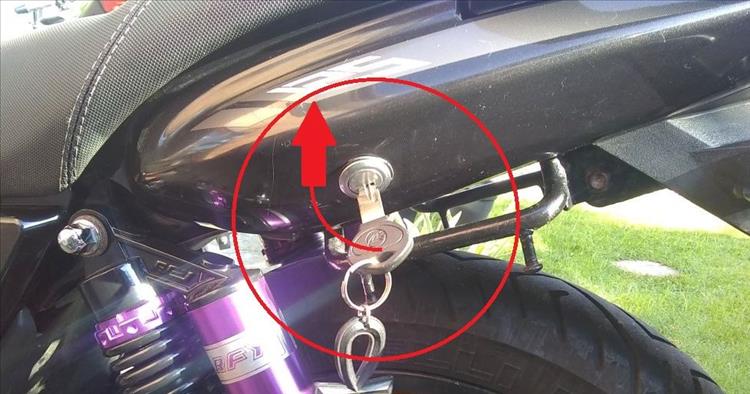
Turn the key 90 degrees
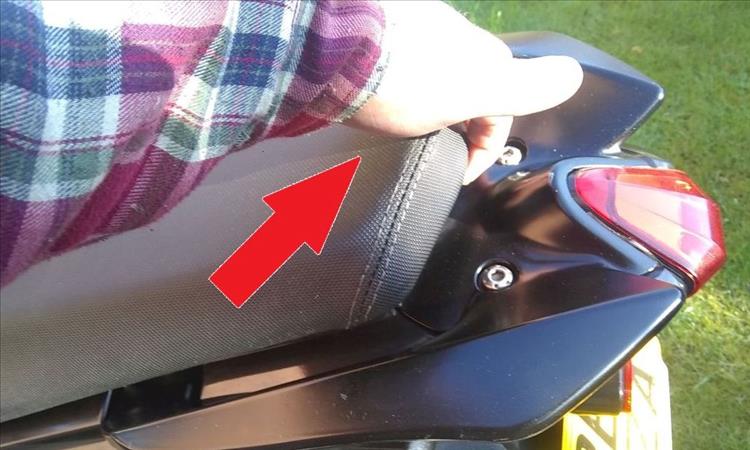
Lift the rear up and back to remove.
Replacing the rear seat requires a little more understanding of the various parts on the underside of the seat, the rear of the tank and the attachment points on the frame.
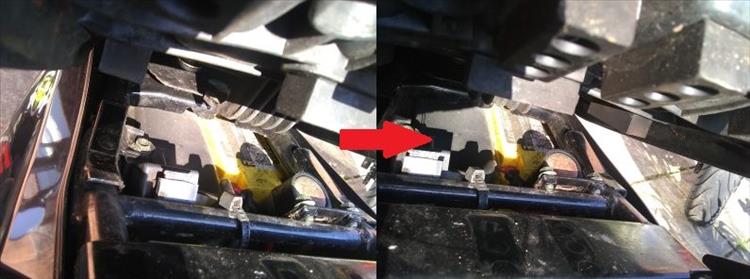
First, look at the rear of the tank - take note of the circled area. Look under this area and you will see a brace in the frame. There's a good gap between the brace and the battery/airbox below. Now take a look at the front of the seat. There's a tongue of plastic. This tongue of plastic hooks under the brace of the frame..

The flat area is circled, look under it.
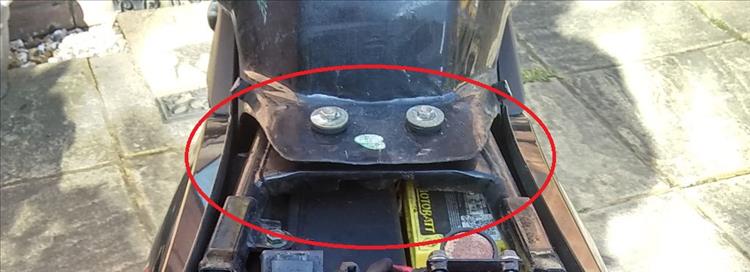
Under the flat area is the metal brace then some space.
This plastic tongue will hook under the brace.
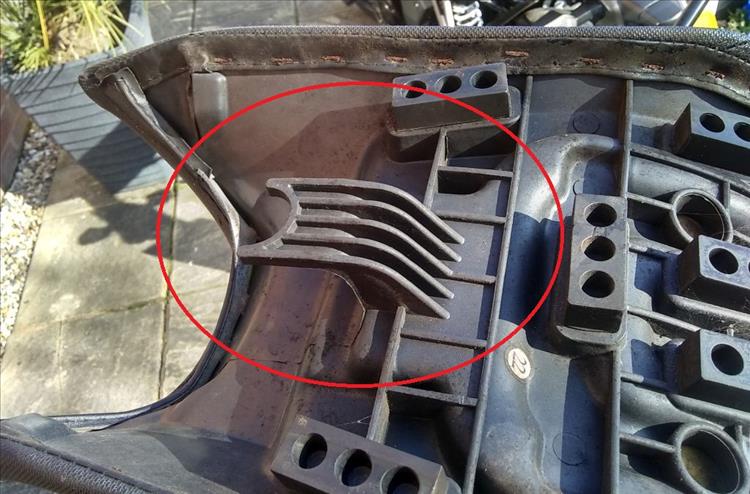
Take a moment now to look further back along the frame. From the picture find the 2 metal loops as circled. Then look under the seat, about half way along, and find the 2 smaller plastic tongues or hooks as shown in the next image. When the seat is in position these plastic tongues or hooks should slip under the metal loops on the frame.
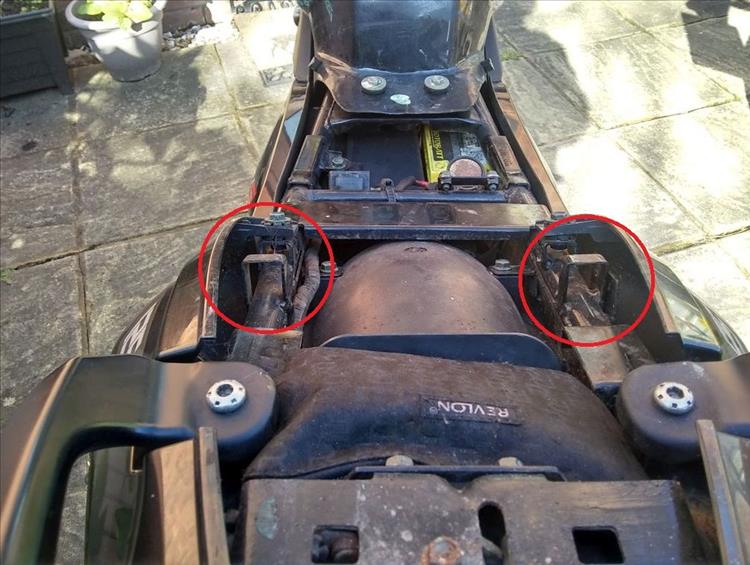
Find the 2 metal square-ish loops of metal circled.
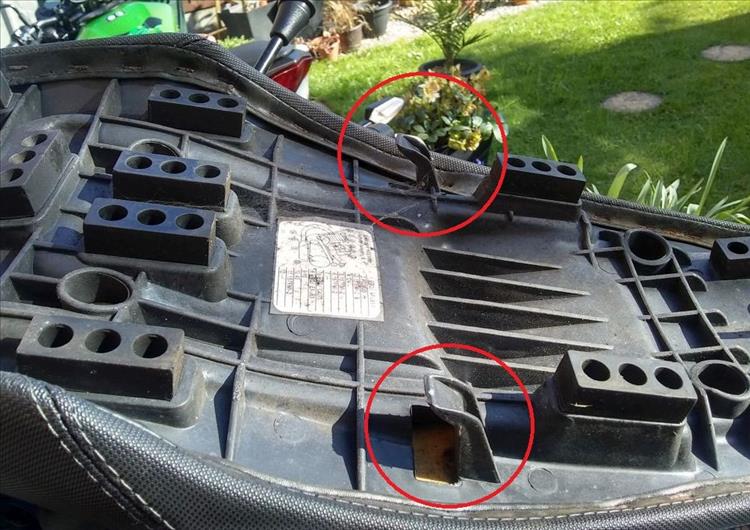
Find the hooks as circled.
At the rear of the frame under the seat you'll see the cut-out for the latch and locking mechanism. On the seat you'll find the locking loop. Again find both of these as circled. When the seat is in position the metal loop on the seat is pushed all the way into the latch and locking mechanim's cut-out hole.
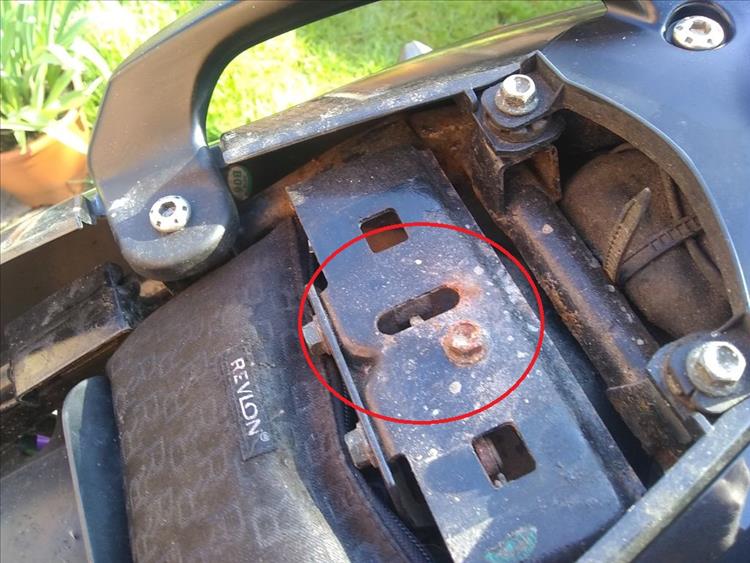
Find this cut-out in the frame. Below this is the latch and locking mechanism.
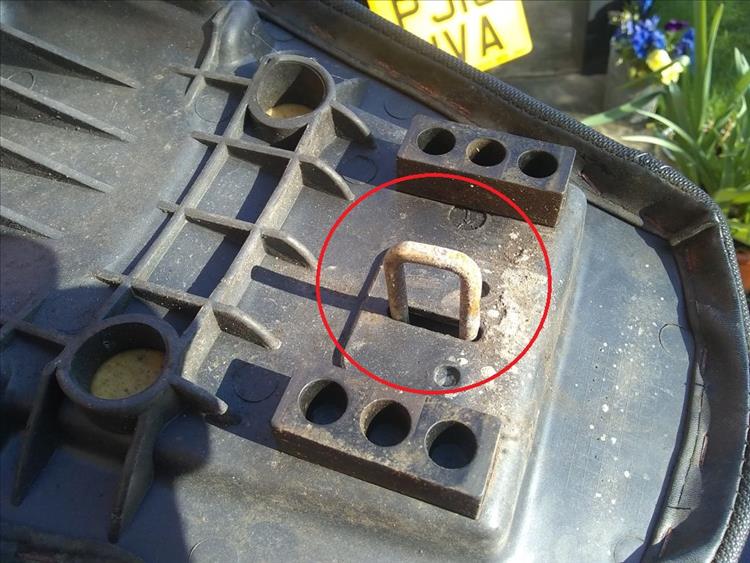
This metal loop goes into the cut-out shown above.
These 4 items (the tongue at the front, the 2 smaller hooks in the middle and the latch at the rear) are the 4 items that secure the seat to the bike. Logically it should be simple! Erm, not quite.
Start off by hooking the tongue at the front under the tank and brace.
The large tongue goes under the rear of the tank and under the brace.
It is very tempting now to simply put down the rear of the seat and press it down to engage the latch and locking mechanism. But wait! Lay the seat down gently into position. Now peer into the gap between the seat and the rear panels. Find the 2 smaller hooks and the square-ish loops of the frame. It is likely the hooks are not engaged with the loops. Pull the seat back enough to engage the hooks then press firmly on the seat to position the hooks into the loops. The seat is plastic and will flex enough to allow this.
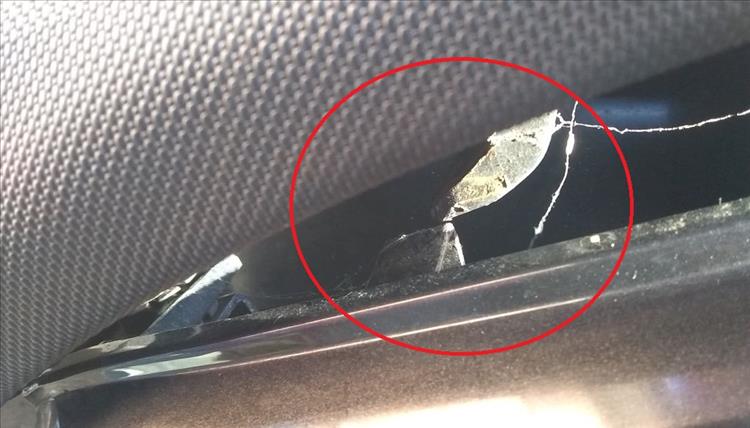
Oh NO!! The smaller hook is not in position to go into its loop beneath.
You don't need the strength of a professional body builder but a firm press in the centre of the seat will allow the smaller hooks to engage their loops.
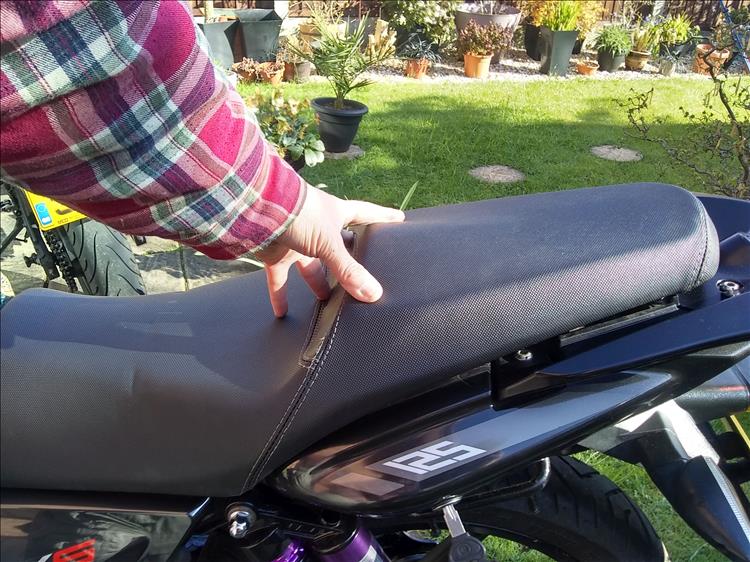
A good firm press in the middle of the seat.
You'll tend to find if the seat drops in and lines up with the moulded side panels you're good. At this point the seat will naturally move forward and allow the metal loop at the rear of the seat to fall into the latch and locking mechanism. Be sure to give another firm press at the rear of the seat to engage the lock. Pull up on the rear of the seat to ensure he lock has properly engaged.
The real key to this seat is to ensure the tongue at the front is under the tank and brace, the 2 smaller hooks are in the square-ish loops on the frame and the latch locking mechanism is all the way home.
It's not all engine rebuilds and shim adjustments. If you've a simple guide to share then click here.
Reader's Comments
nab301 said :-
Ren I thought you mentioned somewhere that the Keeway was rust free!
Nigel
07/04/2021 20:38:40 UTC
Ren - The Ed¹ said :-
If I recall I was impressed with the Keeway's engine casings in particular. Considering this motorcycle is now 8 years old and spent quite a number of years under a canopy and now lives in a tin shed I don't think it's in bad condition at all. I knew, I just knew someone would spot the very minor corrosion. Tell ya what, you should see what it's like under the CBF125's seat...
08/04/2021 08:49:49 UTC
Eric said :-
OMG it was as easy as pressing in the middle. I couldn't find the way to fit those little devilish hooks back until I found this post. Thank you!
11/07/2023 19:14:50 UTC
Ren - The Ed¹ said :-
You're welcome Eric. Anything is easy when you know how.
14/07/2023 18:01:30 UTC
Name
Comment
Add a RELEVANT link (not required)
Upload an image (not required) -
Uploading...
Home
Repair And Restoration