Home
Repair And Restoration
Honda Cub Debacle
Post received 11 July 2020
By Bogger
It's me Onda Cub.
I've been into Honda Cubs for about fifteen years now. Dunno why? But I am. I've owned and sold quite a lot of them. I've still got three. One I use, one has been restored but not built yet, the other needs restoring.
The one I use was purchased about twelve years ago. It came via a casual conversation with one of the lads at work. His Father in law had one and was maybe looking to sell it as he hadn't ridden it for a couple of years. Like a rat up a drain pipe I was round his in-laws house that weekend and a deal was struck. Well, when I say struck, he told me how much he wanted and I said yes and paid him.
At £130.00 I didn't have the heart to barter, I knew it was a good deal.
It was in fair to good condition with only surface rust here and there but I fully stripped it, had it bead blasted then properly painted. Cavity wax was added, in and up every orifice. It looked mint. After an awful lot of miles over the years it no longer looked mint but it still looked good.
Over the last twenty four months my "fleet" of bikes has grown a bit and then shrunk a bit and grown again. With all the fettling going on I'd not used the Cub as much and it sat at the bottom of the shed, the most difficult bike to get out. I'd occasionally dig it out, start it and clean it.
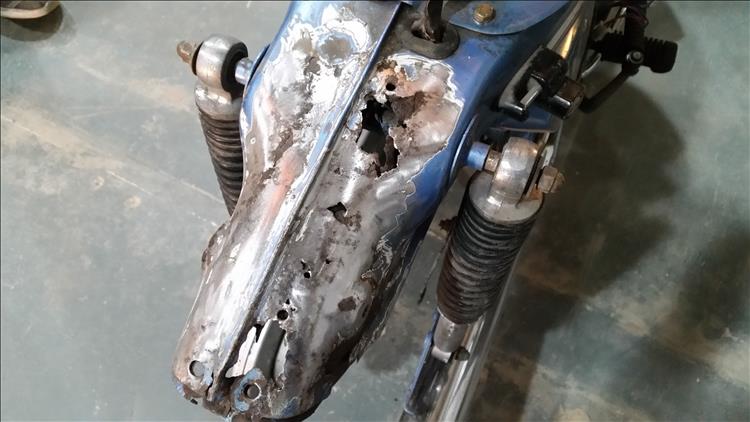
I did notice the last time I did this at the turn of the year, a very small paint blister just starting to appear from under the rear plastic mudguard at the back. The metal work under the plastic mudguard is a known weak point for corrosion. I had no worries in this department as I had been meticulous in this area when it was restored.
I sorted out when I was going to tackle this small amount of surface rust and set about this what will be at most a two hour task. Once the gubbins from the back of the bike had been removed, I had a bit of a poke about.
Oh FFS. Underneath the paint blister was a small hole. I stripped it down a bit further and took it to work in the lads van. Never mind, a quick bit of panel work, a small plate to be welded in, lick of paint, quick job, sorted.
Yeah right.
The rear end once cleaned properly resembled a Swiss cheese. B*****s.
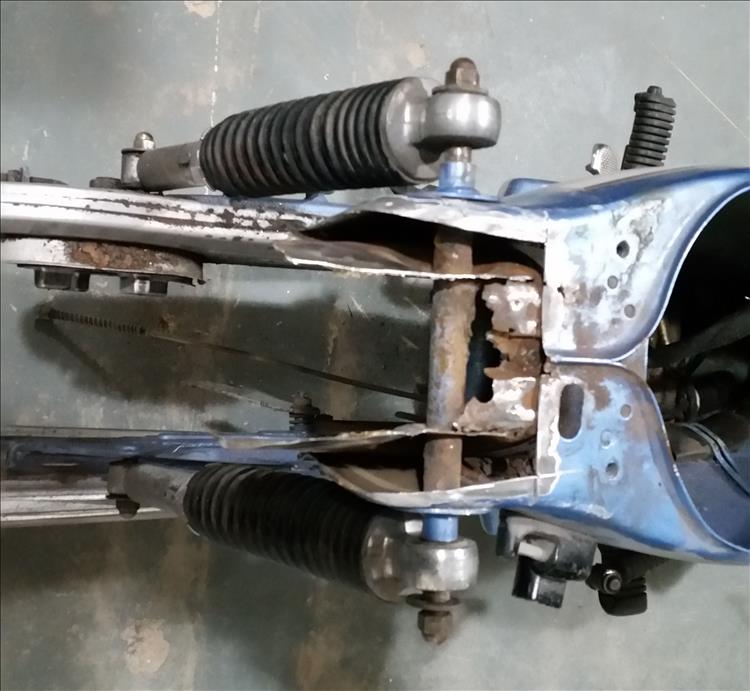
It sat at work for a few days whilst I thought about the best plan of action. I can do most jobs but intricate and precise fabrication is not one of them. Oh Lord, I've got to be nice to someone now to get them to do it for me. This going to hurt. One of the lads actually volunteered to sort it out for me. He's Polish, a cracking lad and highly skilled. He made the panels from flat sheets of metal, I was really impressed.
After about an hour's work this is what he came up with. I think it would have taken me a day to get this far.
I said that seeing as he had made such a good job of the fabrication it would be a shame if I welded it in place and made a hash of it. He should have the honour of doing it instead. I don't know if anything was lost in translation but the words "office" and "immigration" were never mentioned. Honest M'Lud. Only joking. No seriously he was happy to sort it for me, he's that kind of bloke.
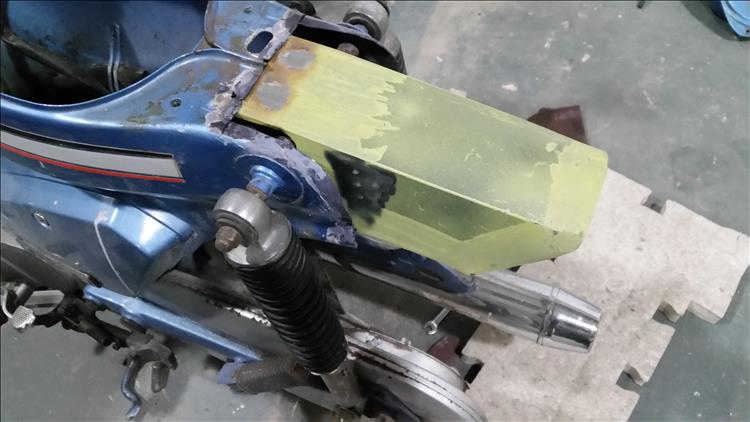
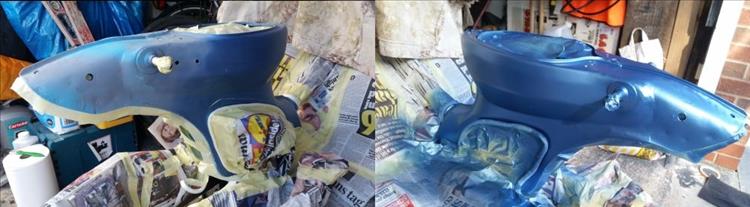
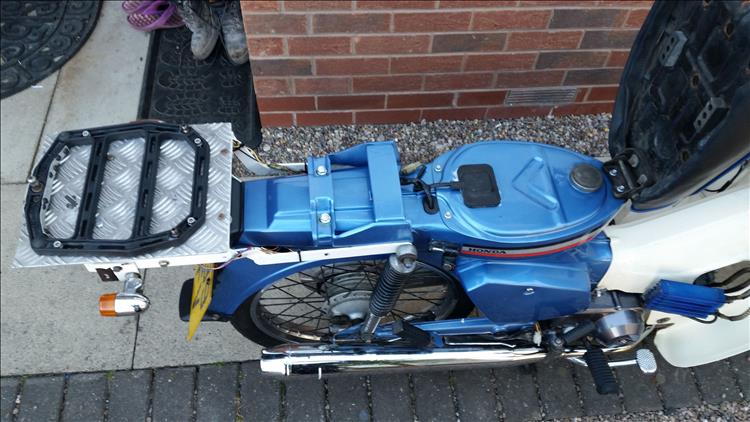
Once it was welded into place it was then just a case of painting it. Originally I was just going to paint the new part that had been welded in place. However the Honda frame decals that I'd had made for the previous restoration were looking a bit worn around the edges. There was a very small amount of surface rust in places on the frame. I decided to paint the main body of the frame, so I took it back home to get painted.
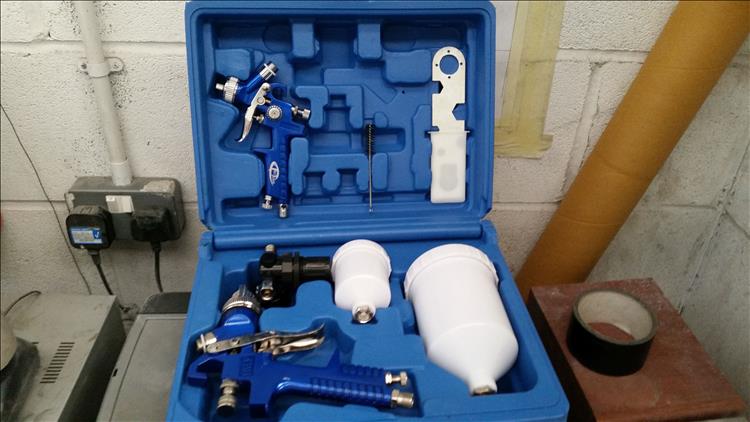
The side panels and tank I prepped and painted at work. The metallic base coat was applied via a rattle can. The lacquer from a mini spray gun. I'd bought the spray guns off Ebay a couple of years back for under £30.00. Surprisingly, you can actually get a good finish with them.
Now the frame, as I mentioned before, was painted at home in the garage. The usual prep was carried out, culminating in Etch primer, primer, base coat and lacquer.
Again the base coat was from a rattle can and so was the lacquer. However the lacquer is a full 2k product. At the base of the tin is a pull ring. You give this a pull and a twist and this ruptures a small section inside the can which releases hardener into the clear lacquer. You just give it a good shake and apply.
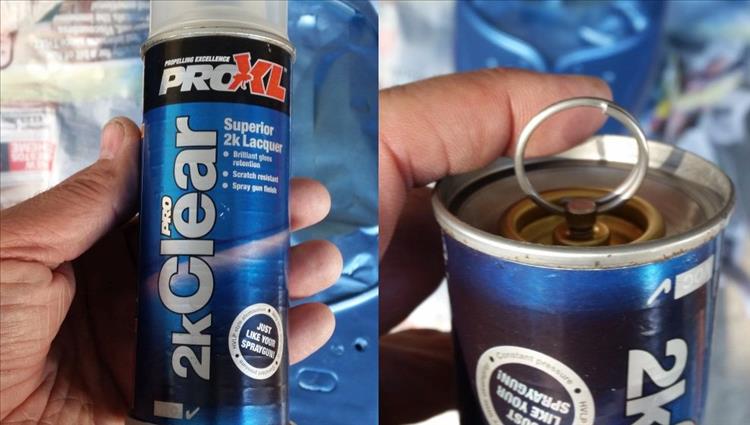
It is a very high build lacquer. If you try to get a "finish" on the first two coats you may as well put a bucket underneath as most of the lacquer will run off. I've found that you need to apply a dry "grip coat" then walk away for ten minutes. Apply a second slightly wetter coat and again leave it to flash off. Finally apply the last coat to obtain a finish, but still be careful.
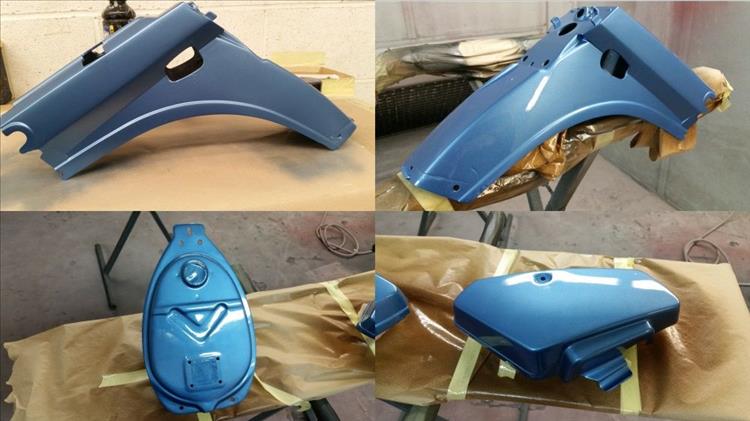
I think the results speak for themselves. The finish, from basically a rattle can, is really good with the added bonus of it being a highly durable petrol proof product. Finally I applied some new genuine Honda frame decals and put it back together. I did smother it in cavity wax again.
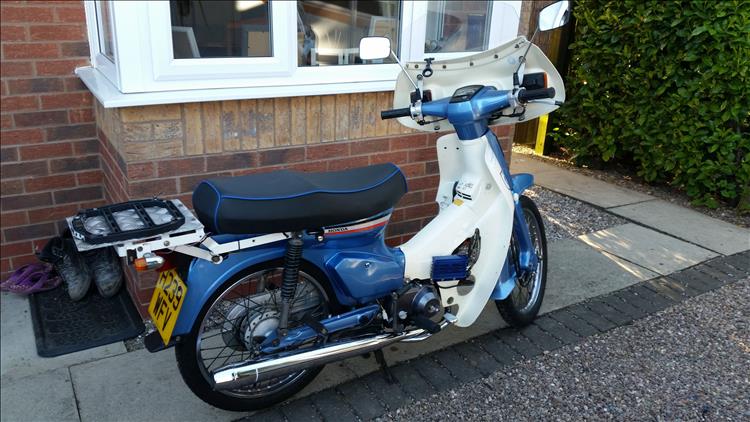
Hopefully good for another ten years.
So if you see a small paint blister on one of your bikes. Do not poke it. Walk away and think of nice things instead.
Bogger
If you'd like to sponsor Bikes And Travels contact ren@bikesandtravels.com
Reader's Comments
ROD said :-
Really nice job. I hope you have many care free miles over the next ten years.
03/08/2020 11:26:18 UTC
Bob said :-
I had to do similar on one of mine.
I ended up with the frame upside down on the bench.
I bought a sheet of 1mm mild steel and spent a fun weekend with the MIG welder and angle grinder - it worked out fine - I think I used 1/2 can of hammerite on the underside, just poured it in!
Pressed steel frames - yuk.
This is one of the main reasons why bikes outlast cars, cars quietly rot away underneath and you know nothing about it until the MOT tester hands you a fail certificate. On bikes everything is more accesible and easy to fix.
03/08/2020 11:29:31 UTC
nab301 said :-
Nice repair job . I'm curious about the panel when you mention cavity wax . Is it a double skin or is it single skin exposed to the rear wheel. If the cavity wax is perforated maybe it'll end up retaining moisture ? Looking again is it the plastic mudguard between this panel and the wheel? Either way I guess it's retaining moisture , maybe a galvanised panel next time !! Or Zinc primer?
Nigel
03/08/2020 16:48:13 UTC
Upt'North said :-
She looks a treat Bogger. You can call immigration now.......
Upt'North.
03/08/2020 16:59:15 UTC
Bogger said :-
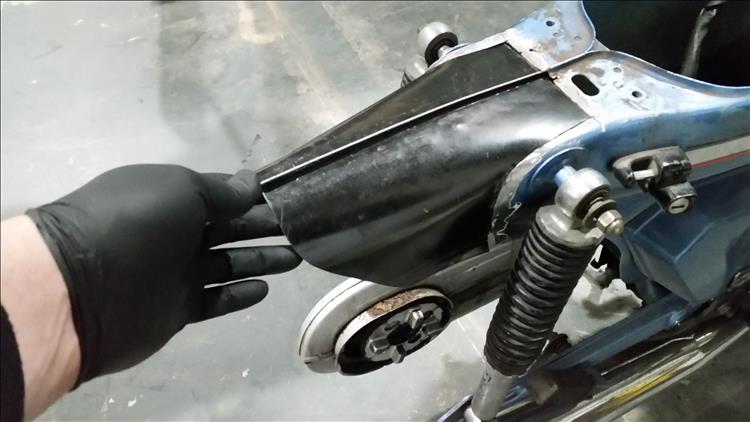
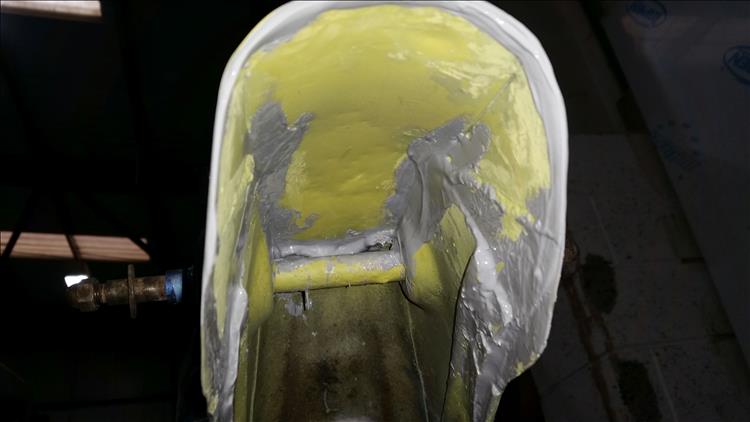
Nab it is a double skin at the rear end. If you look again at the images, the image with the square box section tacked in place is the underside. This is before it was beaten into shape. The image of the black section being offered up is the outer piece. It's a water trap, hence why they corrode.
You'll notice I sealed it all to stop water ingress. There was a gap for the cavity wax Lance though.
Upt I can't ring immigration, it just wouldn't be fair. Besides I might need his skills again.
Bogger
03/08/2020 18:51:26 UTC
nab301 said :-
Amazing piece of repair work , I guess originally those frames on the production line are pressed out in two sides(Left and right) and then welded together?
Nigel
09/08/2020 16:17:37 UTC
Bogger said :-
Yes, spot on Nab. With a gusset plate (the one that rots) up the back for the rear wheel arch.
I've also coerced my new best foreign mate to help me sort out a scooter carrier for the Motorhome. He's a good lad.
Bogger
09/08/2020 18:52:39 UTC
Ren - The Ed¹ said :-
That poor lad! Comes here to the UK to earn an honest crust and ends up rebuilding C90s and making scooter racks. Every time Bogger walks towards him he thinks "Shoulda done the plumbing course... shoulda done the blooming plumbing course..."
10/08/2020 09:12:40 UTC
Borsuk said :-
Naaaaa.
If he had done the plumbing course Bogger would have him replacing the fuel and hydraulic system hoses.
10/08/2020 15:16:57 UTC
Name
Comment
Add a RELEVANT link (not required)
Upload an image (not required) -
Uploading...
Home
Repair And Restoration