Home
Repair And Restoration
Fog Light Attachment CB500X
Fix Date 20 March 2019
By PocketPete
Only 5 days after ordering my fog light mounts the nice DPD driver arrives with yet another box. Inside we have the metal bars and there is a photocopy of instructions on how to fit them. Hmmmmm, the instructions are clearly marked which is unlike most Chinese items you buy.
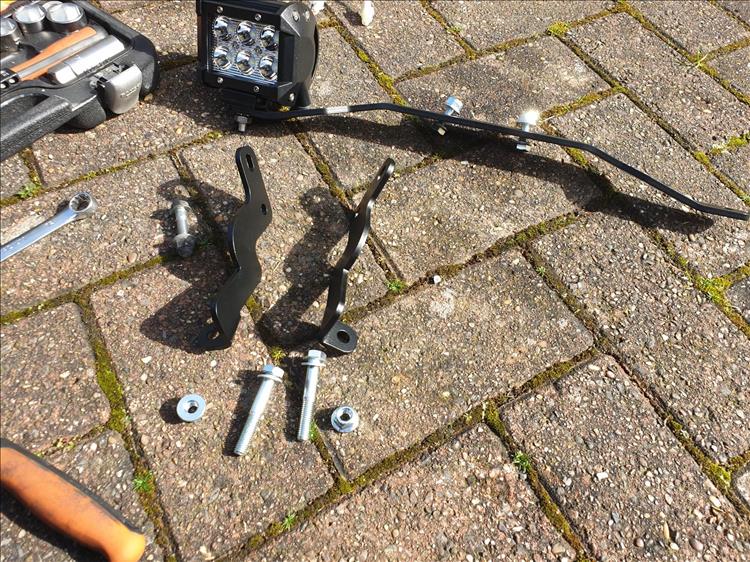
They appear to be for the SW Motech mounts which were much more expensive. I think this because they are the same as a pdf I saw online. Plus the name looks like a sticker was placed over the name of the company on the box as well.
You have to remove the 2 bolts under the "beak" of the bike. They are very tight. And bloody awkward to reach. Lots of cursing and banging of knuckles follow then I finally get them off. Two brackets bolt on and then the cross member bolts on. It all seems sturdy and well made.
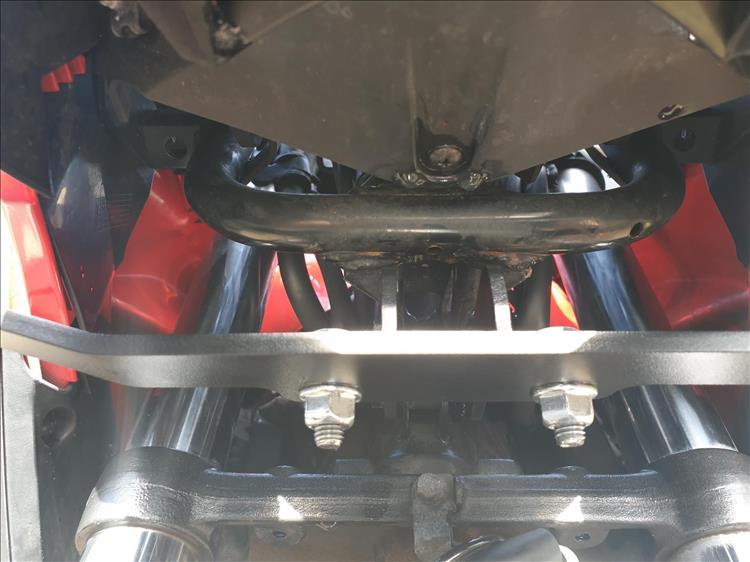
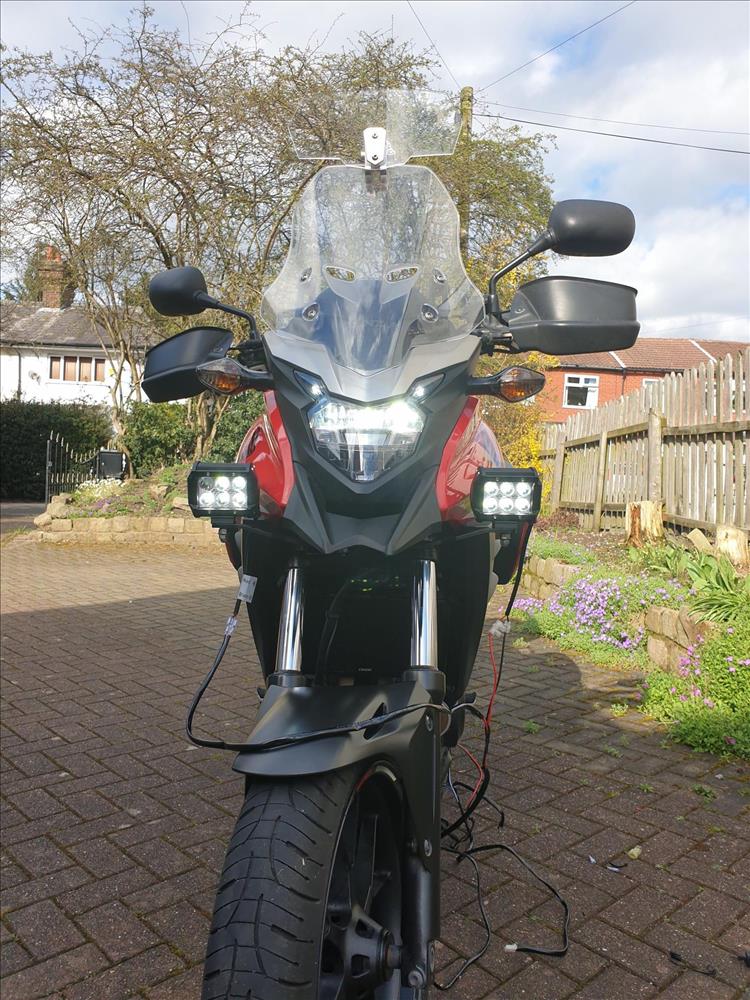
Not sure if its powder coated or painted but it seems fairly decent. The bolts don't look stainless. We shall see how they look in a month or two as they will be pretty exposed. So the brackets are on and it's time to slot on the lights. They fit ok and I angle them slightly to the centre and down.
Hmm, nice, looks pretty smart.
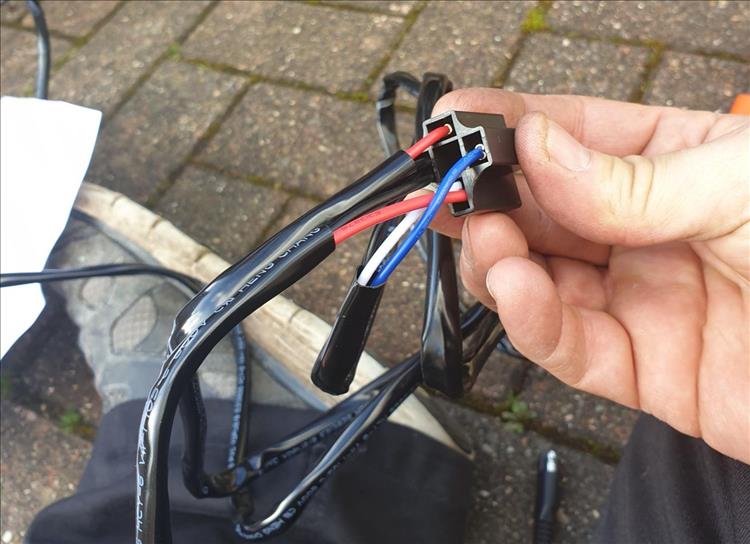
Well - apart from the wires. I picked up a cheapo wiring loom for fog lights which comes with a switch and with some modification should do the job. But before I take off the fairings and run the wires I want to test out the switch relay works with the key and I will need an override switch on the handle bars to turn them off when needed. Plus I need to get some crimping gear to do the job properly as the looms is rather long.
I wire it up but I have no idea what colour wires relate to which number on the relay. Eventually my voltmeter rescues me. It's blue which is the switched line. I attach blue to my new options plug connector and bingo! A turn of the key and the lights come on. Terrific.
All I need to do now is strip down the side panels, buy a handlebar switch and wire that to cut out the blue wire's feed from the options plug. That will allow me to disable the Iights. The only problem is I may need to add a fuse box or add a separate relay for running any extra electrical stuff such as USB etc. I already have an inline fuse, I'd then run the wires and crimp them together with a bit of heat shrink. Should be ok.

Can't wait to get these up and running.
Contact ren@bikesandtravels.com if you want to contribute to Bikes And Travels.
Reader's Comments
David said :-
PocketPete,
Where did you find those light mounts? Who makes them? Can you please provide a link or a name I can Google? They are EXACTLY what I've been looking for.
I've actually been trying to order the SW-Motech originals, but SW-Motech only sells through separate distributors in each country and their distributors are not allowed to ship cross-border. There is no distributor in my country and SW-Motech actually apologized that I can't buy their products! Ridiculous. Now I am happy to find a clone.
Thank you!
25/07/2019 13:24:25 UTC
Craig said :-
David here you go....
Amazon
SW-MO 72044896
25/08/2019 20:44:36 UTC
Name
Comment
Add a RELEVANT link (not required)
Upload an image (not required) -
Uploading...
Home
Repair And Restoration