Home
Repair And Restoration
Latchy's GPZ 600 R Restoration
Latchy's been working on another creation, this time a GPZ 600 R, something of a maked contrast to his previous progect, an FS1E. At least this is a proper bike not some ring-a-ding rubbish that old men view through rose tinted glasses. I finally got to see the almost completed item this sunday, and it's rather nice I must say.
The story starts with Latchy swapping knowledge with a guy called Dave on the Kawasaki Riders Forum. Dave was working on building one good GPZ out of two old ones, one's been crashed so the frame and forks are bent. Latchy's good at tricks like how to remove rust and repair knackered threads, so he made the trip to Rotherham to assist Dave with helicoiling some threads on the good frame. Dave was of course thankful for the help and promisedLatchy all the remaining parts after the build is complete.
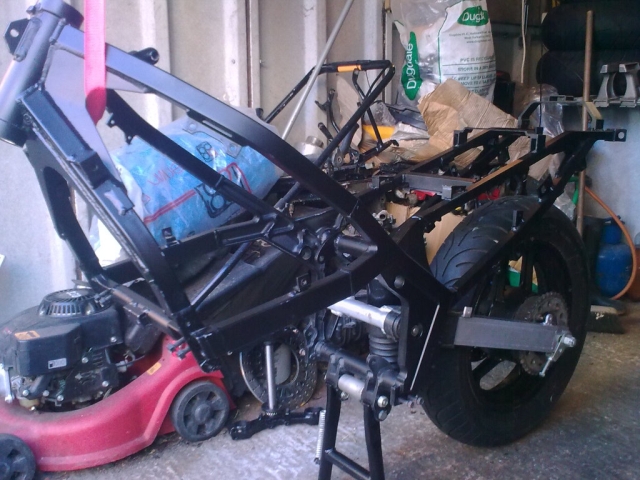
Sometime later Latchy duly recieves all the remaining parts...swingarm, wheels, engine and a box ful of other parts. Apart from a frame and forks it appeared that most of of the bike was there, so began the project. The first job was to strip the top end of the engine to ensure everything was in good order. The pistons were decoked, the tiny valves were reground, new valve stem seals and all put back together with a new head gasket. Whilst the motor was in bits he also fitted heavy duty clutch spings as well as a new oil filter.
He already knew what colour the bike was to be, Kawasaki green and white. He also knew he wanted the alloy frame that is often referred to as the "B" modle in the Haynes manual. In the UK we only got the steel framed "A" model but he managed to find a GPZ 400 R aluminium frame of Ebay. Being Ebay the frame was down in Redhill, Surrey which required an early start to collect. It took a grand total of 3 years all in all to find suitable forks, yokes, missing bodywork panels and all the other bits you don't know you're missing until you look properly. That's a long slow project, I'd have given up after the first 3 weeks, not years.
The GPZ 400 R frame just going through it's first paces...
Starting with the alloy frame, the first job was a "dry build". This was to sort out all the obvious issues and to see what's what. There were indeed some obstacles. The 600 centre stand is quite different to the 400...he had to source a 400 centre stand. Next the top mounting bolt for the rear shocker was too short because the alloy frame was beefed up to have enough strength to take the forces that are transmitted through it, an easy one, get a longer 12mm bolt.
The third proble was a real problem. The 600 yoke did not fit the 400 frame as the 600 bearing, and associated bearing recess, is larger than the 400. Damn. I remember the time Latchy was working on this, there was much polite cursing. The yoke lower is welded to the "stem" that holds the bearings. Simples...just get another bottom bearing for a GPZ 400 R and extract the steering stem out of the yoke and get it machined down from 28mm to 25mm. The stem had to ground off...then forcibly removed from the lower yoke...lathed and welded back into the yoke. It was good to see the smile on his face and the pride as he held the re-engineered yoke and stem like a trophy.
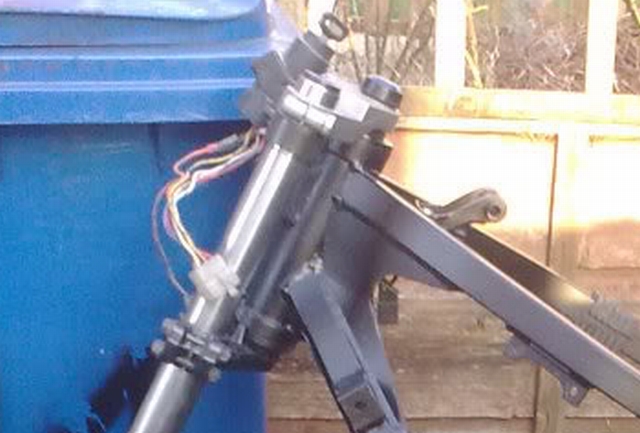
The accursed yokes, stem, headstock and bearings. I'd have given up and walked away...Latchy didn't.
From then on he says the build was straightforward. Yeah, I'm sure it was. Various bits were cleaned and zinc plated, others renovated and repaired. Pretty soon he came to a stop again as all the bodywork lay waiting, needing repair upon repair then priming, filling, sanding then filling and sanding again and again until he had the perfect platform for colour, This is where the real transformation started to happen, as colour was applied and his vision finally materialised before his eyes. The decals were applied and the machine got its identity.
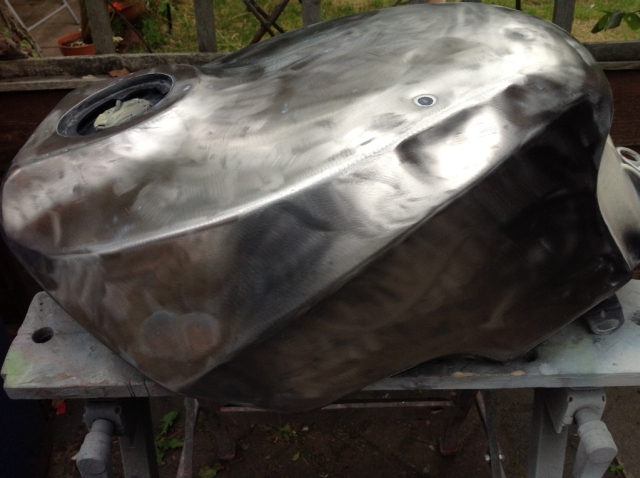
Look right, just a coat of smoothrite and job done yeah...?
The final finish really lifted the appearance of the paintwork which is of course clear lacquer. He told me he still stands back and looks in amazement at newly painted bodywork looking like glass, which he has done himself. All the paint was been done with aerosols, technology has moved on now and there are some fantastic products on the market. He was most impressed by the clear lacquer which is 2k. It comes complete with a proper hardener in it making it petrol resistant, and even has a professional fan spray pattern just like a spray gun.
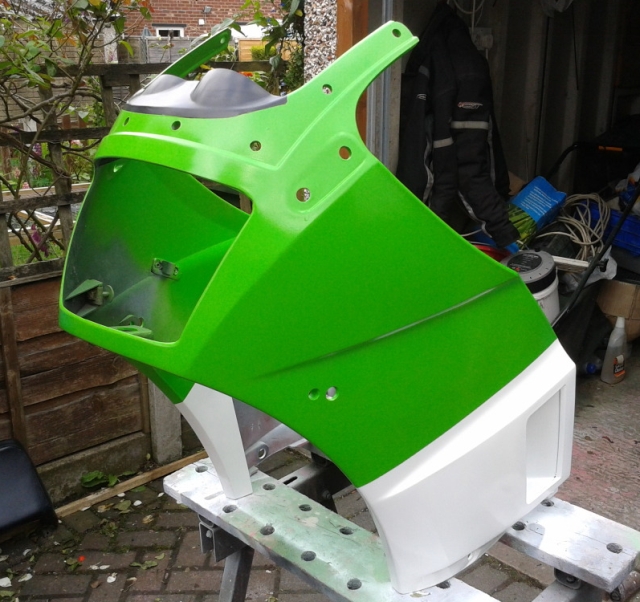
Oh, and you're going to tell me you did THAT yourself huh...from a can huh...?
All finished the bike has cost around £350, the most expensive part being the Motad Nexxus exhaust which was new old stock. As a rebuild this made it a cheap bike indeed which has new bearings, seals, bushes, cables, levers etc. If you go and buy one for this sort of money it will be in need of a lot of work, so all in all well worth it from a financial view but a heck of a lot of work. But that's what Latchy likes to do, its his hobby.
Many many thanks to Stephen for providing me with a write up for this project. I finally got to see the completed machine this weekend and it is quite something. The motor runs well, almost too well. I was always told if a Kwak 4 doesn't make a slight rumble from the bottom end there's something not right, this one's as quiet as anything. He tells me the motor is a peach with a wide spread of torque everywhere rather than the peaky power of a modern bike. Everything feels tight and fresh and just as it should be.
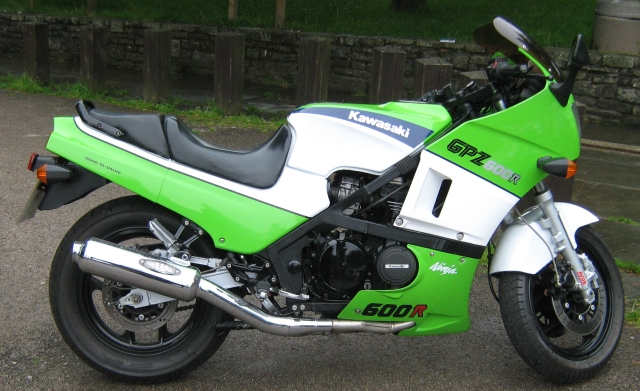
OK, it's a thing of beauty...fair play to Latchy.
I know what will happen. He will, of course, be looking for another project and he'll promise to sell this bike to make space and money for whatever he builds next. He won't though, he's still got the FS1E to finalise and sell, and there's a few minor niggles he wants to sort on the GPZ too. Come on Latchy, admit it, when you've put so much love into a machine you just can't let go can you!
Reader's Comments
Tom McQ said :-
GREAT JOB!! When I saw that first photo though, I thought "Oh no, don't put that lawn mower engine in it"! LOL
01/01/2000 00:00:00 UTC
ken lowe said :-
what can i say steven is a very very clever chap who should be doing it for a living as people would pay for top class work like this.AAAAAAAAAAA+++++++++++
01/01/2000 00:00:00 UTC
len Taylor said :-
Very impressed with the write up an the rebuild .
That one ace looking bike !
That I'd love to own
01/01/2000 00:00:00 UTC
Nick keen said :-
Wonderful job done! Purchasing a heap friday. Its been stood 2yr. Goin 2 get running first then try 2 fix up mint like yrs. Might do it the cobalt blue and pearl white..... Great write up by the way. Keep up the first class work!
01/01/2000 00:00:00 UTC
Stiffy said :-
Excellent to see these great bikes are still attracting deserving resto attention!
Could you post some more detail about the bottom yoke conversion, as I am planning to do the exact same thing with an ally Jap imported 400 frame.
Thanks.
01/01/2000 00:00:00 UTC
Ren - The Ed said :-
I'll ask Latchy to look in on the page again, and to see if he's anything to add :)
01/01/2000 00:00:00 UTC
Jason said :-
Decals look like the ones I made for Grant at Awesome Graphics. :)
Nice job, sweet looking result.
01/01/2000 00:00:00 UTC
John marshall said :-
Great build and write up .
I thought all the bikes had aluminium frames ? All the spec specialists list a aluminium perimeter frame . I will find out when I see one and scratch a chunk out of the paint or not lol .
28/01/2016 04:41:52 UTC
Garth said :-
400 frame, 600 motor. That makes it a GPZ4-6 don't it?
16/11/2016 18:24:11 UTC
Ren - The Ed said :-
Yip, like the Suzuki GSXR 7-11 I guess.
17/11/2016 18:23:52 UTC
mick said :-
hi nice gpz what clutch did you use as mine is so heavy after 20 minutes my wrist is killing me is there any conversion kits i can use ie make it into a hydraulic clutch thanks ....Mick
02/01/2017 16:40:18 UTC
Ren - The Ed said :-
I'll ask Latchy who wrote this to get back to you Mick.
03/01/2017 06:44:52 UTC
Latchy said :-
I changed the the springs on a Yamaha RD350 clutch I once owned with the same result, it went from super light to way too heavy. I left the clutch on the Kawasaki 600 standard however I did clean up the steel plates with fine wet and dry because of plate imprints which were left on them, but I put everything stock back in. The clutch that Kawasaki make for the 600 is very good for the job but someone may have had a go at trying to improve perfection.
If your cable is in good condition ( is it?) then it sounds like it has heavy duty clutch springs fitted, you will have to strip it down to have a look at them, if they are black in colour then they are non original parts, the original springs are grey and have more windings. That's as much as I can tell you Mick.
03/01/2017 08:56:02 UTC
Michael said :-
Very nice, I spent 3 years restoring my 600, I did replace the rear shock, the brake lines (with red goodridge lines) the anti dive works really well, I also replace the coils with new ones. just did the top end tappets and a really good service, all set for season of riding.
 19/12/2017 15:33:09 UTC
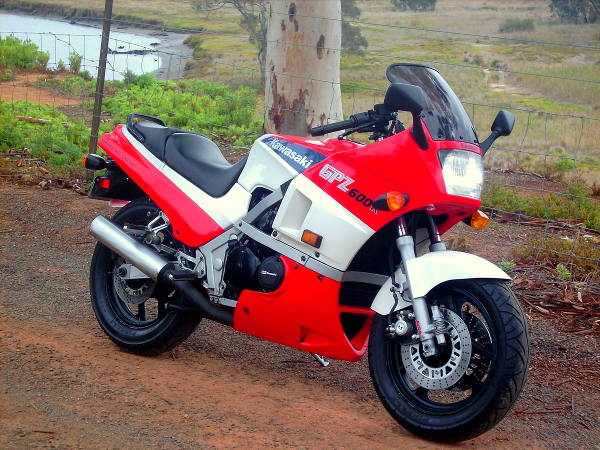
Michael said :-
Regarding above picture, I would like to add that the exhausts were hand made to match as close to the originals as possible.
19/12/2017 15:35:20 UTC
Ren - The Ed said :-
You people have far too much time and patience. That looks mint that. So how the devil do you "hand make" exhausts?
20/12/2017 10:25:00 UTC
Chris said :-
Does anyone know the paint codes for the red and white and the silver for the frame?
10/03/2018 17:51:05 UTC
Hugo said :-
Friends some carburetor in good condition for sale for kawasaky gpz 600R
19/03/2018 15:19:54 UTC
Chris F said :-
Great looking job on both bikes, hopefull youguy's might be able to help me with some little issues I have with mine.
31/10/2018 09:40:53 UTC
Name
Comment
Add a RELEVANT link (not required)
Upload an image (not required) -
Uploading...
Home
Repair And Restoration