Home
Bike Tips
Repairing or Servicing Rear Brake Light Switches - By Ren Withnell
For years and years your rear brake light switch will work. Then one day, usually when the MOT test is due, it'll go on the blink...literally. Instead of lighting the brake light as it should it'll work internittently, it'll blink.
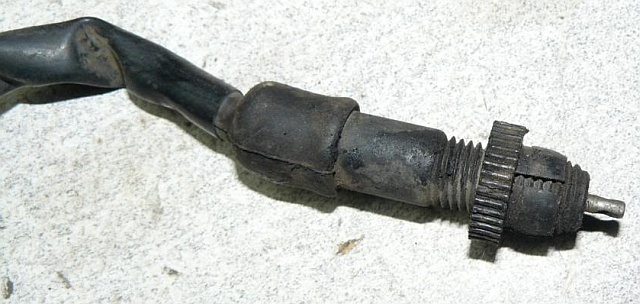
A typical Honda rear brake light switch. They're all much of a muchness.
First things first. Ensure the rear brake light system is working by checking the light comes on using the front brake. There's no point assuming the rear switch isn't working if the front one doesn't work either. The next thing to do is grab some needle nosed pliers and push-pul-push-pull the pin in and out. Essentially you're activating the switch with the pliers and not the brake lever. Keep on doing this, see if the brake light comes on. Sometimes this is all you need to do, the repeated action may clear the contacts enough to keep you going for a while longer.
If you get no success, you can service the switch. That said if you're not mechanical or in a rush or have a lot of money, a new one can be purchased for around the £10 mark. Still, if like me you're that way out, here's my guide.
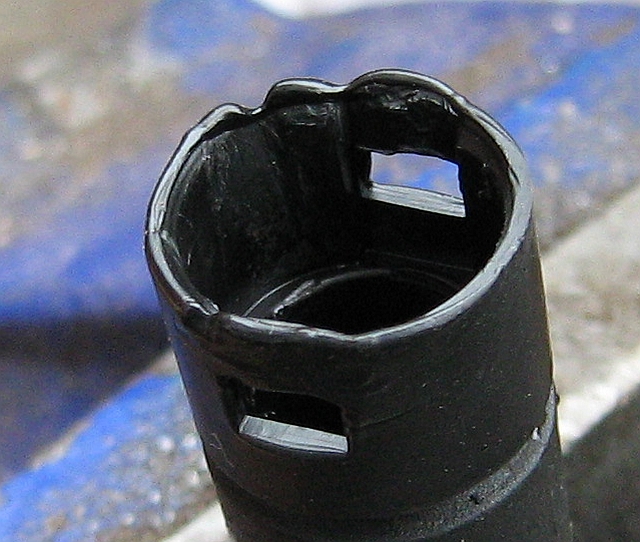
From the image above you can see the brake light switch. Where the wires enter the switch is covered by a rubber cover. Pull the cover back and you will see the top of the switch. Note behind where the rubber was on the sides of the switch will be 2 recesses with locators the keep the plug in the top of the switch. You need to dig this plug out. I use a snall thin screwdriver and basically "dig" the plug out. This will deform the body of the switch, like below.
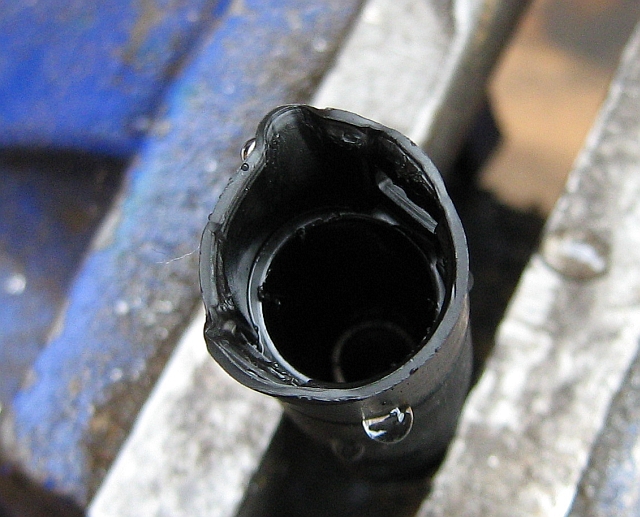
The body of the brake light switch, deformed by the forceful removal of the plug where the wires go in.
Once the plug has been removed the wires will come asunder from the plug and the whole things fall apart. Now you can also remove the pin and contacts. This should leave you with the following parts.
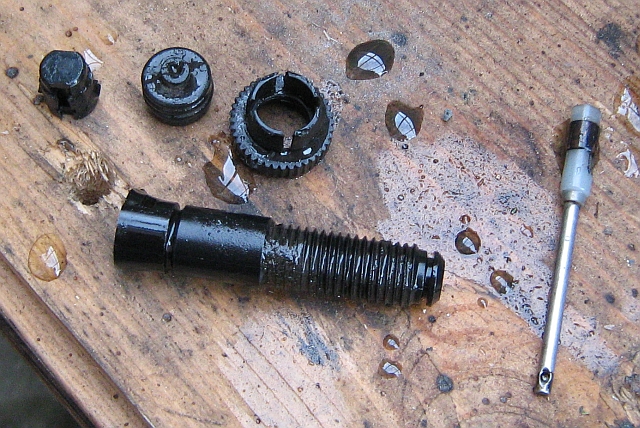
Top right, the plug, next the boot that protects the pin, the adjustment nut, the switch body and the pin.
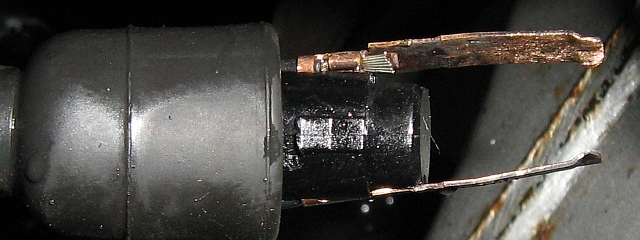
The next job is cleaning. Clean the brass contacts on the pin using a bit of emery cloth or a small file. Also clean the contact wires that came out with the plug. Clean the rest of the parts, I use parafin then a good rinse with water from the hosepipe. Soon everything should be bright, shiny and clean.
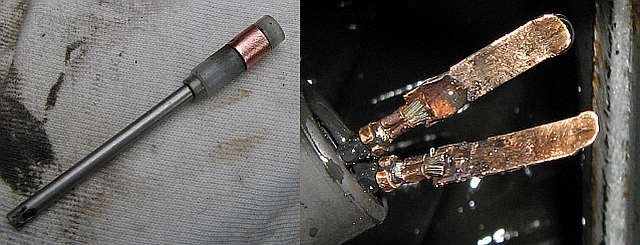
The contacts on the wires and the pin should be as clean as possible.
The next job is to straighten out the body. It's plastic, it's malleable when hot. Now you need to be real careful here. I used a cigarette lighter to heat the plaastic just enough to bend it sort of straight. I'm only talking a second or 2 of heat before I pressed the body genlty to the work bench. So, that's a TINY bit of heat to to soften the plastic and straighten it. It'll not be perfect, but you should be able to get things straight.
The straightened body. It won't be perfect but it's enough to hold the lugs on the plug in place and it'll be covered by the rubber.
The next step is to put it back together. I did consider packing the whole unit with grease but I think that will just dry out and attract more dirt. The next stpe is to put the wires and contacts back into the plug. They won't stay there porperly without the body, but near enough to get the body back on.
The contacts won't stay in place properly, but near enough to slip the body back on.
Next replace the pin back into the body, be sure to push it home and note that there's a spring in the body. Carefully slip the body back over the wires, being sure the wires stay located in their recesses in the plug. Push the plug home and ensure the locating lugs are in the holes in the body. Using the needle nosed pliers check the switch is working. ...Dont't be silly, you'll need the ignition on before the light comes on. If everything's back to good then put the switch back in place and check everythings adjusted.
There ya go!
Reader's Comments
Ian t said :-
Wouldn't bother, just get a new one for a few quid from a breakers. Brand new pattern ones don't cost so much either
01/01/2000 00:00:00 UTC
Stackers said :-
Great article,
Found this very helpful and its great to see you giving detailed info and great clear photos.
It takes the fear out of the unknown-so thank you for your time,trouble and kind advice.
01/01/2000 00:00:00 UTC
Girtron said :-
Thanks for the info on the internal parts of the switch it helped, it got me out of trouble, it works a treat as I need the motorcycle to travel to work and back and waiting for the new switch to turn up which is on order I have to wait up to two weeks, which is not an option cheers
04/06/2025 05:40:45 UTC
Ren - The Ed¹ said :-
Thanks Girtron. I'd still recommend getting a new switch and keeping it in the cupboard as one day or another the switch will go wrong again. You can replace it with the new one and get to work just fine - and in your own time you can re-service the old one and keep it as a spare.
04/06/2025 10:51:38 UTC
Name
Comment
Add a RELEVANT link (not required)
Upload an image (not required) -
Uploading...
Home
Bike Tips