Home
Repair And Restoration
Project Zen - Paint Job On A Keeway RKS 125cc
Post Date - 16 February 2018
By Sharon Parker
Stage 1 Preparation
Zen my Keeway RKS 125cc is getting on a bit. At 4 years old and with 24,000 miles on the clock he needs some TLC. He is not exactly a rust bucket but four salty winters and lots of rain has made some parts succumb to the rust devil.
So where better than to administer the TLC than my very own living room. My daughter was horrified to come home to find that Zen had taken up residence but I am delighted, so was Cleo our cat.
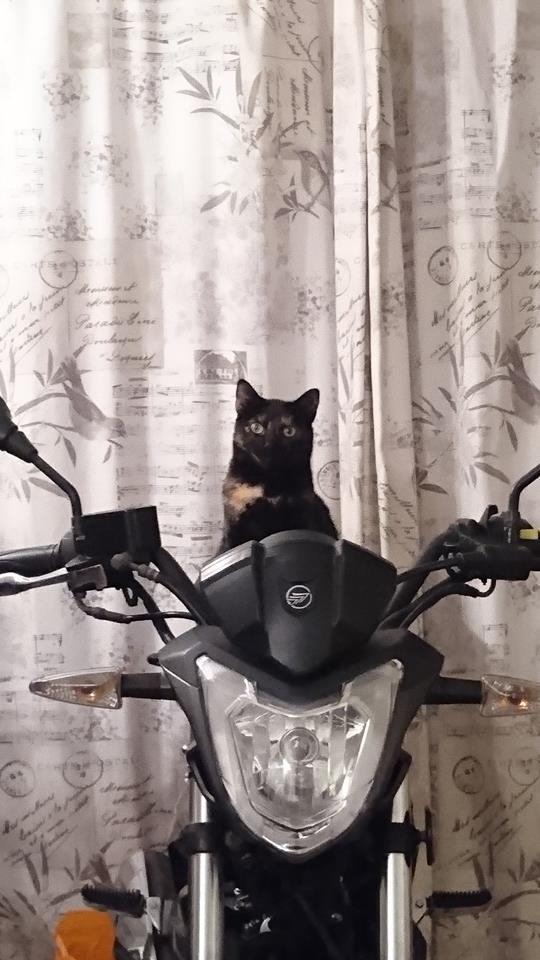
Keeway Kat - Cleo loves to sit on my motorbikes
I have plans in my head. Ambitious plans for me because these will be things that I have never tried before. Before any of that though my first job is a good clean and get the rust sanded down.
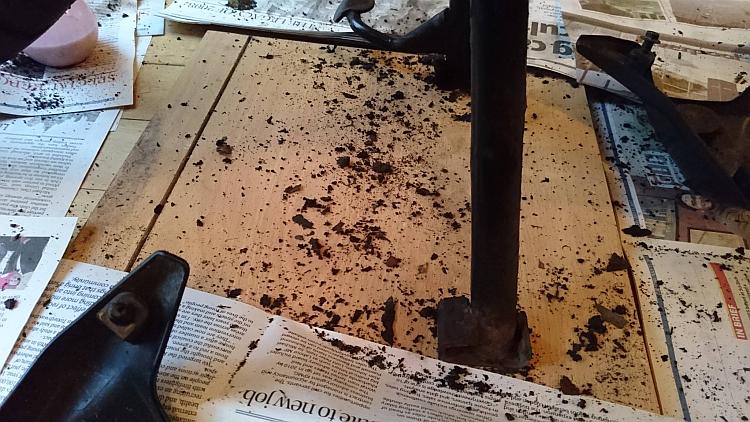
A good clean and brush down
Stage 2 Shocking Shocks
Anna - a lady on Motorbike Women,one of the forums I am a member of, on seeing my first photos of Project Zen quite rightly pointed out the following.
"You'll need to protect the floor... No matter how careful you are, oil and grease will get everywhere! Old sheets, towels are perfect, but again, don't expect to be able to use them for anything else after! Looks like a good winter project, go for it. I wish I could do my project indoors, but spray painting is completely impossible to protect the house from! "
Yes there was indeed no way I could spray paint indoors. So my weapon of choice was a can of good old Hammerite, Black Smooth, and a paint brush.
Yes I am going Old Skool here. None of these new fangled modern ideas here I will have you know. For one I can't afford them and second I just wanted to have a go at doing it myself. I know there are better ways like powder coating etc etc. But there is something basic and rather intimate in just doing it yourself with a can of paint and a paint brush.
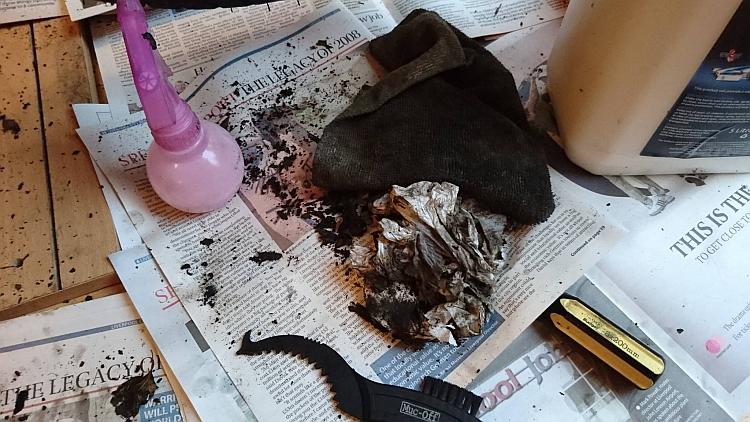
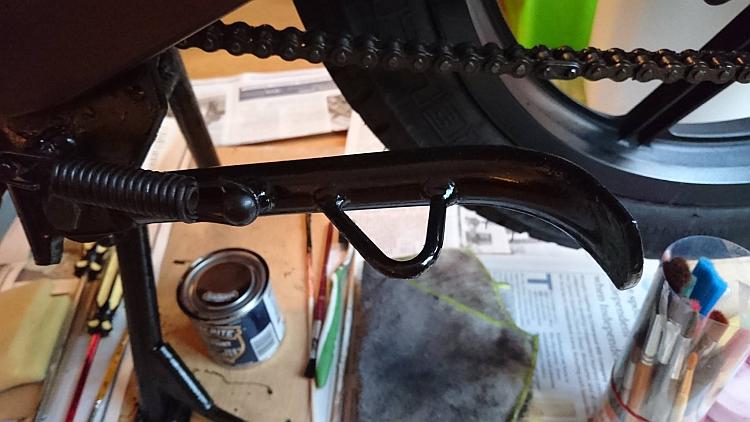
First job on my list was the shocking shocks. Despite my best care they had become rusty.
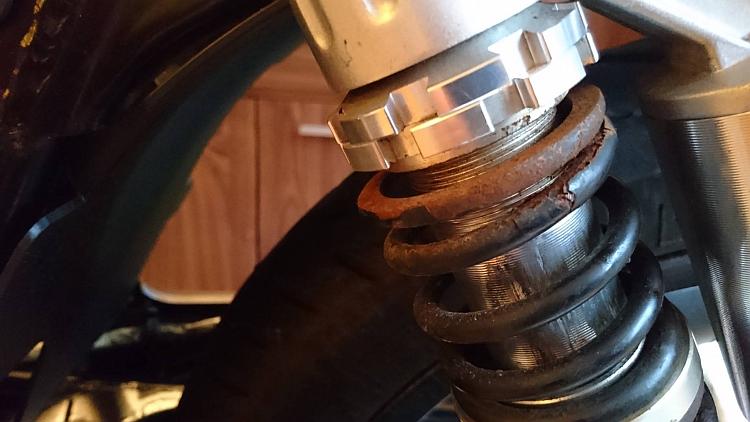
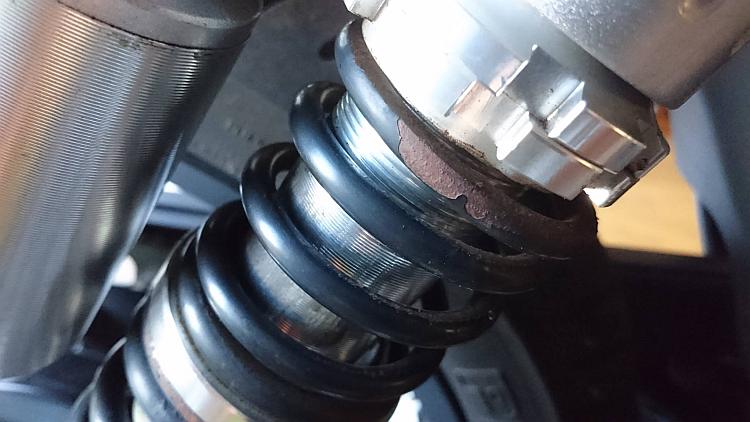
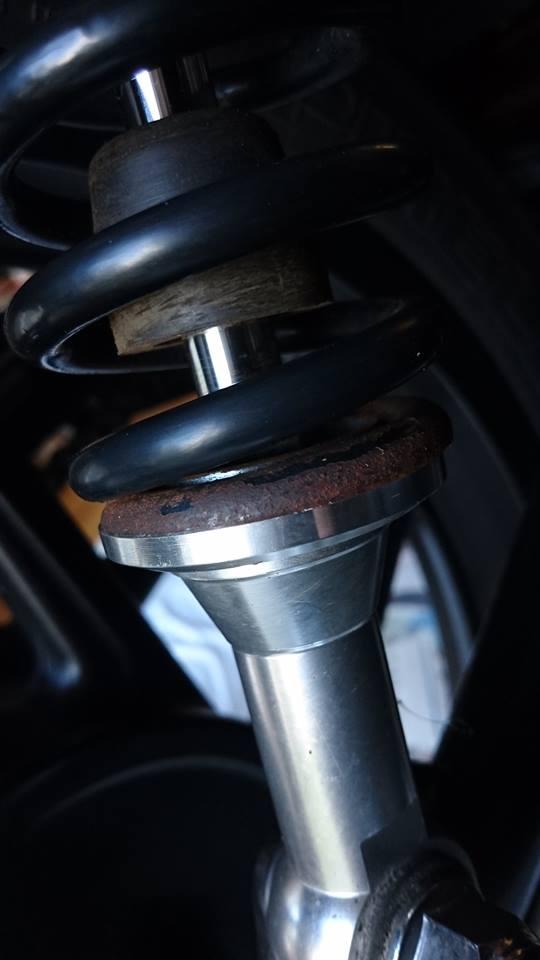
Shock, horror
I got a lot of satisfaction from doing them myself. I also got a lot of paint where it should not have been while painting despite Anna's warning. I did manage to paint my curtains and spill paint all over my floor and mat. Despite those err mishaps I am very happy with the newly painted shocks.
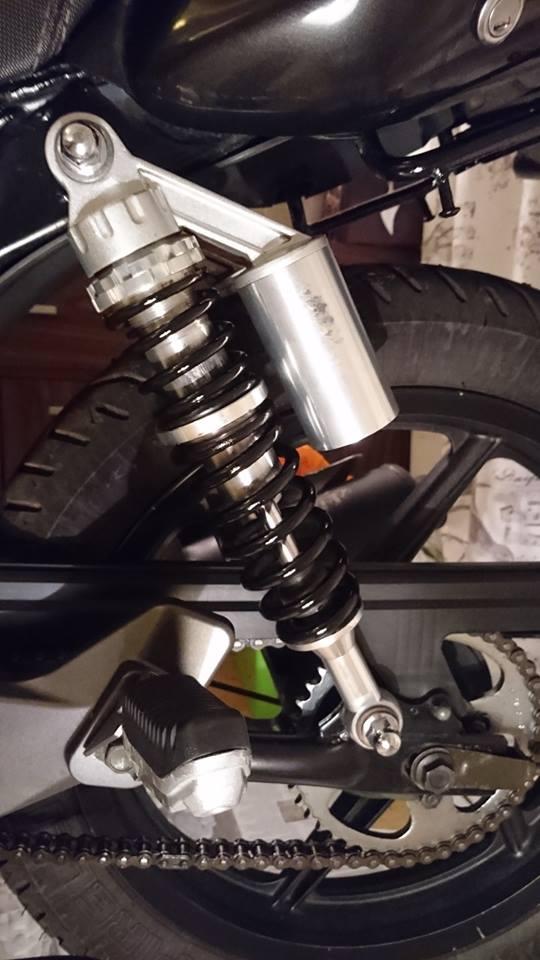
Shiny shocks
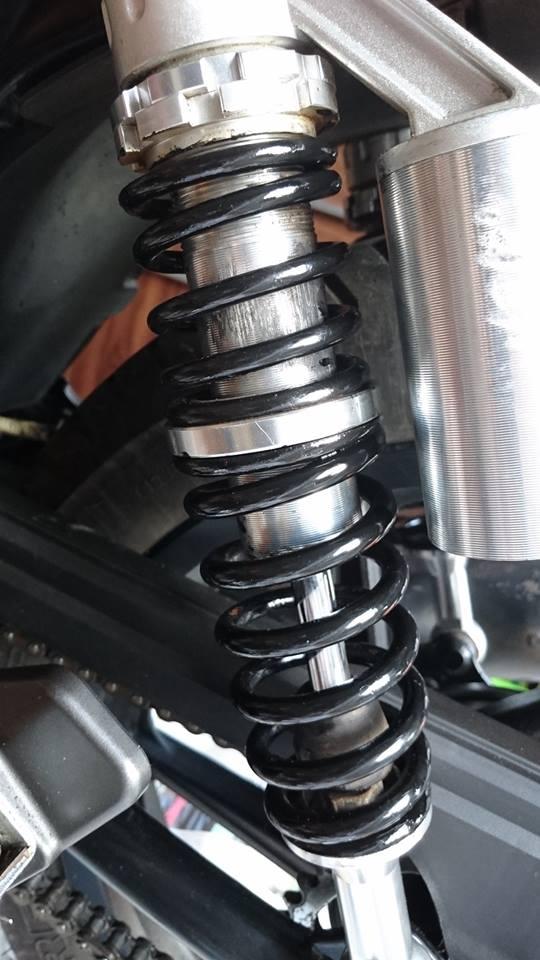
They are not perfect but they are certainly good enough for me. They came out better than I dared to expect. I particularity love the before and after split photo.
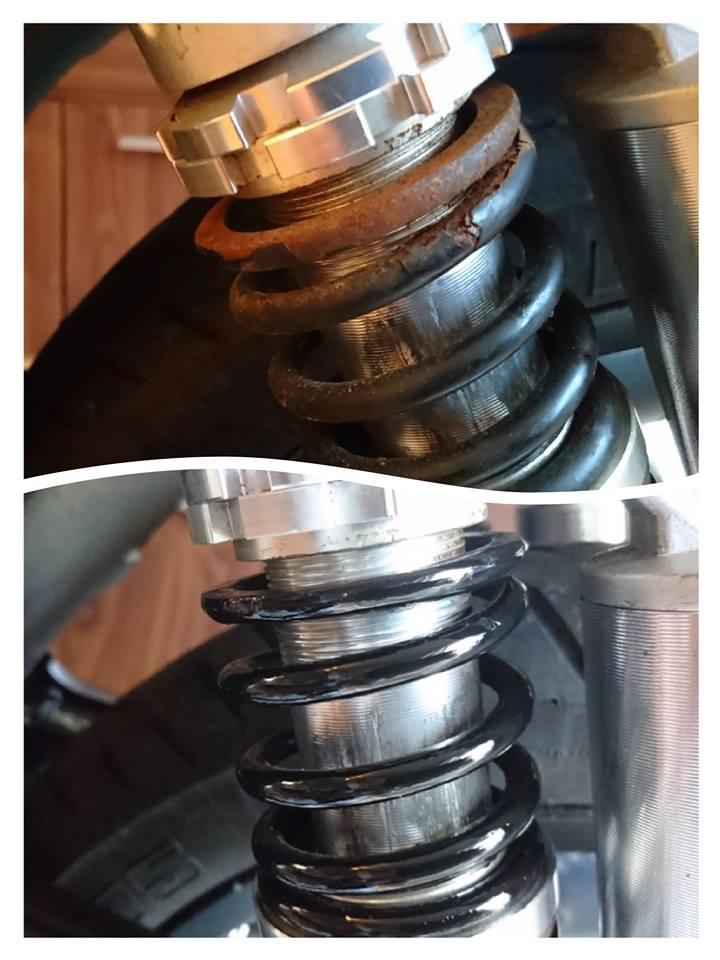
Before and after painting
Stage 3 Rust be Gone
So with the shocks proving rather successful I was fairly confident to begin painting the rusty areas on the frame of the bike.
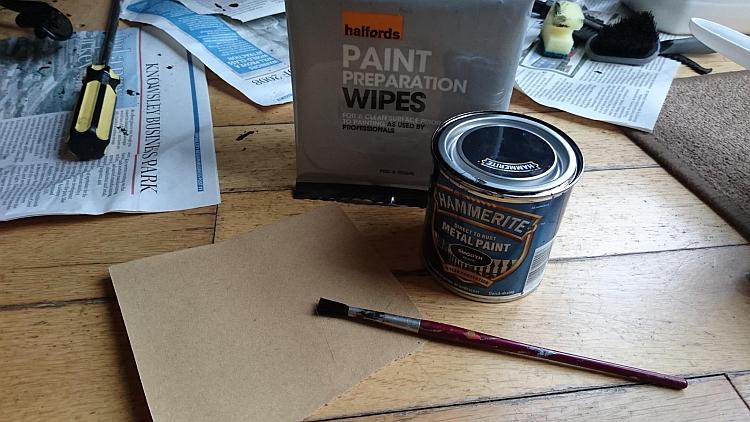
Hammerite. my weapon of choice to defeat the rust devil
Now for those of you who are of a delicate disposition please do not look at the photos. They show graphic images of a not very well sanded motorbike frame and unsmooth painting. Quite frankly I realised prep is not my thing. I am too interested in doing the painting. I got the flaking bits off but a smooth flat surface was beyond my boredom tolerance levels. It was a case of that is good enough for me. If you like super smooth, sleek paintwork then I am your worst nightmare.
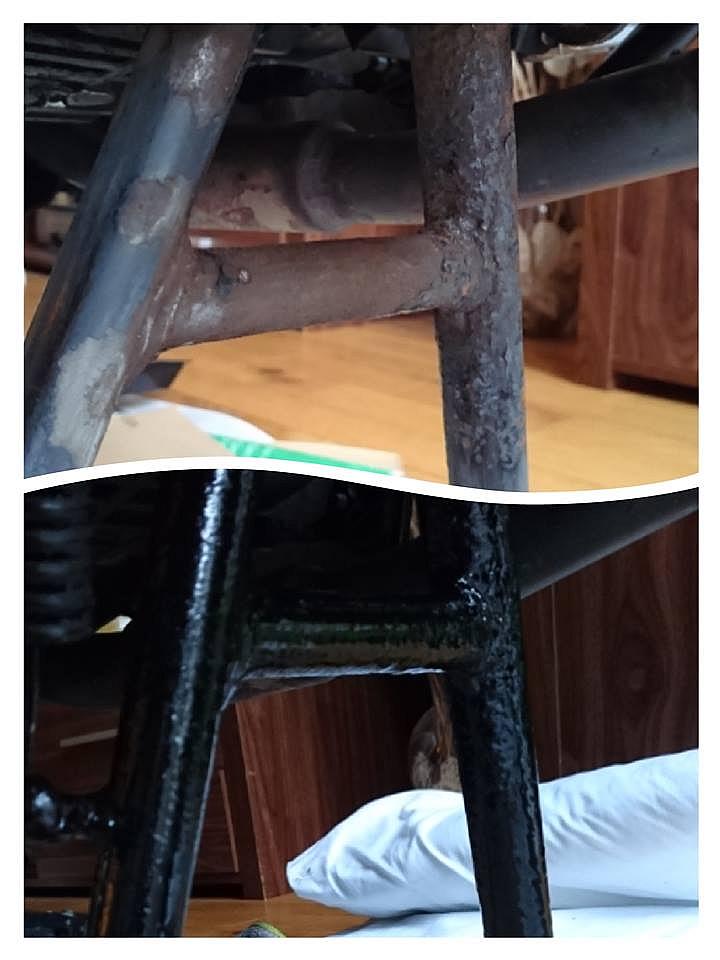
It may not be pretty but it maybe the smooth look is outdated. Some ladies prefer a bit of rough
My goal was to protect the bike, not to achieve perfection. Just as well otherwise I would have been most disappointed. However with my basic tools, limited knowledge and zero skills of doing anything like this before I was happy with the results. OK yes super smooth would be nice but that would have required sand blasting and powder coating and far more money than I had at my disposal. I already had some sandpaper in the house and paintbrushes. Therefore the sum total of restoration work on my bike frame amounted to a tenner. £8 for the Hammerite smooth black paint and £2 for the paint preparation wipes.
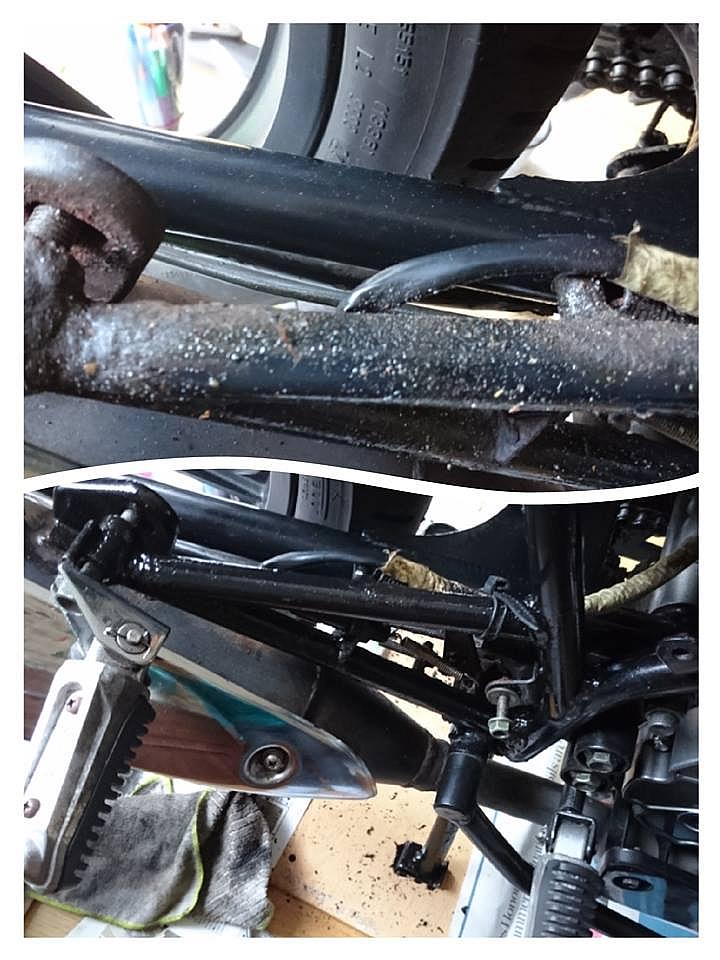
Not perfect but much better after painting than before
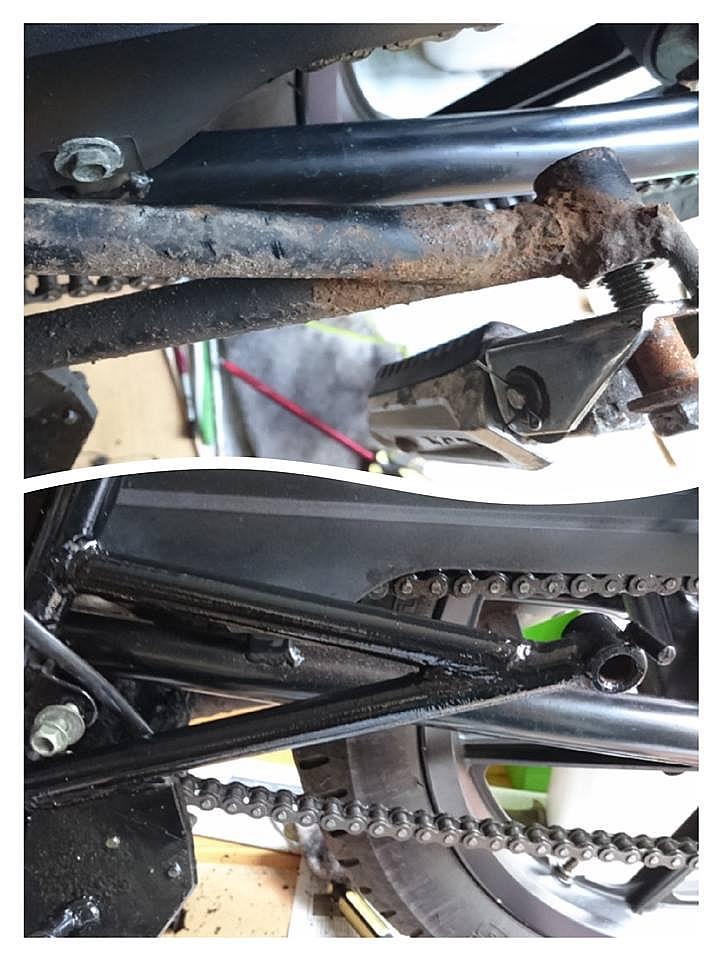
Taking the fairings off came as a bit of a shock. The rust where I had not been able to regularly get to and clean and protect was much worse here. That said some parts of the inaccessible framework that had been liberally covered is spattered oil, dirt and gunk revealed a almost perfect paintwork underneath. Hmmm maybe we should just cover our bikes in a layer of grease and dirt as it appears to the best protection there is.
So anyhow no not a perfect result but it is a vast improvement. All signs of rust have now been eradicated. Good enough for me.
Good enough
Stage 4 The Tank. Adolescent Zen suffered from pimples
Most of the other painting, shocks aside, has been a bit rough but that is because most of it will be under the fairings. Now it was time for the much more delicate difficult task...the tank. It was what I had been looking forward to doing the most. Regular readers will recall that the Keeway has suffered from blistering on the tank - Blisters On Fuel Tank
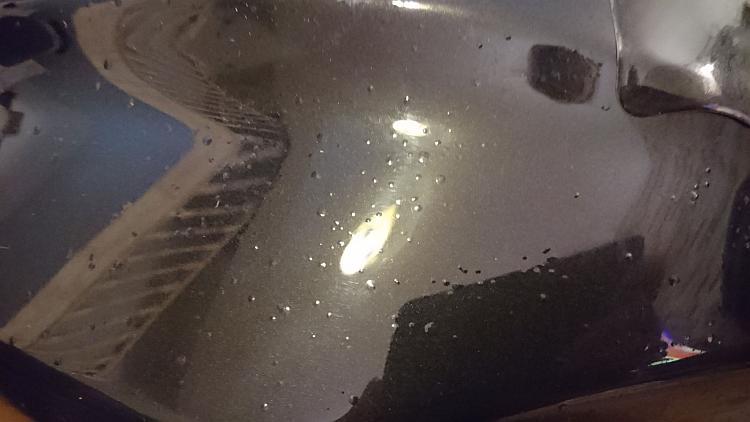
Pimple popping anyone?
As the issue was never resolved the tank remained a bit of an eyesore so this led to me being brave enough to have a go at repainting the tank. If the tank had been perfect I would have probably just left well alone. I was both excited and terrified of my own plans. I had no idea how it would all turn out. It could be a total and utter disaster. I consoled myself with the fact that in the worse case scenario I would have to take it to a professional to undo my mess and get it resprayed.
So with that in mind a took the plunge and began to lightly sand off the blister bumps. God it went through me sanding the tank and seeing it all scratch up.
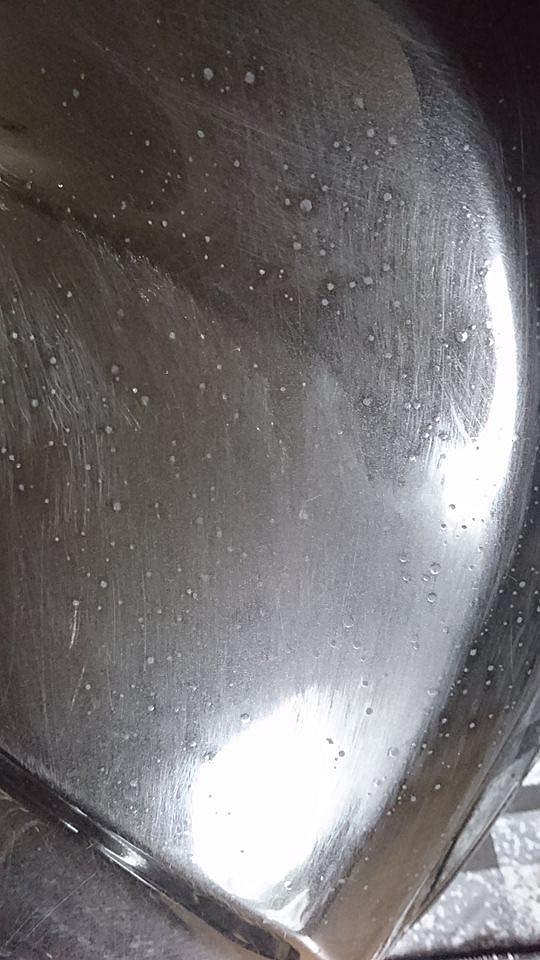
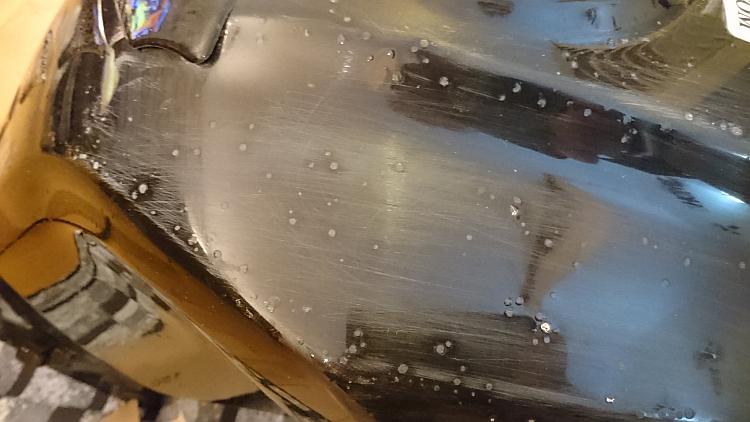
It is most unnatural to scratch up your tank on purpose
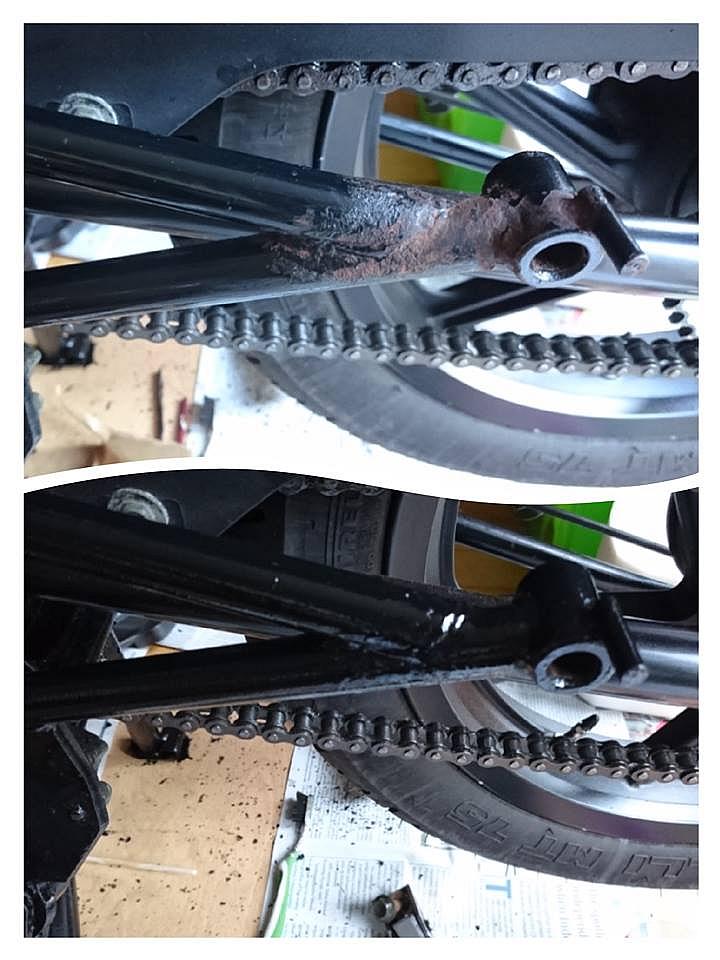
The underside of the tank showed a faint dusting of rust so I gave that a couple of coats of Hammerite.
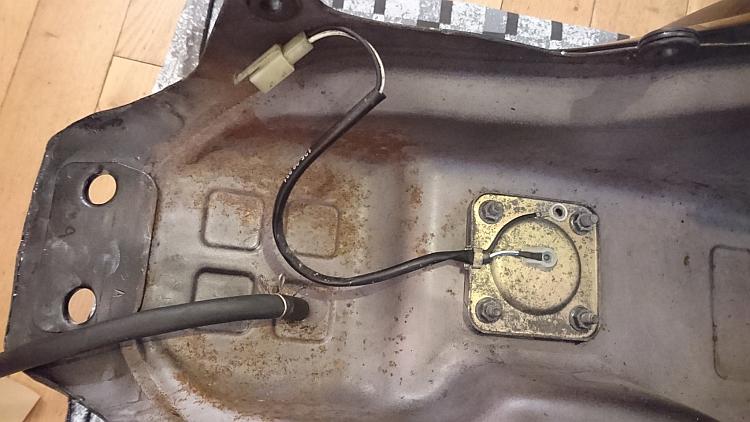
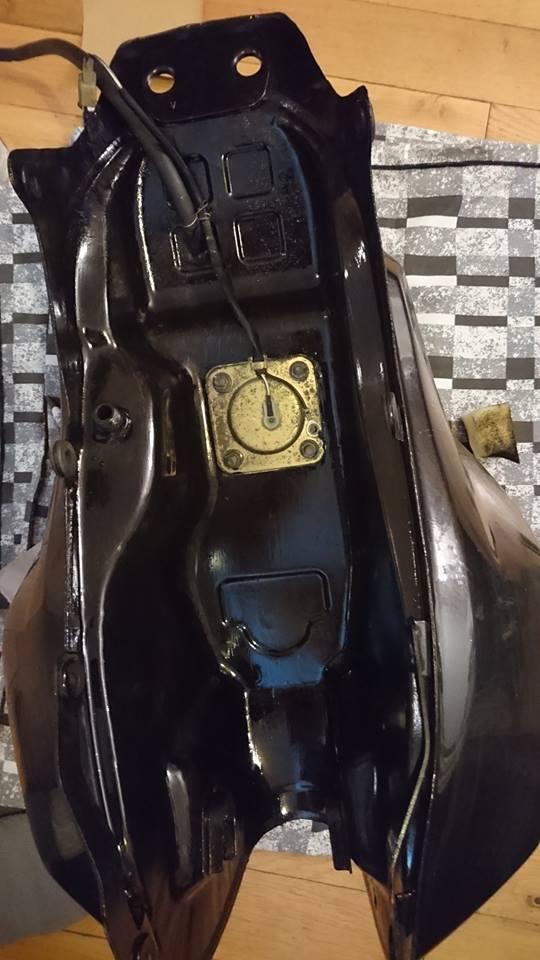
Underside of the tank before and after painting
My plans for painting the tank were a little more ambitious than a simple plain paint job. I had in mind a full on design. I had bought more Hammerite. In green, yellow, red and white. From these I would mix all the colours I would need. My tools would be small sponge make up applicators, cocktails sticks and general washing sponges cut into small pieces. I had decided to use stencils to help with my design as well as freehand painting.
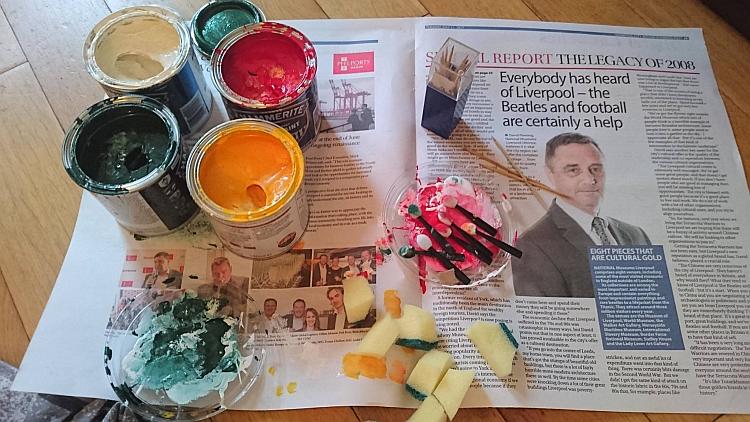
Hammerite now comes in more than just plain black
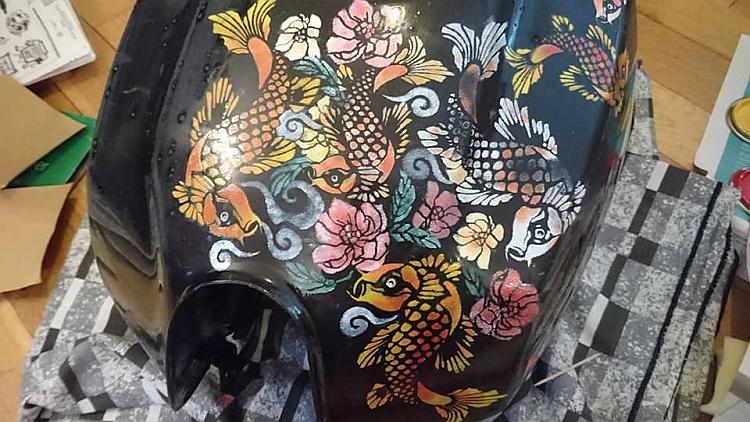
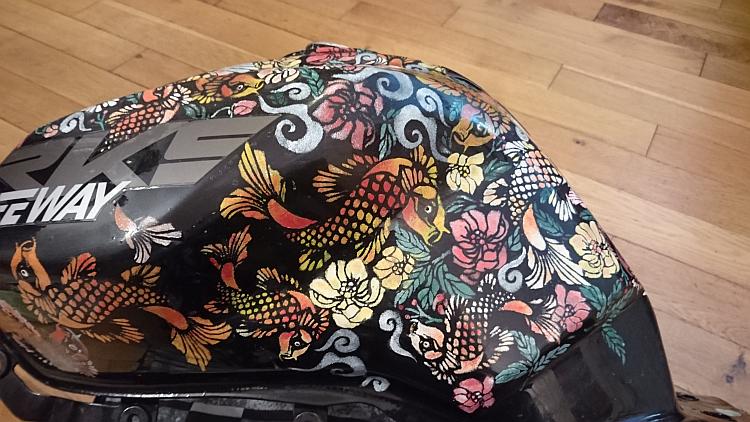
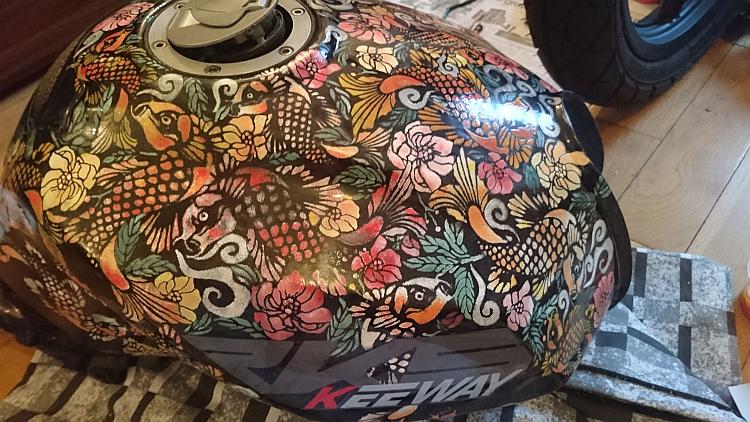
Unusually for me I had no detailed plan. No sketches and careful measurements. All I had was a vision in my mind and with that I began work. My design would be of koi fish and peony flowers in a Chinese tattoo style. A nod to Zen's Chinese heritage. I did consider a dragon but decided against it. You see lot of dragon designs and I wanted something a bit different and more feminine. 4 hours later and my first 3 koi are complete. As planned each was unique. My plan is that no two would be the exact same colours. The colours had to be individually mixed and layered one on top off the other in thin layers. So far so good. Maybe my design and painting skills did hold some hope of a successful outcome after all. Maybe just maybe. There was still an awful lot to do yet and therefore lots of potential for disaster. But I am happy with the beginnings.
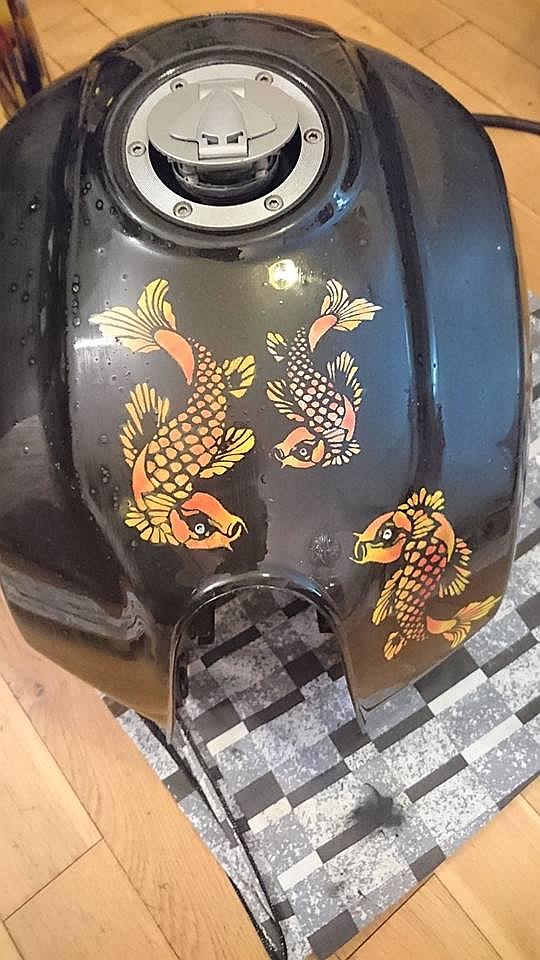
Bright beginnings, from small fry and all that.
Stage 5 12345 once a saw a fish alive
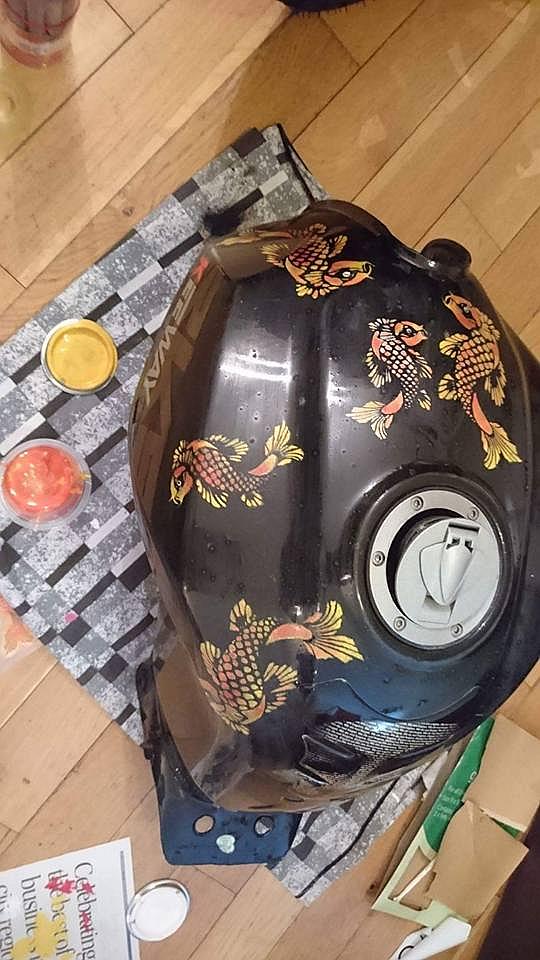
Another 4 hours and another 3 koi fish. It is time consuming but am enjoying this now a lot as my skills improve.
Stage 6 Peonies in bloom
Today I began the delicate task of painting the peonies. Not only are they fiddly being so small but a lot of thought had to go into the placement and spacing. Like the koi my intention is to make sure that each flower is different in tone and shade so no two are alike. I also added leaves and waves and another koi. 6 hours work today.
Oriental charm
Stage 7 Going alright on the right and a step to the left
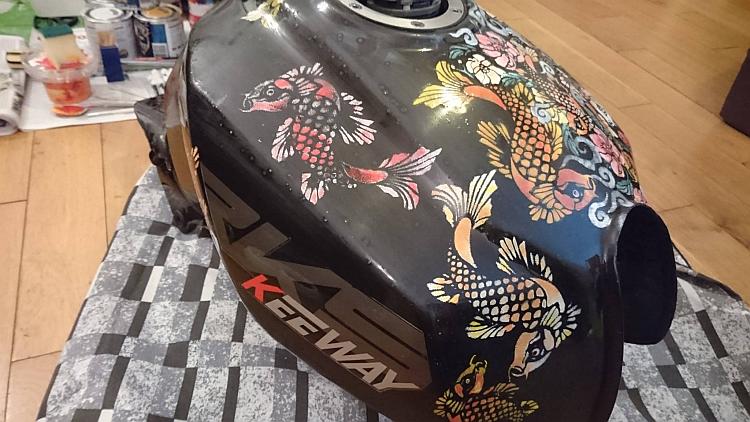
A day off today provides me with 10 hours to work on the tank. Resulting in a large portion of the top right hand side of the tank being completed. I am really liking the colours I have chosen. Spacing of the peonies in between the koi again prove to require a lot of creativity and thinking over to create the look that mirrors what is in my mind. Though smaller they are more difficult than the fish to paint and place.
Delicate blooms require delicate careful panting
After a break I add more koi to the left
I then begin to bring the design on the right to the the centre of the tank. It has not all been plain sailing. Some koi just seem to come into being without any trouble. Some seem to fight me all the way, being problematic and difficult to control. Some spaces just flow while others require me to stop and puzzle over then for some time.
Like a jigsaw puzzle the pieces begin to slot together
Stage 8 The fish are a multiplying
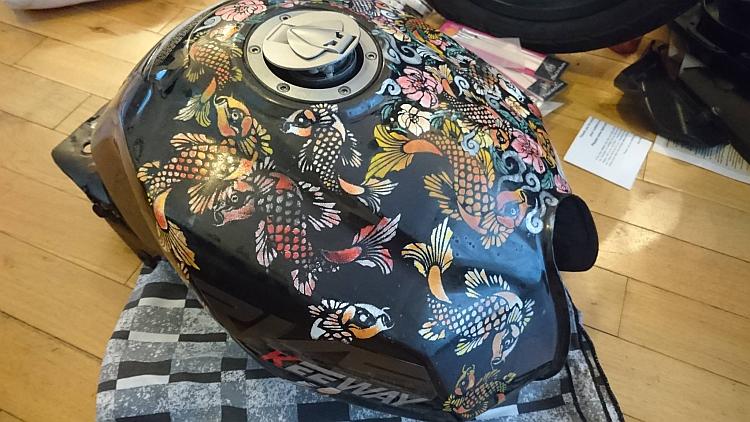
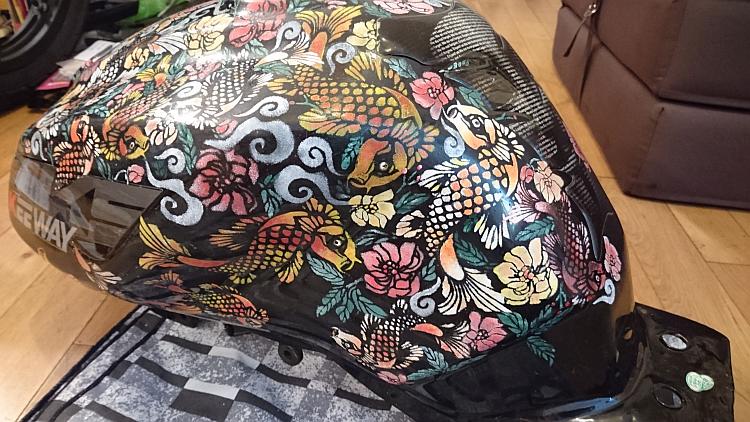
Another 4 hours and more koi in a variety of colours and sizes are added all around the tank.

Stage 9 And 10 What lies beneath
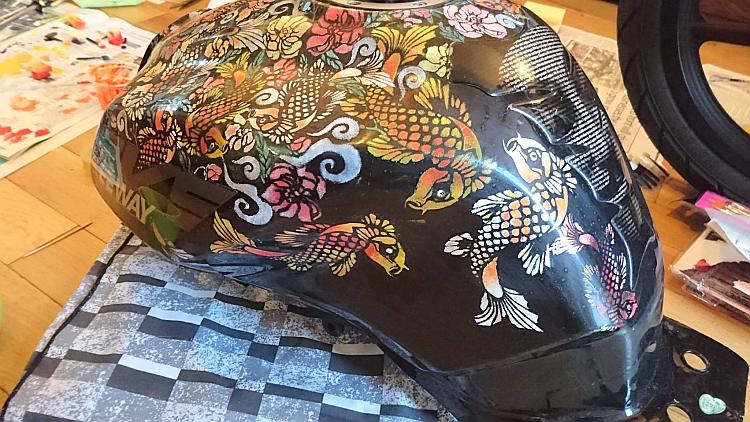
The next two days I concentrate on painting the right underside of the tank. It is beginning to feel like the design is all coming together now. Total hours worked over the past two days 9 hours

Stage 11 Half way there and living on a payer
7 Hours work and I finally finish the whole of the right side of the tank. I am really pleased with how it looks. Scared now I will mess up the right side and make it into a disaster.
Stage 12 Almost there
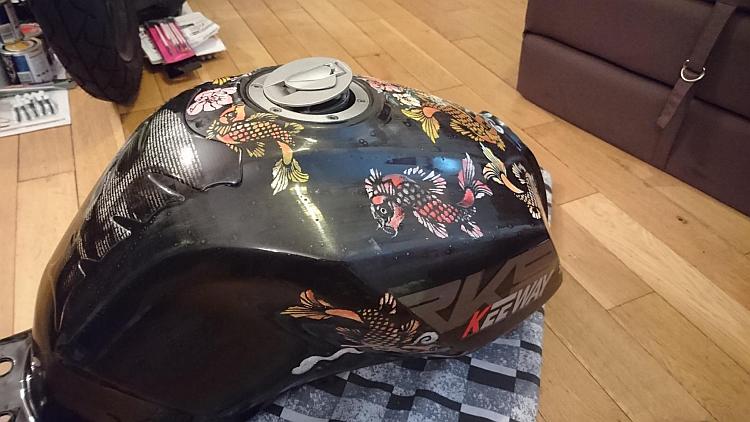
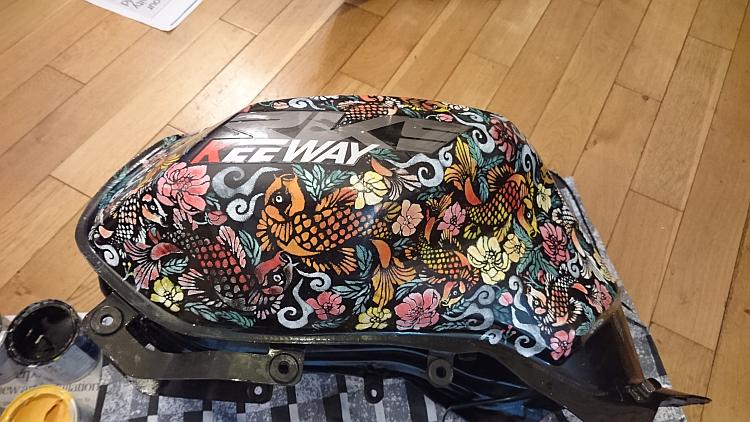
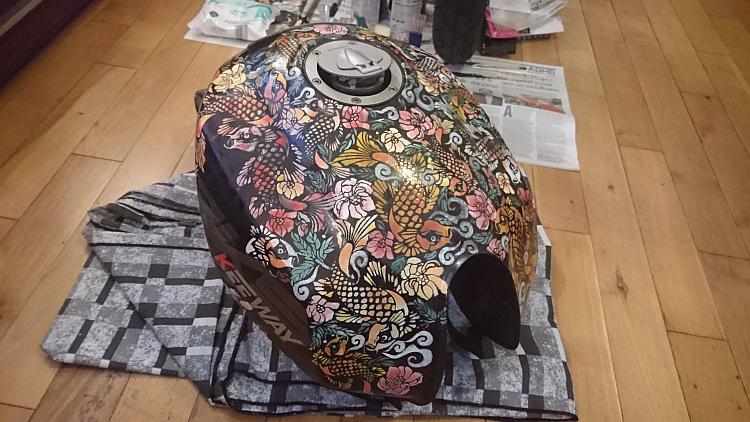
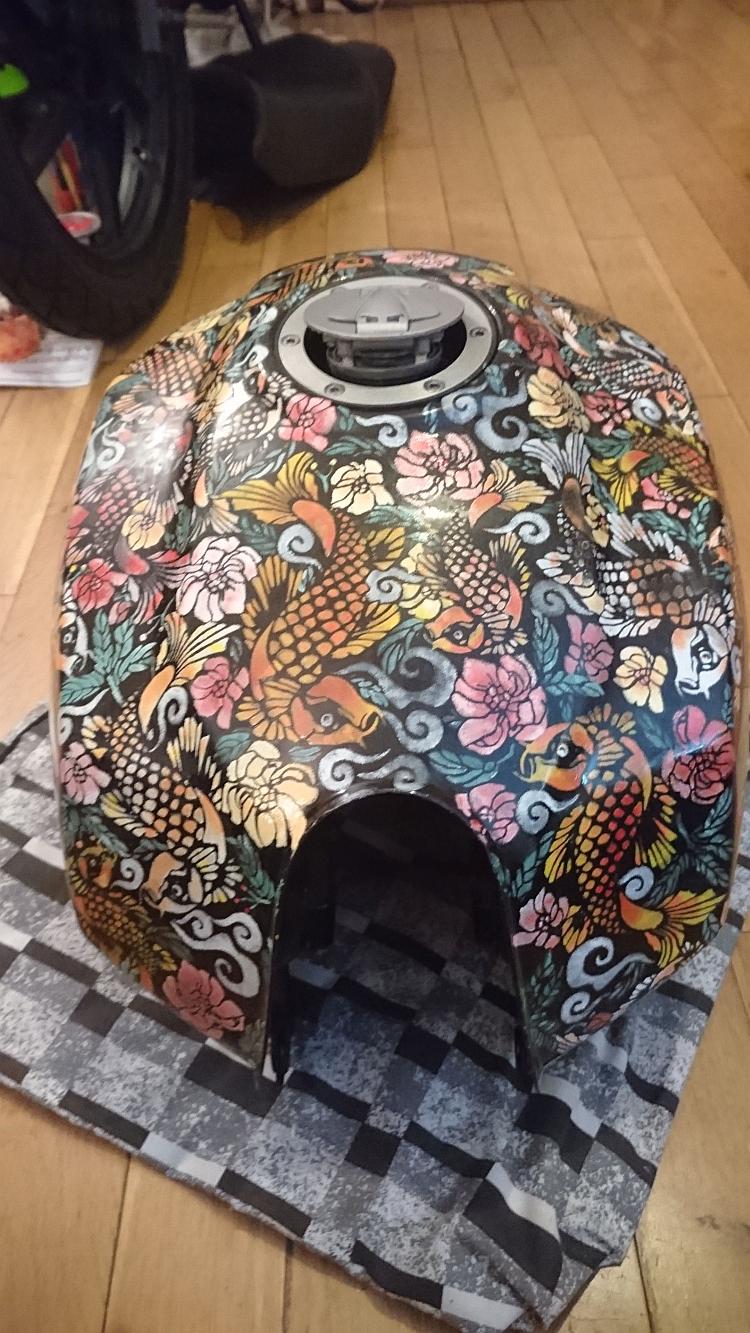
Moving over to the left again I fill in the spaces between the koi with a mixture of peonies, buds, leaves and waves. I also finish off the bottom of the tank beneath the tank protector to complete this area. Total 6 hours..
Stage 13 The end is nigh
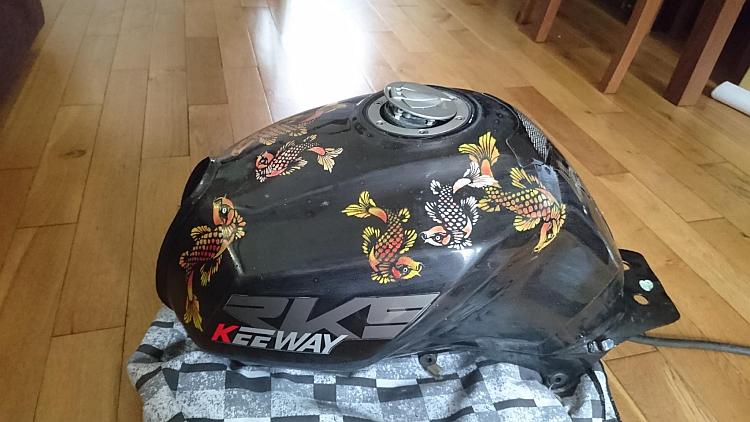
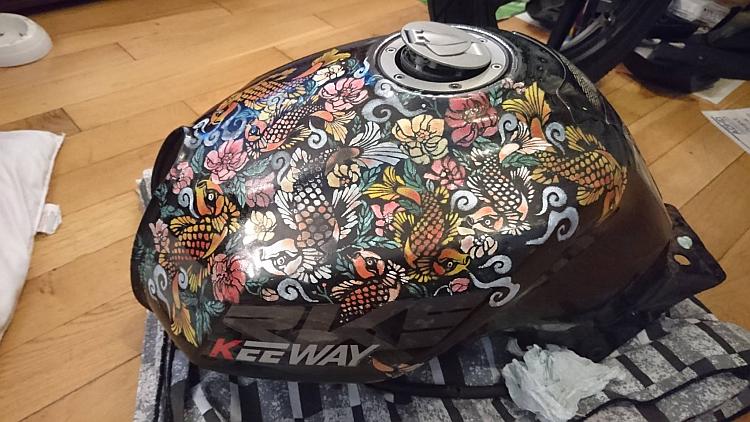
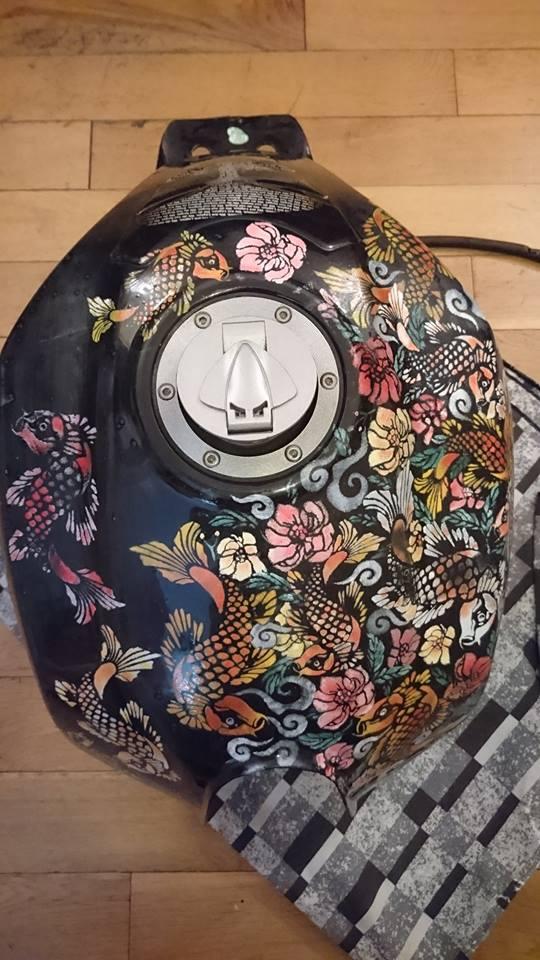
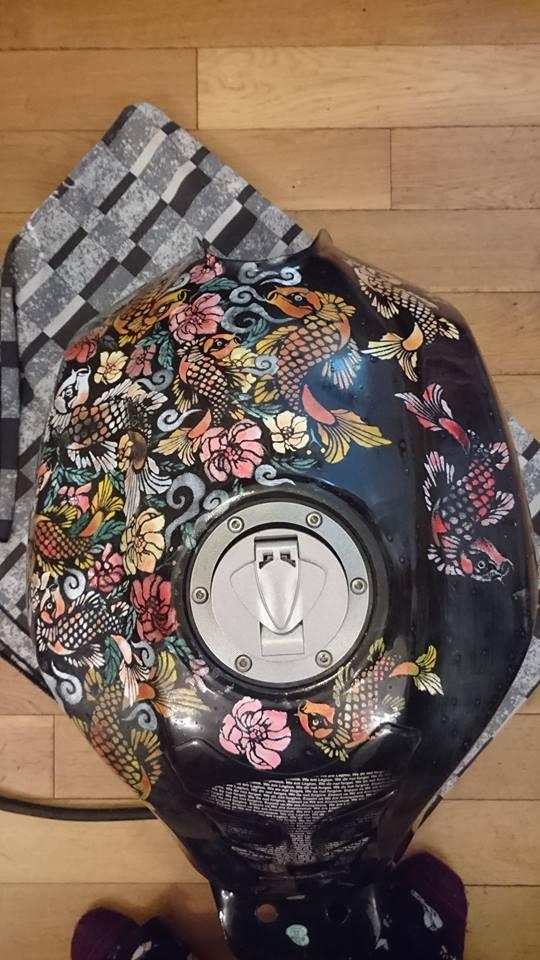
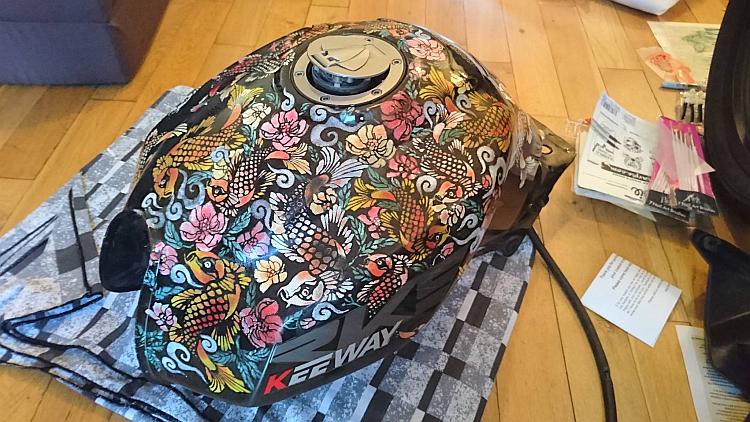
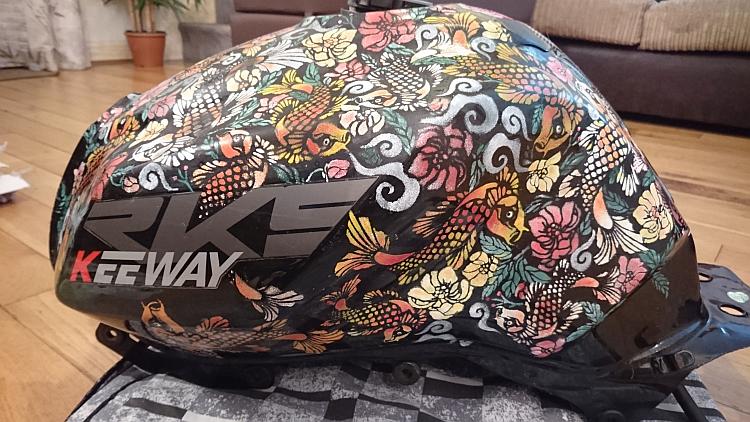
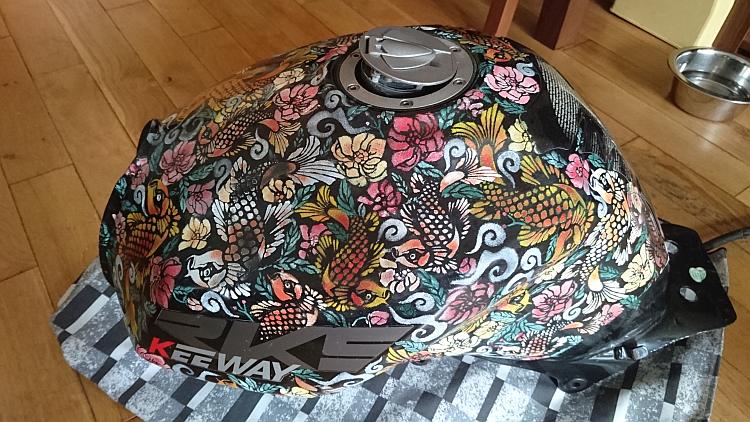
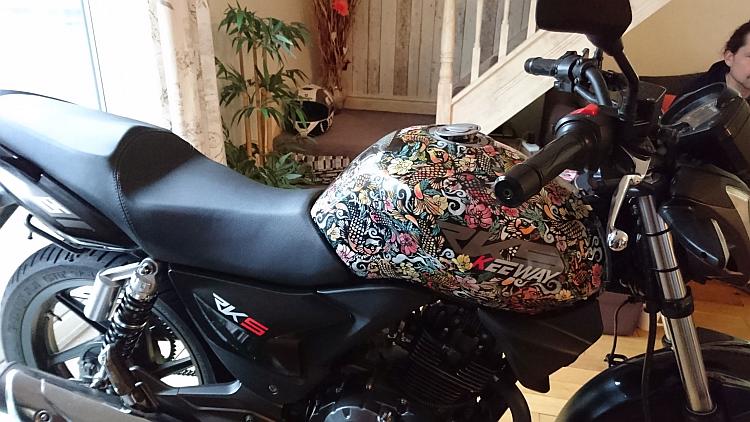
I continue on the left side until after another 6 hours work I finally complete the tank. Wahooo!! What I had considered nigh impossible at the beginning proved in the end to be possible.
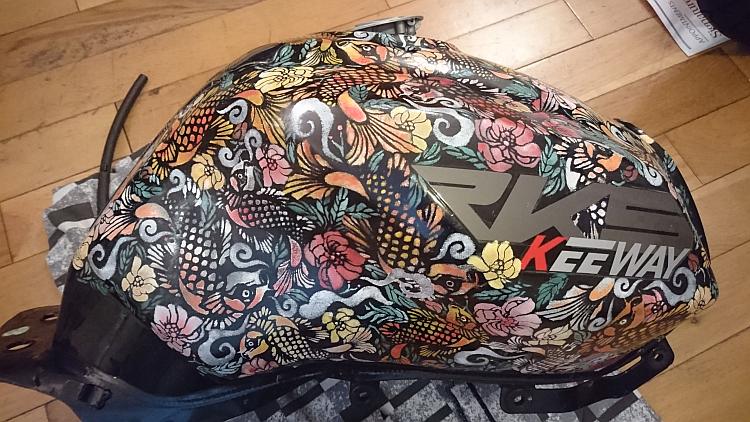


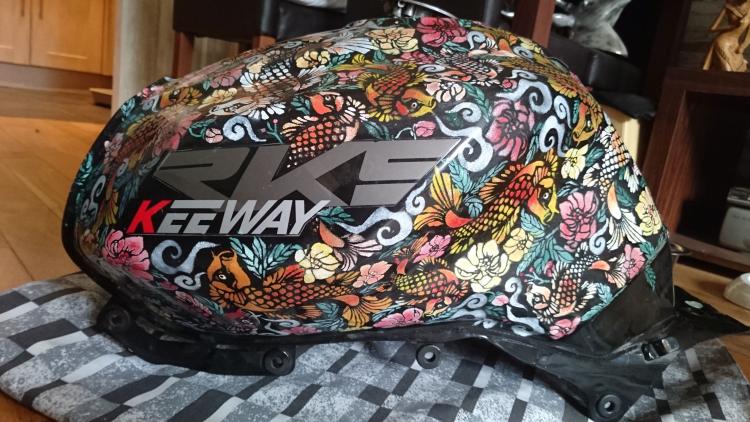
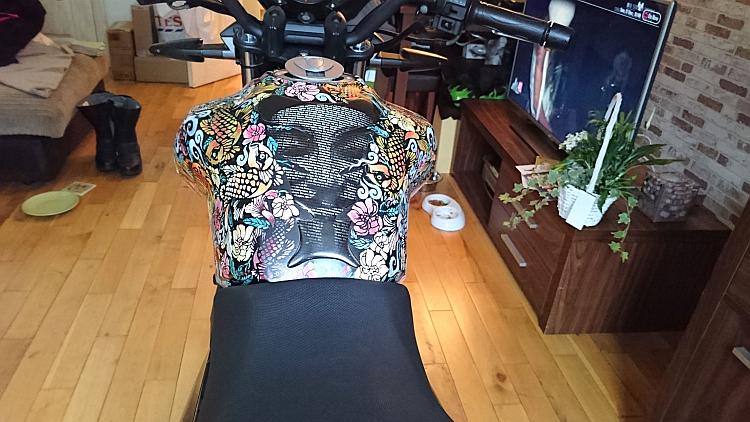
So what do I think of it now it is complete? As planned every koi is a different colour combination. Each peony had it's own unique hue. I had no plans drawn to a set design when I began, just an idea in my head. However the spacing between each individual element is consistent as if it was actually a part of a grand design...
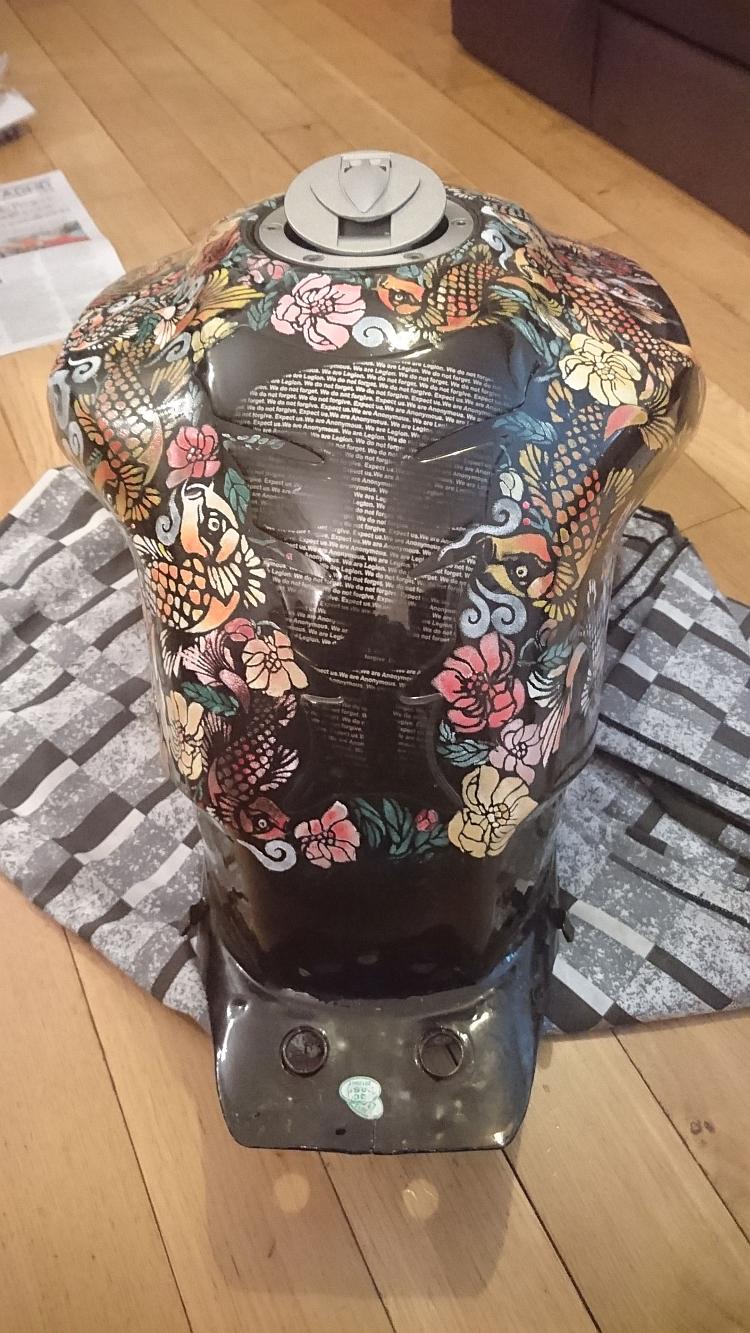
I made a few errors along the way but it was my first attempt and all those mistakes added to my knowledge base. The main error being I should have prepared the tank better before painting over with the design. I thought the design would cover the whole tank. However as it turned out I liked the spacing between. Therefore I should have of re-sprayed the tank so as to give a nice flat smooth surface to work on. This would have made my life easier in the long run and I would have achieved a nicer finish on the blank areas. As they say every day is a school day, this was all part of my learning curve.
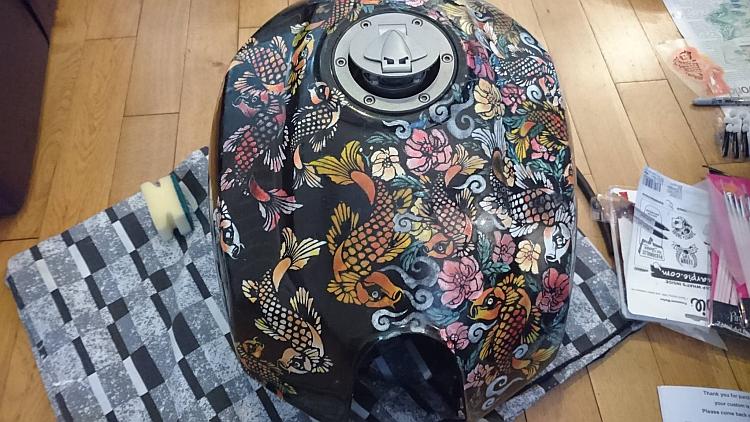
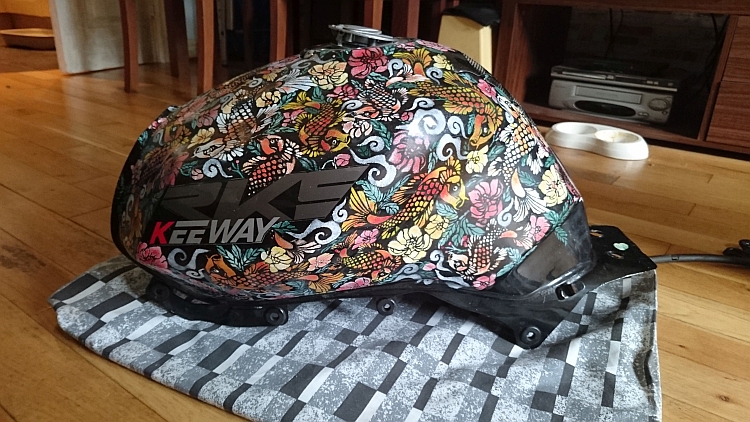
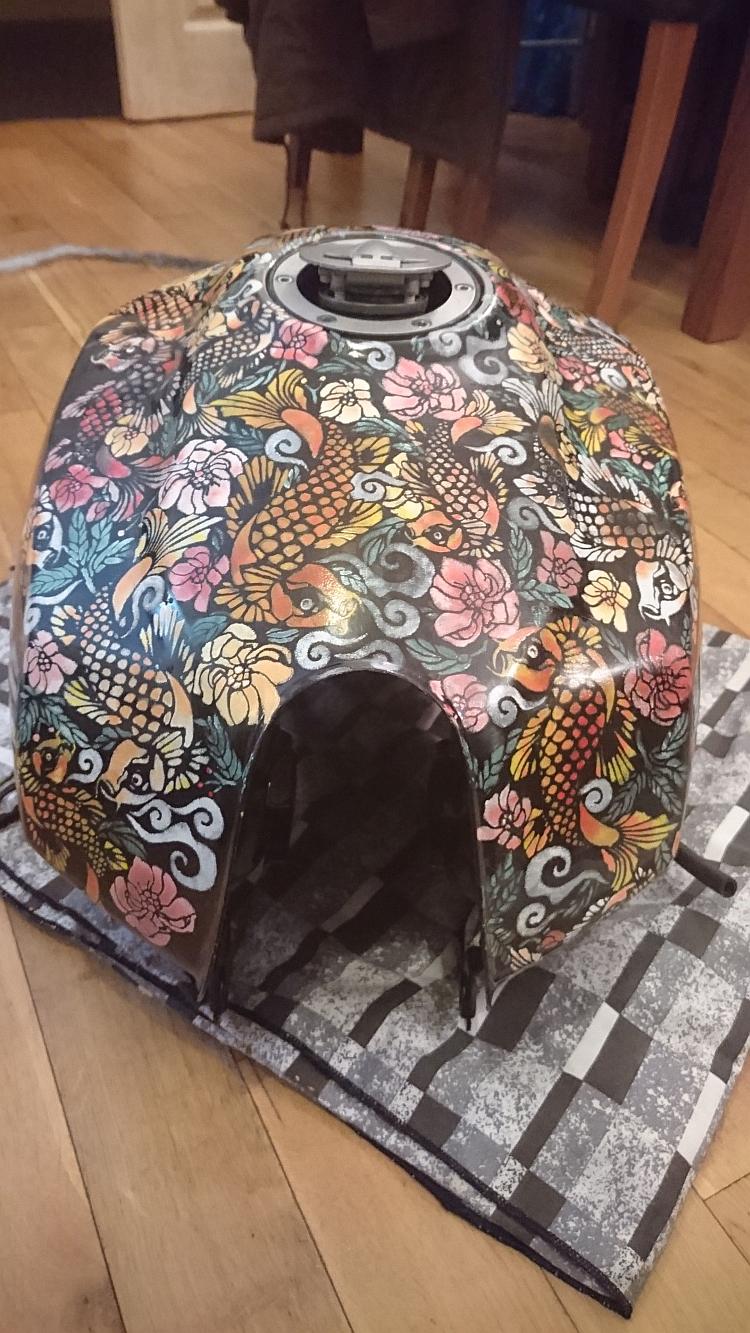
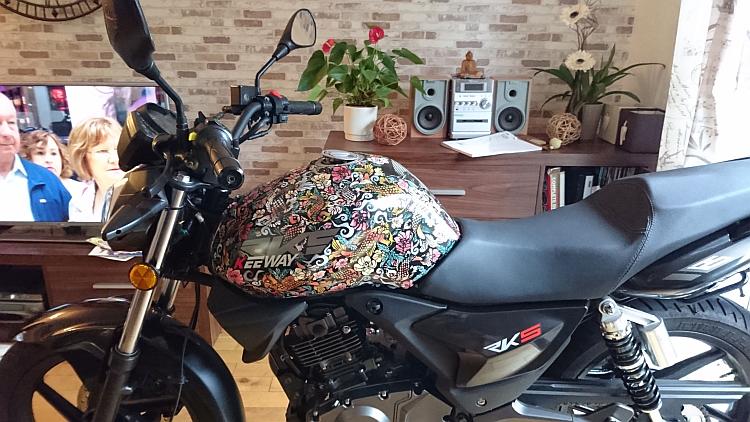
As I finally place the tank back onto the bike I allow myself a moment of self praise. It is actually everything I had hoped it would be. The vision I had in my head had actually transferred itself onto my tank. I am delighted with it and what is more I loved working on it. It was a pleasure not a task, a true work of love.
Only time will tell how durable the paint proves to be. Since completion the bike has been living back outdoors under its bike shelter. It has been doused with petrol on 2 occasions to test it and so far so good.
In total it took me around 60 hours to paint the tank. I consider that time to be time well spent. I now have a completely original and unique tank. It makes me smile every time I look at it and that is what biking is all about, the smiles.
If you'd like to speak with Sharon regarding a commission you can contact her on sharon@bikesandtravels.com
Reader's Comments
Ian Soady said :-
Very nice job Sharon although not quite to my taste.
I hope it will inspire Ren to tidy up some of his creations......
17/02/2018 10:17:01 UTC
Norm said :-
Absolutely fantastic job Sharon well done.admire your patience
17/02/2018 19:20:21 UTC
Ren - The Ed said :-
Sharon knows it's not exactly my thing too Ian - it makes my eyes go fuzzy. We're all different and the bike has received high praise from several chaps and the ladies go mental over it. It ain't my thing, but it's one hell of a thing.
As for her skills dragging my aesthetic out of the gutter. No chance. She's been trying for years to get me to dress properly without success. She seems to think I ought to "decorate" my house too. Clothes are to keep me warm in winter and to stop me being arrested in summer. Houses are just solid tents to sleep in and somewhere to store tools and motorcycles.
17/02/2018 19:40:04 UTC
Badger said :-
Wild! I like it.
20/02/2018 17:27:56 UTC
Bob said :-
Very nice, an ample demonstration of a key skill I don't have - patience.
I can do the rubbing down and lather in Hammerite bit though....
21/02/2018 09:51:02 UTC
Borsuk said :-
Lovely job Sharon. Far beyond my capabilities.
21/02/2018 21:24:53 UTC
Sam said :-
Sharon I think that reflects great credit on you.I've shown your artwork to Zak (my RK125-reg.letters ZHK)and he agrees but says his tank's the wrong shape!
21/02/2018 22:39:36 UTC
Sharon said :-
Thanks everyone for your comments,
Of course the style will not be to everyone's taste as art be it's very nature is subjective. The beauty of hand creating something yourself is that you get to choose the style the colours etc the you want and this is what I loved so much about painting my own tank.
I was out on Zen the other week and someone admired the tank, they thought it was hydro-dipped.
Sam as for your tank being the wrong shaped if you hand paint a tank there is no right or wrong shape. You just adapt the design to whatever shape you are working with. I admit the hardest part of the tank was to get the design to flow around the angles of the tank but we got there in the end.
24/02/2018 09:24:24 UTC
Shirley said :-
Well done Sharon, great art work and full respect for doing your own design and not pandering to the masses.
28/02/2018 14:00:05 UTC
Rod said :-
Sharon said : some parts of the inaccessible framework that had been liberally covered is spattered oil, dirt and gunk revealed a almost perfect paintwork underneath. Hmmm maybe we should just cover our bikes in a layer of grease and dirt as it appears to the best protection there is.
When I first started biking, there was an older biker who lived just around the corner with a garage where he showed me how to protect a bike for the winter. The first job was to take of the chain and inspect it. If the chain was ok it was cleaned in paraffin and hung up to dry. The bike was given a good clean and polish. We then melted grease in his baking tray and placed the chain into the melted grease so the grease would penetrate into the rollers of the chain. The melted grease was then painted all over the bike, and any remaining grease would be mixed with gearbox oil to brush onto the chain through the winter.
The bike would look really dirty over the winter months, but would clean off in the spring to reveal a well protected bike.
I would just like to add that I do not treat chains to a paraffin clean and a hot bath anymore, as most modern chains are sealed, and the paraffin and heat can damage the seals.
I have always been a rider, and not a polisher, so your approach to painting to protect the bike looks good to me. The paint work on the tank would be way beyond my capabilities, but looks very good.
Well done Sharon!
08/03/2018 20:36:12 UTC
Ren - The Ed said :-
Dirty bikes!! I've been telling everyone for years and years but no-one listens. Pfffft
09/03/2018 11:57:59 UTC
Name
Comment
Add a RELEVANT link (not required)
Upload an image (not required) -
Uploading...
Home
Repair And Restoration