Home
Repair And Restoration
Latchy's Rusty Stand.
Job Date - Christmas Break '17 '18
By Stephen Latchford
Something has been bugging me. I hate rust on any part of a motorcycle and both my stands on the Fazer are crying out for some TLC. They are both in a terrible state having been on the bike for 17 years and are now caked in rust.
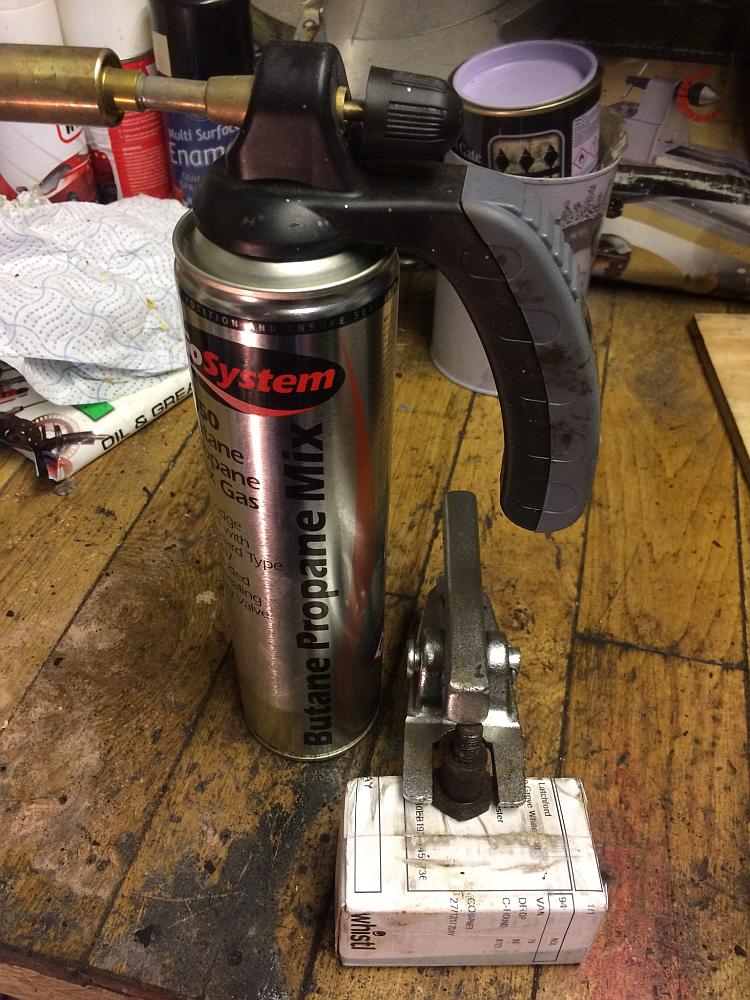
It's a simple job so I decided to do it over the 2017/18 Christmas break. I undid the 2 retaining nuts and tried tapping out the pivot bolts. The left hand one came out no problem but the right hand one refused to move, even with the nut back on and using a drift with a heavy lump hammer. Even heat from my propane blowtorch could not persuade it so I left it alone whilst I had a think.
I had an idea. Would a ball joint remover do the job? Only one way to find out so I sent off for one from ebay as it was less than a fiver. When it arrived I offered up to the bolt that came out to see if the jaw would clear the head. It didn't so I modified it by widening each side by about 3mm.
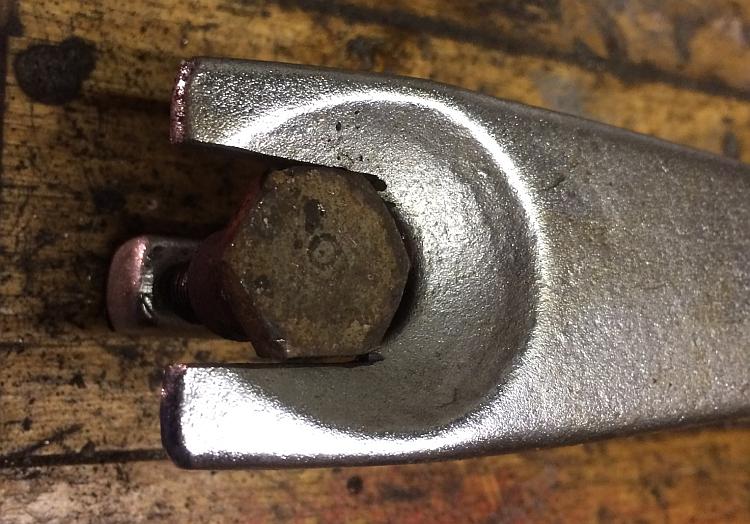
I placed the modified tool around my centrestand bracket making sure the two sides were located round the bolt head on one side and on the bolt threaded end on the other side. I tightened the tool's bolt head as much as I possibly could and there was still no movement.
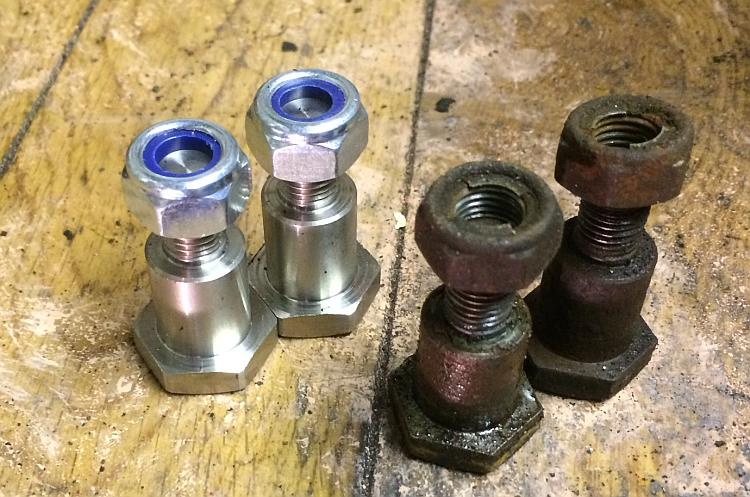
I got the blow torch on it again and then with a 'bang' the bolt was catapulted out just from the sheer pressure it was under. It shows what expansion can do. I inspected the the bolt and it had bent on the threaded end, that didn't matter because I had purchased 2 stainless replacements.
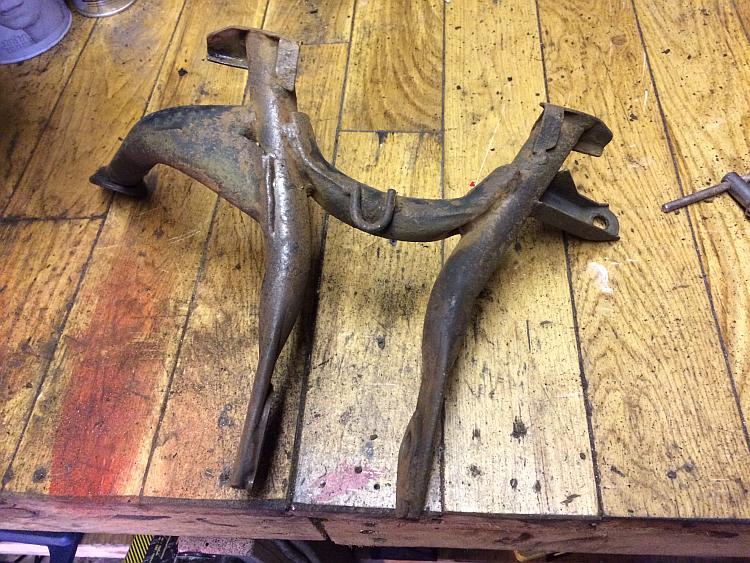
After removing all the crud from the centrestand I set to it with a rotary wire brush in my drill. There was no need to go bonkers trying to remove the rust, I was just giving it a start by removing more dirt and surface rust. The real meat will be removed using a little known method.
And this is my secret weapon - a cat litter tray filled with a gallon of MALT VINEGAR.
Oh yes indeed this stuff really is an acid and eats the rust away in a day or maybe two.
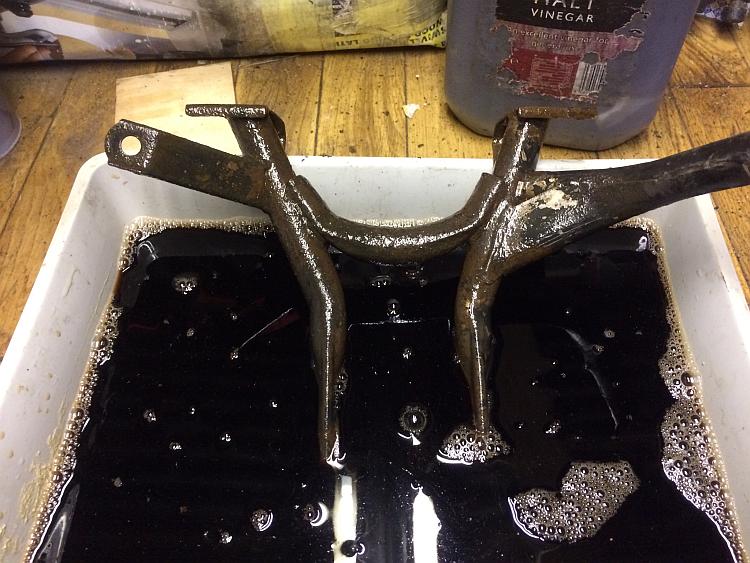
As expected most of the rust had gone just by being in vinegar for 3 days. Usually 2 days is enough with fresh vinegar but mine had been used a few times before, weakening the acid content I suspect but it has done the job. I also gave it 20 mins with the drill and rotary wire brush which really polished the steel back to bare metal.
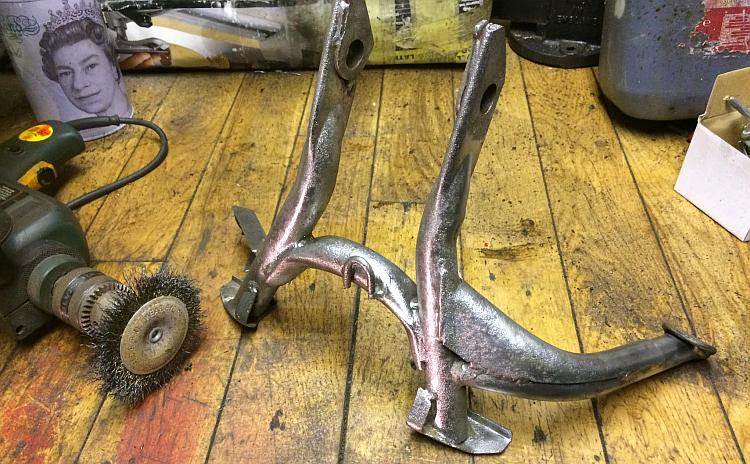
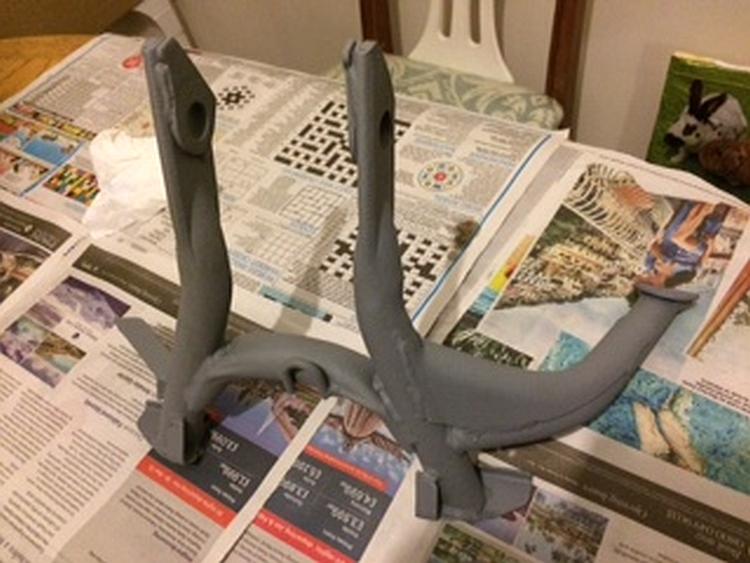
I put a coat of primer on straight away ready for two coats of brush on iron gate enamel, this will hopefully mask the peppered finish. If I were restoring to pristine condition I would have had it shot blasted and filled back to smooth again before painting.
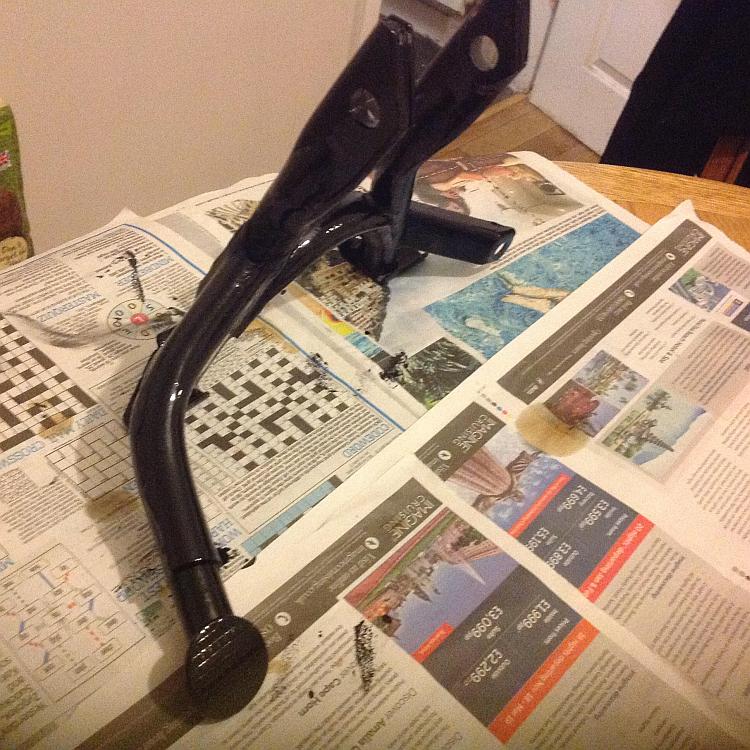
The 1st coat of black gloss, I love this iron gate enamel, it goes on thick and shiny
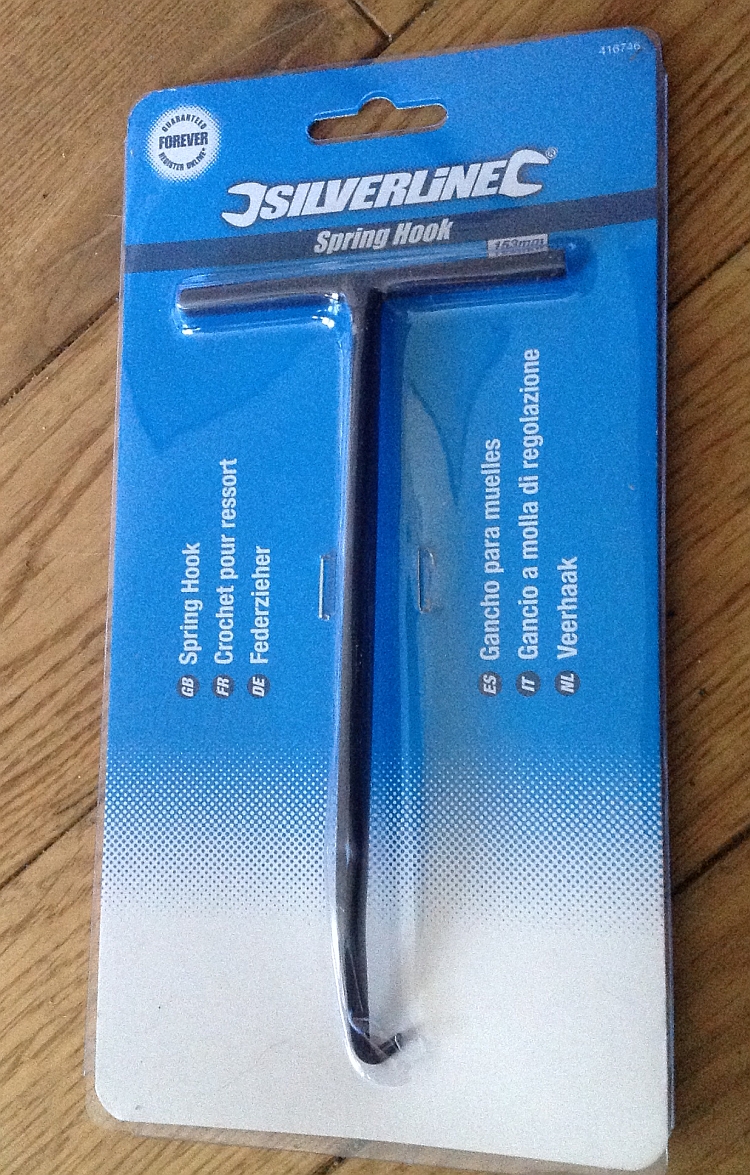
I had ordered a spring puller then after waiting nearly a week the spring puller dropped through my door, I'd been eagerly wanting to use my new tool to see how much easier it makes the job of mounting the centrestand spring. However it proved totally useless as I simply didn't have the leverage/strength to pull the thing far enough to hook over the metal loop.
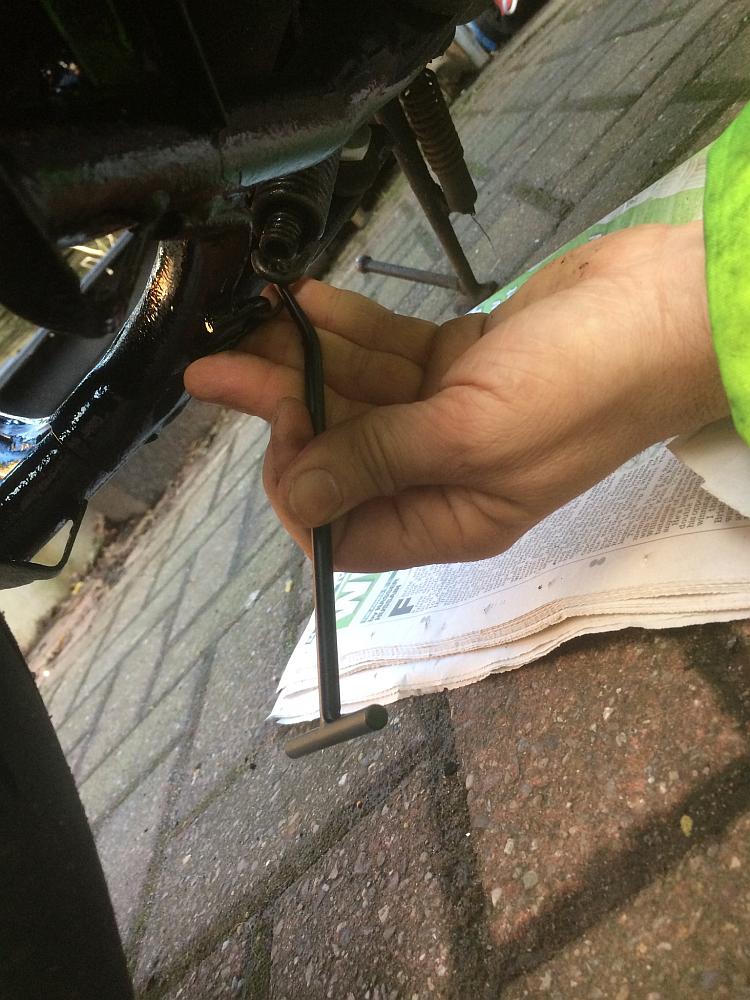
The bolts had been loosely fitted so I tightened up the two nuts and greased the pivot points with chain lube, I also abandoned the pulling method and took the spring to my vice to try out Ren - The Ed's idea of expanding it (thanks for reminding me Ren).
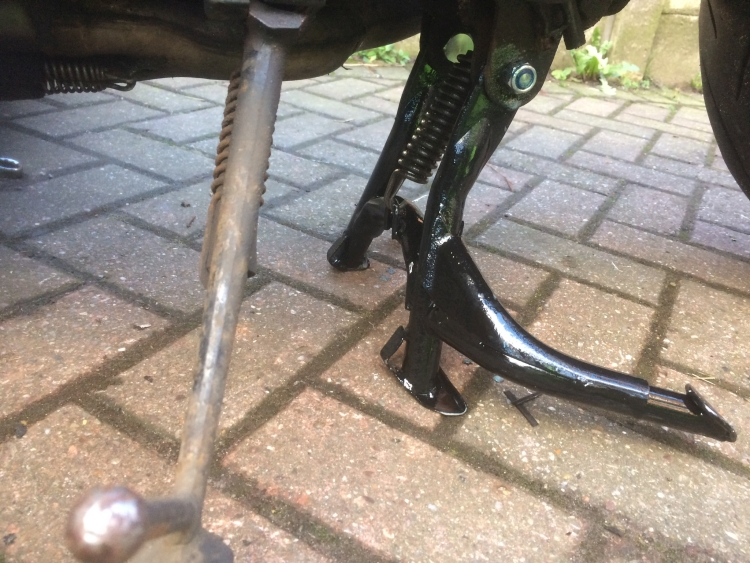
It worked a treat and maybe I will use the tool at a later date but for smaller and weaker springs. I'm sure Ren will put the link in place for you all to see the video for fitting springs. Anyway after pulling out all the bits of cable tie this is the result of all my effort, job done. Now for that rusty sidestand to get the treatment...
If you've got your own fixing - bodging - repairing or maintenance tale we'd love to share it here on Bikes And Travels then contact ren@bikesandtravels.com
Reader's Comments
Ian Soady said :-
I must admit I loathe stands. As you say they're always rusty and seized with nasty sharp springs waiting to snag tender bits of flesh.
I have a home made version of your spring puller and actually find it quite effective for most jobs. That spring of yours looks pretty sturdy but I would probably use the long thin screwdriver method - locate the business end of the driver in the loop on the stand and pass the shaft through the end of the spring. You then have plenty of leverage although it's again fairly easy to hurt yourself.
I have tried Ren's method but with no success myself.
I've heard of using molasses for removing rust but not vinegar - must try it. Although do I want the garage smelling like a chip shop?
08/01/2018 12:32:16 UTC
Ren - The Ed said :-
Nothing wrong with the garage smelling of chips. The only issue would be every time I'm in the garage I'd end up having to nip around the corner for a portion of greasy spuds.
08/01/2018 14:27:31 UTC
Mike Lawrence said :-
I've looked on YouTube and seen, but not tried, people using electrolysis to remove rust. I plan on having ago when the garage warms up a bit.
09/01/2018 08:00:48 UTC
Latchy said :-
Any organic acid will do, ie citric acid, white vinegar etc
But the vinegar I used was 20 pence per litre
09/01/2018 12:18:44 UTC
Pocketpete said :-
Quite a bit of rust on my cb500x centre stand Nearly 2 years old there will be nothing left of it by 10 years.
09/01/2018 22:03:04 UTC
Ren - The Ed said :-
You'll be fine Pocketpete - cover it in nasty grease.
10/01/2018 11:01:55 UTC
Sharon said :-
Another fantastic job Latchy.
I really need to do prep work. I love the actual painting but I rush the prep in order to get to what I consider the fun bits. I need to learn from you Master.
14/01/2018 19:57:31 UTC
Ian Soady said :-
Indeed, the three key factors are preparation, preparation, preparation.....
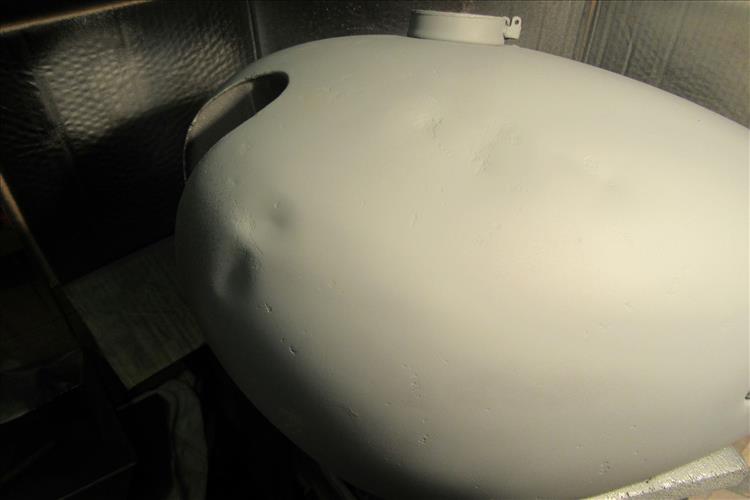
One side of the Norton tank which I'm now starting to fill:
 15/01/2018 11:41:03 UTC
Ian Soady said :-
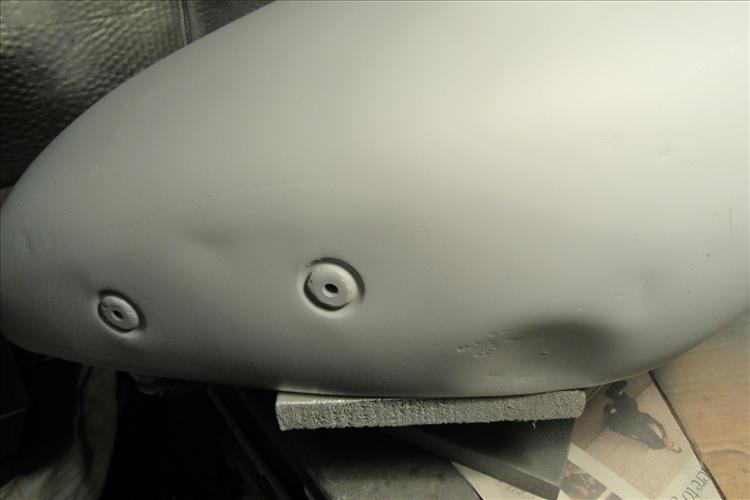
The other side.
I had the tank blasted to remove the old finish (in hindsight I should probably just have sprayed over it) and this revealed significant dents and rust pits. Plenty of Isopon being used!
 15/01/2018 11:42:19 UTC
Ren - The Ed said :-
Look - just cover it in a thick layer of Hammerite and it'll be fine Ian. Everyone will be so shocked at the paint job they'll not worry about the dints.
16/01/2018 10:31:15 UTC
tahrey said :-
Wish I'd seen this last week. Somehow ended up with a bottle of white vinegar that's never been used for anything. And I was doing a massive de-rusting job on my exhaust, then covering it in hammerite spray-on barbecue paint (which has nothing like the coverage the size of the can suggests). Ages in the kitchen with the wire wool thing, a sanding flapwheel, and then a brillo pad over the bath, using sparing amounts of water and sacrificial cloths to carry away the fine rusty dust and leave a reasonably well keyed paintable surface. Got something that looked like bare metal, though rather dark, but it started going brown again alarmingly fast despite my best efforts to thoroughly dry it. Think if I'd been using vinegar instead the job would both have been easier, gone quicker, and held out longer. Still, we'll see if the paint starts coming off within weeks or months as-is... and I've plenty of other parts I can try the trick with.
29/10/2018 14:30:21 UTC
Ren - The Ed said :-
He's pretty handy with tips like this is Latchy. I'd be interested to know how well the Hammerite BBQ paint lasts on the exhausts, my previous exhaust painting efforts didn't last long you see.
29/10/2018 18:30:17 UTC
tahrey said :-
I'm now thinking I might try painting vinegar onto the particularly rusty bits at the back of the bike rather than doing a wholescale disassembly job ... don't have any containers large enough to properly hold them anyway, and as the list includes the wheels there'd be a bit of a job of tyre removal anyway. Scour away what I can then just put some repeat coats on, maybe once an hour or something, and finish off with a final sanding. Got some of the Hammerite anti-rust paint to use as a top layer, it'll clash a little as it's shiny silver but better that than continued corrosion and orangeyness.
The spring expansion tip worked a treat btw, even though I didn't have the benefit of a vice to put it in - in fact, I had to do it to get the centre stand springs off the bike because, likewise, even with the benefit of a T-bar crochet hook thing, I just didn't have the strength and the bike started moving dangerously when I really tugged on them. Instead of cable ties (or pennies) I used some M8 washers, as well as a sharp tipped flatblade screwdriver to force open enough of a space between each coil to slip them in. M6s or smaller would have been a bit easier, but it still worked. Forced one into the uppermost exposed coil of the inner "sub spring" first of all, too, so it got stretched out at the same time as the outer main spring. Only put them along one side but that was enough to give sufficient slack to get the springs off, and when putting them back on it was almost enough just to push them straight against the natural curve the technique created, which was curiously much easier than actually stretching it; that plus the hook to guide the ends into place was... well, not exactly easy or enjoyable, but at least possible... (if only it had been possible for the blasted brake pedal spring, unbelievable amount of stress caused by THAT).
If I had enough washers spare to do both sides it probably would have stretched out easily enough to get the springs on and off without even bothering with the hook; have actually invested in a multipack now "just in case", wish I'd done it before given that a single small pack in one size cost more than a third of what the multipack with about 20x as many pieces did.
And of course when you need to remove them you can just yank them out one at a time with the hook and they pop free quite easily.
07/11/2018 18:30:08 UTC
Name
Comment
Add a RELEVANT link (not required)
Upload an image (not required) -
Uploading...
Home
Repair And Restoration